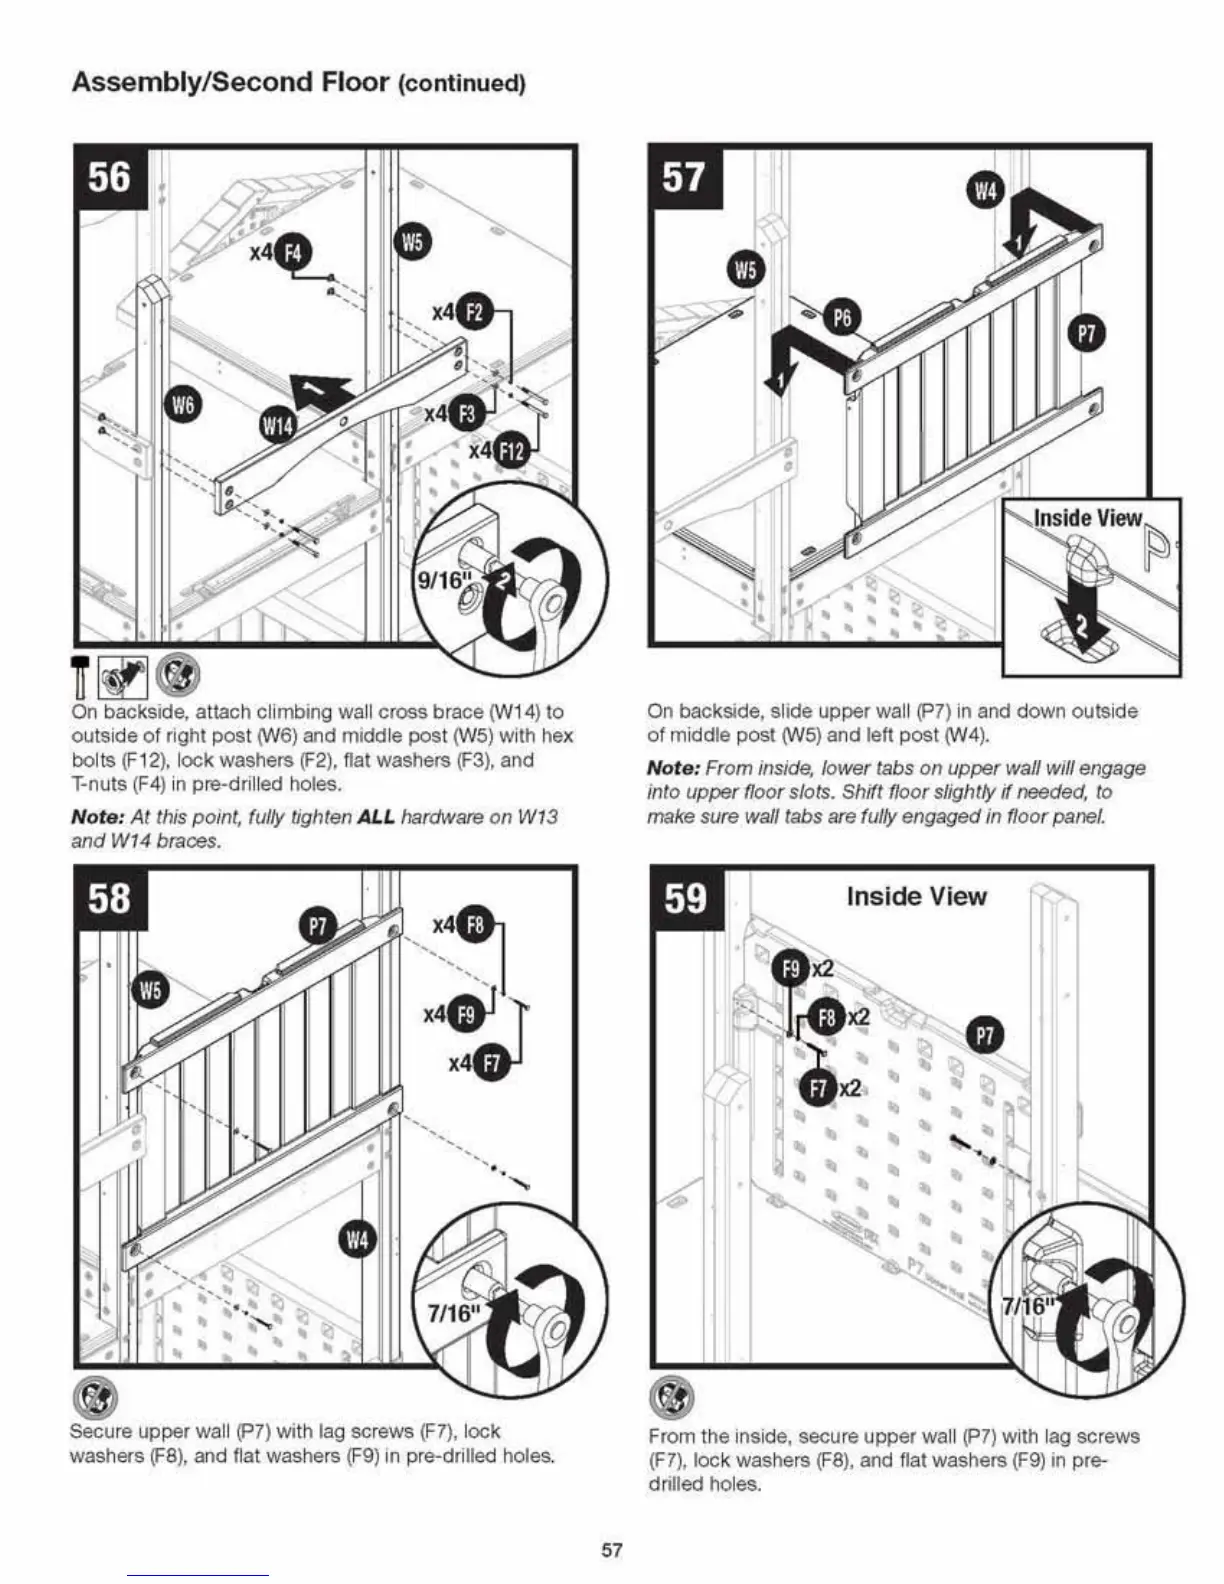
Assembly/Second Floor (continued)
1r
~
On
backside, attach cli mbing wall
cross
b r
ace
(W1
4)
to
outs
i
de
of right
pos
t (W6) and
midd
le
pos
t (W5) with
he
x
bo
lt
s (
F1
2), l
ock
washers (F2), nat washers (F3), and
T-nuts (F4) in pre-drilled holes.
Note:
At
this point, fully tigllten ALL hardware
on
W1
3
and
W14 braces.
Secure
upper
wa
ll (P7)
wi
th lag
sc
r
ews
(F
7),
l
ock
washers
(FS),
and flat washers (F9) in pre-drilled holes.
57
On
backside, slide
upper
wall (P7) in and
down
outs
i
de
o f mi
ddle
post
(W5) and left
post
(W4).
No
te
: From inside,
lower
tabs
on
upper
wall will engage
into
uppernoor
slots.
Shift floor slightly
if
needed,
to
make sure wall tabs are tully engaged in floor panel.
Inside View
From the i
ns
ide, secure
upper
wa
ll (P7) with lag screws
(F
7)
,
loc
k washers (F
S),
and f
lat
washers (F9) in pre-
drilled
ho
les.
 Loading...