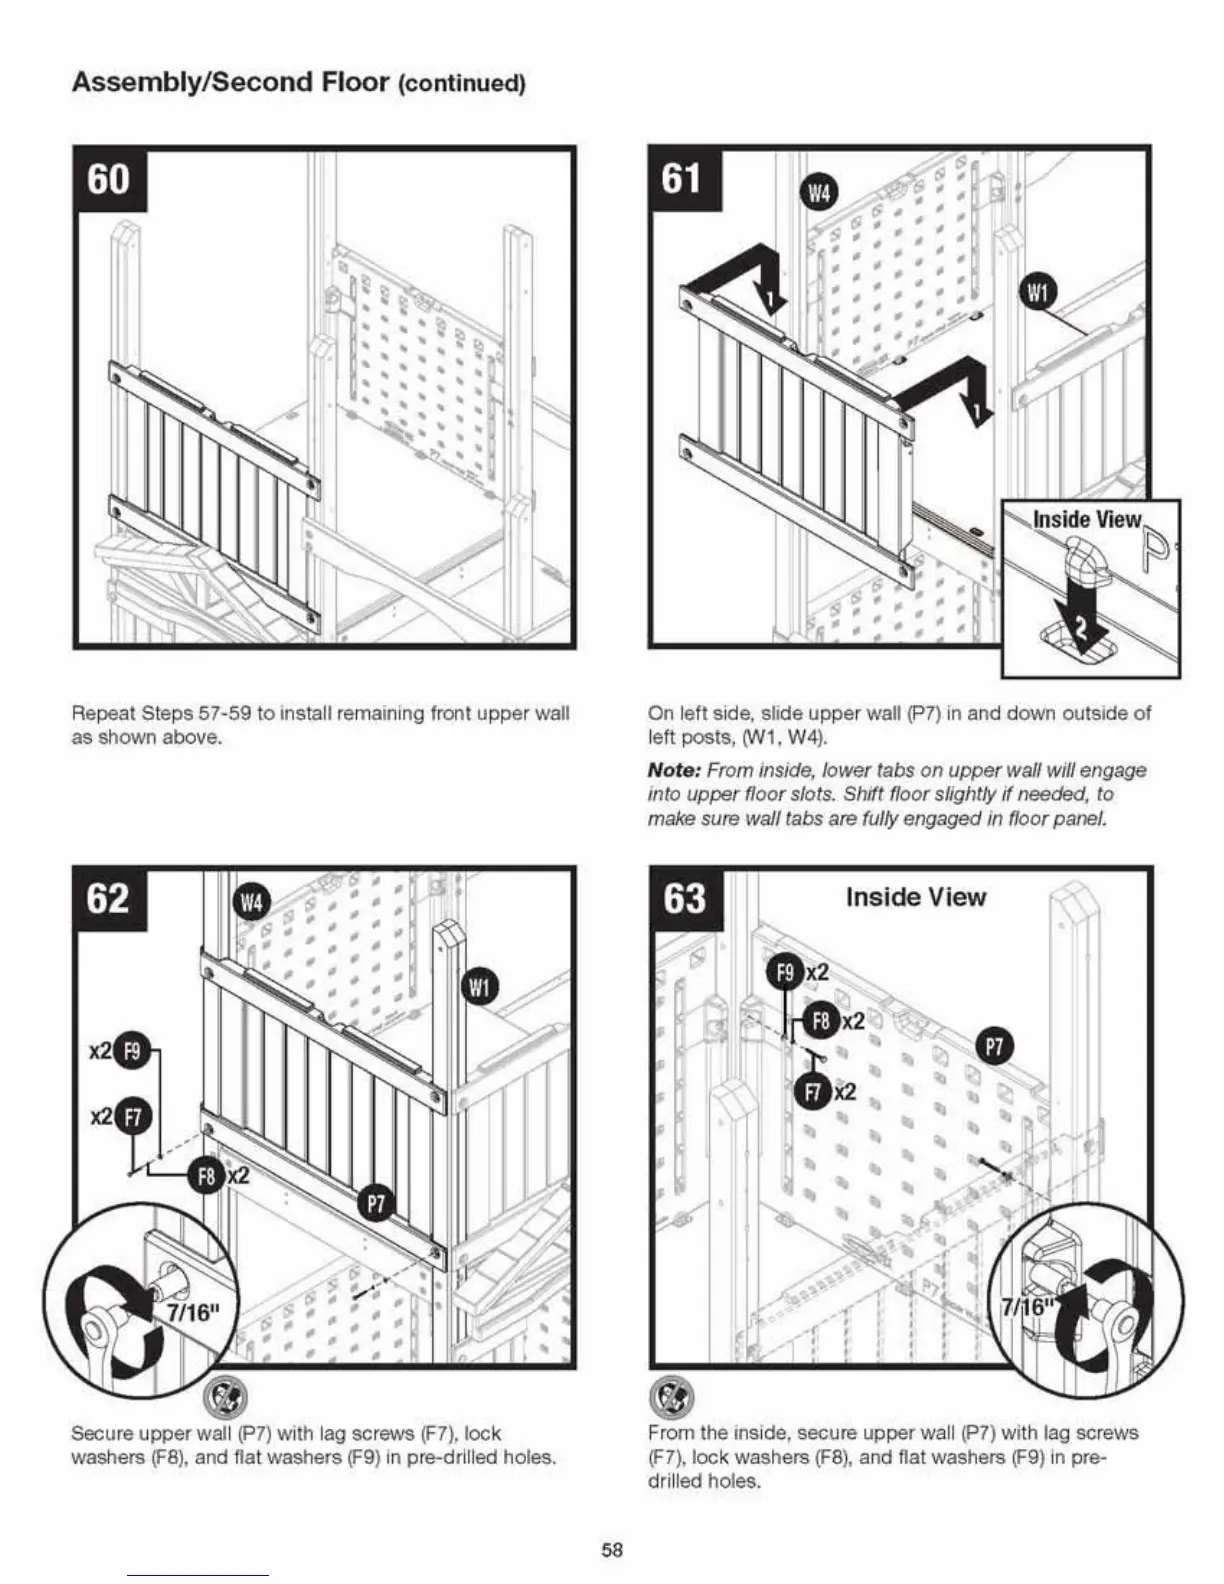
Assembly/Second Floor (continued)
Repeat St
eps
57-59
to
install remaining fr
ont
upper
wall
as
shown above.
Secure
upper
wall
(P7)
with lag screws (F7),
loc
k
washers
(F8),
and flat washers (F9)1n pre-drilled holes.
58
On left side, sli
de
upper
wall (P7) in and down
outs
ide
of
l
ett
posts,
ry./1
,
W4
).
Note: From inside,
lower
tabs
on
upper
wall will engage
into
upper
floor slots. Shift floor slightly
if
needed,
to
make sure wall tabs
are
fully engaged in floor panel.
Inside
View
Fr
om
the inside, secure upper wall (P7) with lag screws
(F7), l
ock
washers (F8), and flat washers (F9) in pre-
dri
lled holes.
 Loading...