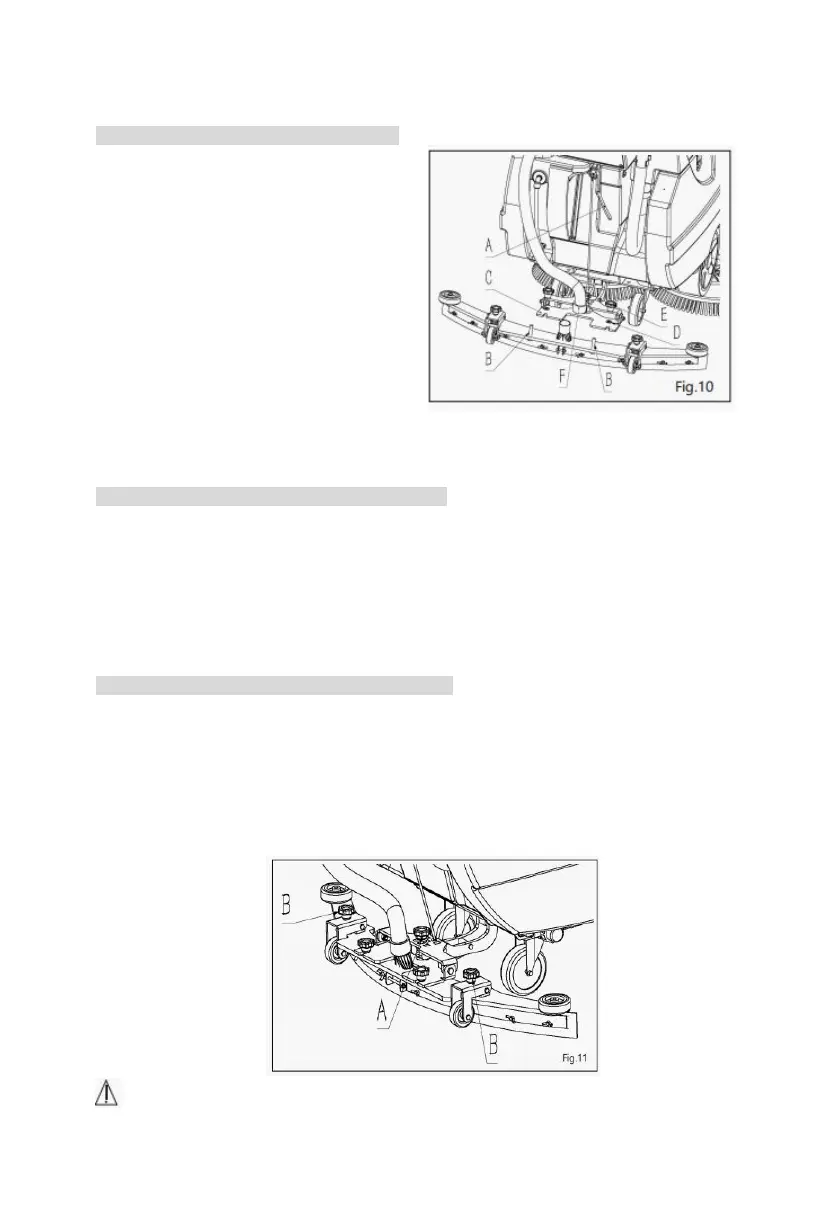
1. Lift the handle rod (A) of the suction scraper
and move it upward.
2. Place the suction scraper (B) under the
suction scraper mounting seat (C) and align it
with the two mounting holes of the mounting
seat.
3. Place two 10 flat pads (D) on the suction
scraper mounting seat (C) and align them with
the two mounting holes of the mounting seat.
4. Place two M10 star handles (E) on the flat
pad (D) and align them with the mounting
holes of the two mounting seats, then align
them with the two threaded holes of the suction
scraper, and finally tighten the star handles.
5. Insert the sewage suction pipe (F) into the
connector in the middle of the suction scraper.
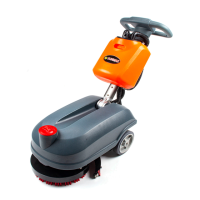
12. Angle Adjustment of Suction Scraper (Fig. 11)
In the process of operation, the rubber scraper behind the suction scraper must be slightly tilted
backwards (about 5mm) to ensure the overall length to be uniform. If it is necessary to bend the
middle rubber scraper, the suction scraper must be tilted as follows:
1. Turn a star handle (A) clockwise to make the rubber scraper of the suction scraper in the
middle part bend continuously, and adjust it until the rubber scraper leans back slightly (about
5mm).
13. Height Adjustment of Suction Scraper (Fig. 11)
The height of the scraper must be adjusted according to the wear state of rubber, which mainly
includes the following steps:
1. Rotate two star handles (B) clockwise or counterclockwise to adjust the height of the rubber
scraper of the water suction scraper. When rotating clockwise, the rubber scraper will rise, and
when rotating counterclockwise, the rubber scraper will fall. If the rubber scraper is worn, rotate
counterclockwise to adjust the two star handles (B).
Note: It is necessary to use protective gloves for these operations to avoid touching sharp
edges or tips of metal objects.