10
4-4. Returning to Original Position
1) Clear away tools from the table.
2) Hold the face plate with the left hand, while slowly
returning the sewing machine back to its original
position.
[ Fig. 4 ]
4-6. Installation of Power Switch Box
See <Fig.6> when installing the power switch box① and
install it on the right bottom of the table.
[ Fig. 6 ]
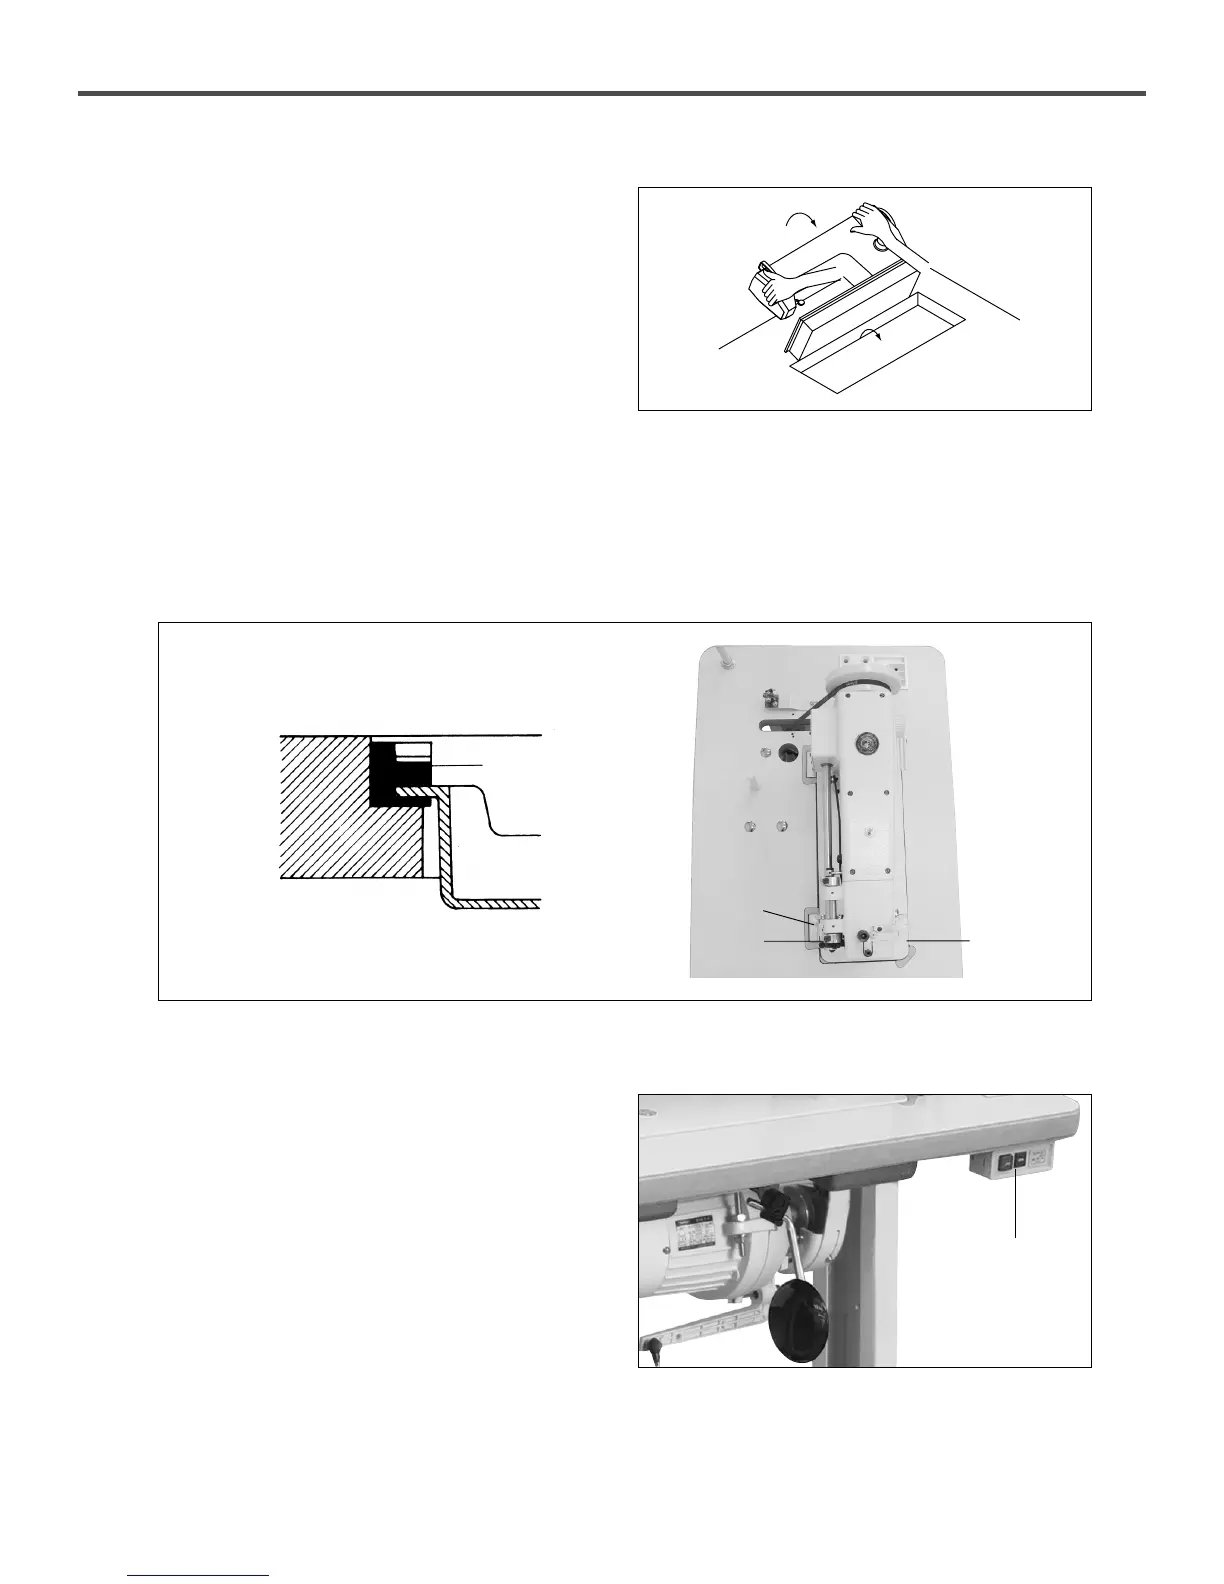
4-5. Installation of Head Part
Insert the hinge rubber① into the table, and insert the oil fan into the middle of the head supporting rubber B③ as in Fig. 5.
Insert the head hinge② into the bed hole and install the machine above the head supporting rubber A④ and the head
supporting rubber B③, while inserting the hinge rubber①.
[ Fig. 5 ]
③
④
①
②
①