Questions? Call or Text +1-801-658-0015 • 13
• A plastic cable guide cover (E) can be clipped
on over the angled bracket if desired. See
Figure 12.4.
Mounting Option 2 - Bolt through Table
Mounting Option 2 is best for tables without accessible
edges. Hardware required from Box 2:
(1) Flat Mounting Plate (H)
(3) Flat Head Hex Screws (G)
(1) Long Carriage Bolt (F)
(1) Flat Pressure Plate (I)
(1) Adjustment Knob (J)
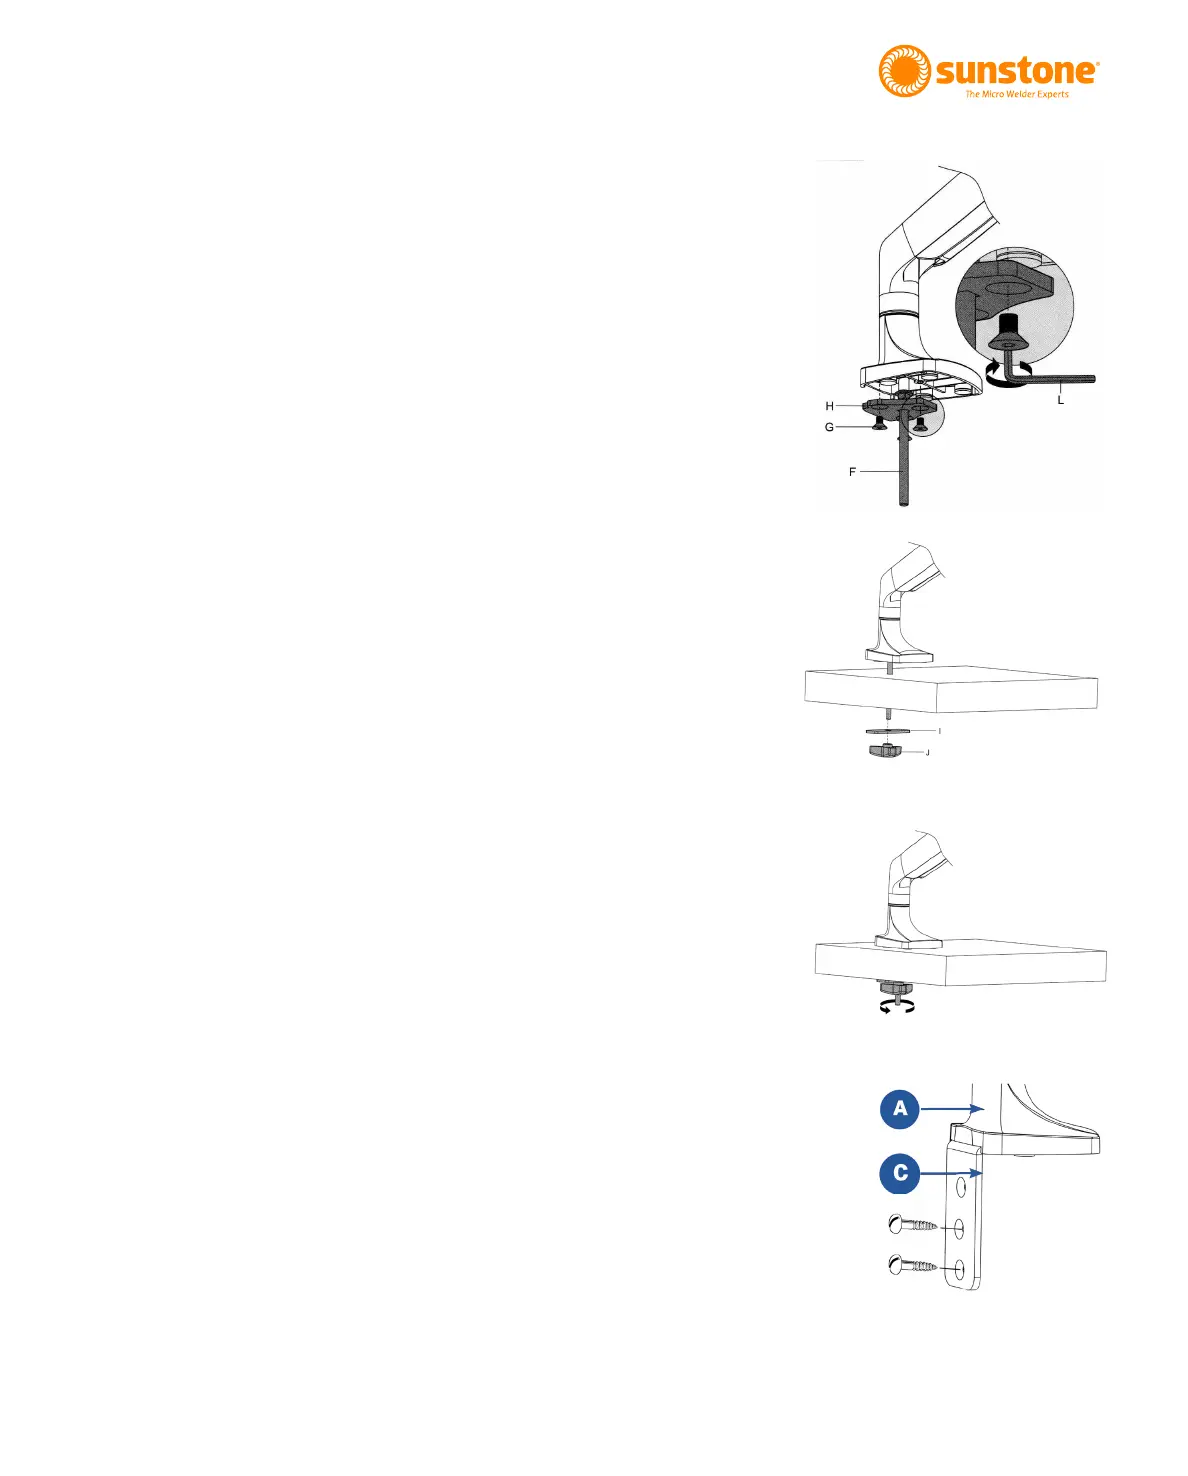
• As shown in Figure 13.1, using a 4mm (5/32”)
(G) holding the Flat Mounting Plate (H) to the
arm.
• Run the included 8mm (5/16”) Long Carriage
Bolt (F) through the included Flat Mounting
Plate (H).
• Attach Flat Mounting Plate (H) to the bottom of
• Drill a 3/8” (9.5mm) hole through the tabletop.
• Lower the arm so the Long Carriage Bolt (F)
goes through the hole in the tabletop. See
Figure 13.2.
• Slide the Flat Pressure Plate (I) onto the bolt.
Turn the Adjustment knob (J) clockwise to
tighten the plate to the underside of the table.
See Figure 13.3.
Mounting Option 3 - Screw to Table (vertical
surface)
Required hardware from Box 2:
(1) Angled Mount Bracket (C)
(3) Flat Head Screws (G)
(2) Wood Screws (not included)
Figure 13.4. Use wood
screws (not included) to
attach the Angled Mount
Bracket (C) to the table.
Figure 13.1. Remove
the plate from the arm,
run the carriage bolt (F)
through the mounting
plate (H), then re-attach
the mounting plate to
the arm.
Figure 13.2. Lower the
arm so the bolt goes
through the hole in the
table.
Figure 13.3. Turn the
Adjustment knob (J)
clockwise to tighten the
plate to the table.