Operation
NT 10000...NT 12000 57
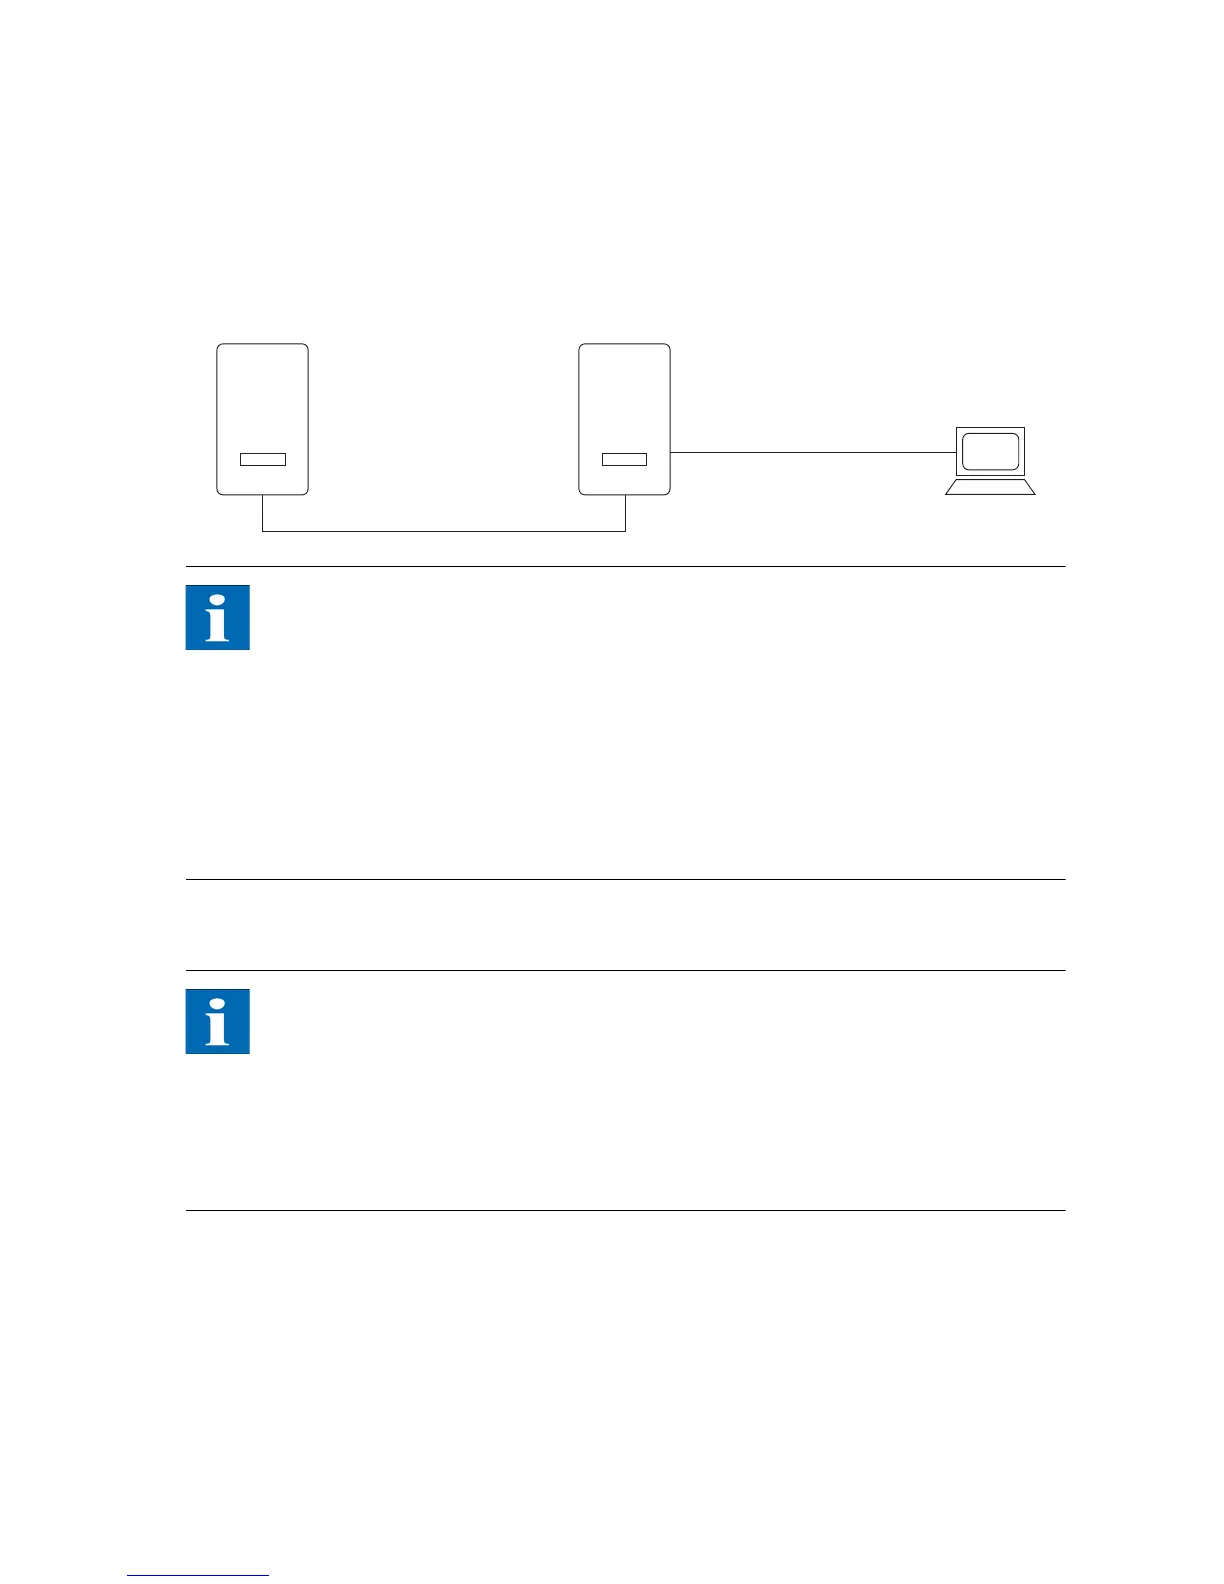
Connect your PC and the Solar Inverter using the Ethernet cable provided.
X-patch cables can also be used.
The PC is connected to the main unit as standard. Basically all Solar Inverters –
including Solar Inverters configured as secondary units or single units – feature
their own web server, so that a connection with any device can be established.
NOTE
To always find the suitable configuration for installation and commissioning
on the PC, we recommend the use of a second network card (e.g. PCI Bus,
PCMCIA), which you can configure to match the default setting of the Solar
Inverter.
The PC and the Solar Inverter must have matching IP addresses and net
masks. The network settings can be adjusted either directly on the Solar In-
verter via the LCD display or on your PC.
If two network cards are used the IP addresses must be in separate subnets,
e.g. 192.168.30.XXX and 192.168.40.XXX.
Network settings on the Solar
Inverter
NOTE
The Solar Inverter is supplied with the following preset IP address:
192.168.30.50
In the default setting the Solar Inverter does not support DHCP (Dynamic
Host Configuration Protocol). Therefore, the IP address is not assigned auto-
matically. It is possible to activate the DHCP protocol via the Settings menu.
IP addresses may not be assigned twice within the network!
If required you can assign your own IP address for the Solar Inverter via the Set-
tings menu.
1. Open the menu Settings – Login.
2. Enter the default password (********, i.e. 8 asterisks) or the password you
have assigned.