Operation
60 NT 10000...NT 12000
After the network configuration is completed you can start the Sunways Brow-
ser by entering the IP address of the Solar Inverter in the address line of your
web browser.
For more complex network configurations please contact your network admi-
nistrator.
Connection via an existing
Ethernet network
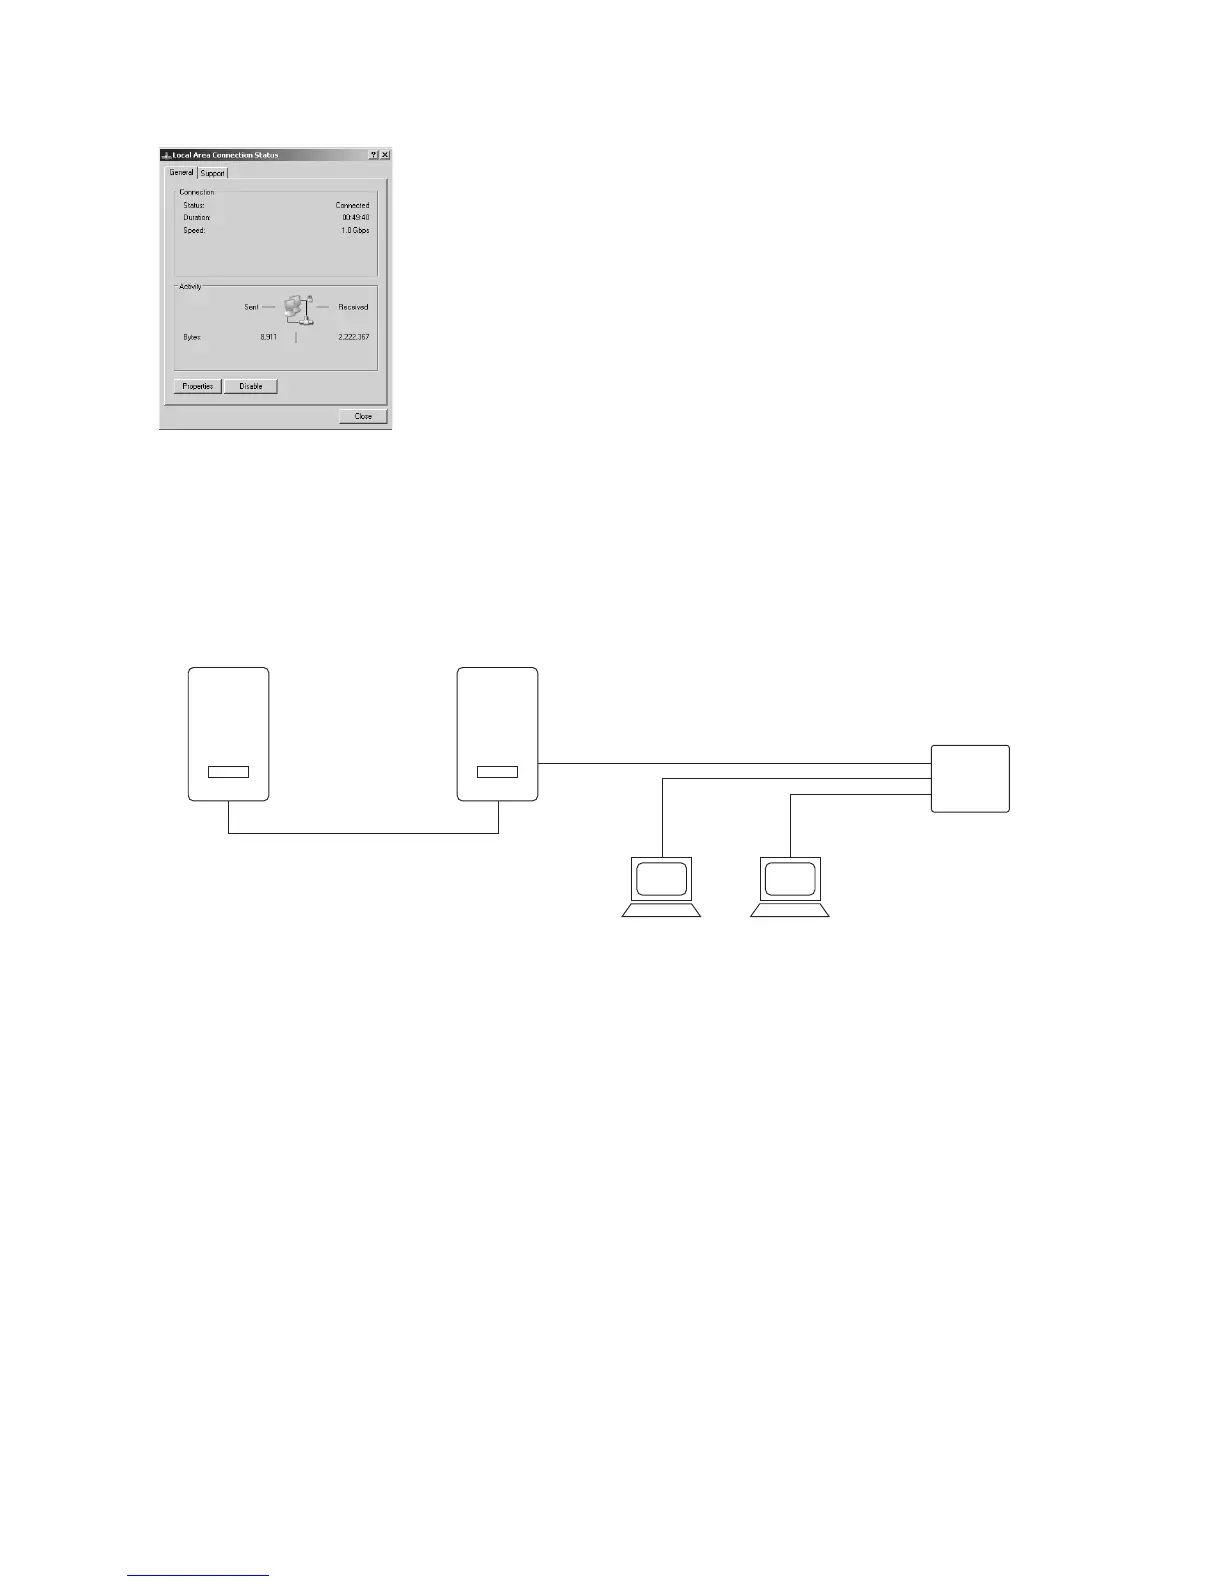
You can integrate the NT Solar Inverter as a network device directly in an exis-
ting home or company network.
Connect your PC and the Solar Inverter using a CAT 5 Ethernet patch cable.
The main unit is connected to the network as standard.
With DHCP If a DHCP server is present in your network, you can activate DHCP on the Solar
Inverter. In this case the Solar Inverter obtains the network settings automati-
cally. You can display the assigned IP address via the LCD display (menu Settings
– Network – Ethernet).
Without DHCP If there is no DHCP server in your network, you must set an unused IP address
on the NT Solar Inverter (see section Solar inverter network setting settings).
Ask your network administrator for the necessary settings for IP address, net
mask and gateway.
After the network configuration is completed you can start the Sunways Brow-
ser by entering the IP address of the Solar Inverter in the address line of your
web browser.
Remote access via a DSL router If a DSL connection or a network with Internet access is available you can make
the Solar Inverter accessible via the Internet.
Requirements:
Your DSL router supports static IP address services such as www.dyndns.org