28
Rev. 12GB0712
SYSTEMA S.p.A.
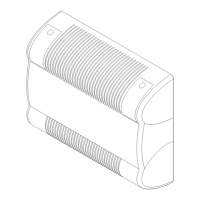
AIRTIGHT GAS CONVECTORS
5) Remove the gas pipe (6) from the pilot, remove the
pilot nozzle and replace it with the one contained in
the transformation kit.
6) Re-close the cast-iron front panel, making sure that
the fiberglass sealing liner remains in place.
7) Check for leakage of gas along the threaded joints.
8) With a 20 mbar supply pressure, use the adjustment
screw (9) to bring burner pressure (4) to its nominal
rating plate value. Screwing in the clockwise direc-
tion increases the pressure, while unscrewing coun-
ter-clockwise decreases the pressure.
9) Indicate on the rating plate the type of gas transfor-
mation performed on the device.
EURO SIT SOLENOID VALVE REGULATION
Take out the plastic cover of the valve.
Regulation of gas flow of pilot burner
Turn the knob in Pilot position (). To increase the flow
turn the PILOT regulation screw counter-clockwise and
vice-versa.
Regulation of gas pressure (output) at the main burner
The gas regulator is adjusted to the right position by the
manufacturer. Modifications of such adjustment have to
be done by qualified personnel, respecting the following
instructions.
Turn the knob to the position 7, corresponding to the
maximum (the bulb of the thermostat has to be at the
minimum declared temperature)
Using a screwdriver take out the plastic cover of the
valve.
To increase the output pressure turn the screw "9" coun-
ter-clockwise and vice-versa.
After this adjustment the regulator has to be in com-
pliance with the UNI EN 126 standard for pressure regu-
lators.
At the end of regulations, put again the plastic cover
onto the valve.
Disabling the pressure regulator
Using a screwdriver take out the plastic cover of the
valve.
Turn completely clockwise the screw "9" : the internal
bush will be released from the screw, disabling the pres-
sure regulator (gas of III family).
At the end of regulations, put again the plastic cover
onto the valve.
3.5 Transformations for various
types of gas supplies for elec-
tronic devices (Mod. K21E,
K28E, K40E, K55E, K28VE,
K40VE, K55VE, K21FE,
K28FE, K40FE, K55FE)
ransformation must be performed only by qualified pro-
fessionals in complete respect of the safety regulations
in force. The Manufacturer declines all liability for erro-
neous transformation or the inappropriate or incorrect
use of the device.
Transformation from Methane gas to LPG gas
1) Close the gas supply line and disconnect the elec-
trical power supply.
2) Remove the cast-iron front panel by unscrewing the
four M8 screws at the corners.
3) Remove the gas supply line pipe from the main bur-
ner (4) using the sealing connector (5) (See Draw
30a).
4) Remove the nozzle-holder (6) and the nozzle (7),
and replace the nozzle with the one contained in
the transformation kit after first checking to make
sure that the diameter corresponds to the diameter
listed on the rating plate.
5) Disable the valve's pressure regulator by removing
the brass plug (8) and then screwing the screw (3)
clockwise (+) all the way down.
6) Re-close the cast-iron front panel, making sure that
the fiberglass sealing liner remains in place.
7) Check for leakage of gas along the threaded joints.
8) Fire the device, and make sure that the supply
pressure to the burner is like indicated in the tables
to the page 8, 9 (*) using the pressure tap (5).
9) Indicate on the rating plate the type of gas transfor-
mation performed on the device.
(*) For LPG gas (Butane-Propane), a “I” stage pressu-
re reducer must be installed near the tank in order
to reduce the pressure to 1.5 bar; a “II” stage pres-
sure reducer must be installed on the main external
supply line in order to reduce the pressure like indi-
cated in the tables to the page 8, 9.
Transformation from LPG gas to Methane gas
1) Close the gas supply line and disconnect the elec-
trical power supply.
2) Remove the cast-iron front panel by unscrewing the
four M8 screws at the corners.
3) Remove the gas supply line pipe from the main bur-
ner (4) using the sealing connector (5) (see Draw
30a).
4) Remove the nozzle-holder (6) and the nozzle (7),
and replace the nozzle with the one contained in the
transformation kit after first checking to make sure
that the diameter corresponds to the diameter listed
on the rating plate.