Discovery TGA™ Getting Started Guide Page 28
NOTE: Allow free air to circulate around both enclosures. Do not place equipment against walls or
cabinets that might impede air flow. Leave at least 7.5 cm (3 in) clearance around the Discovery TGA.
Preparing the Discovery TGA for Installation
After the TGA instrument has been removed from the box and placed on the bench, use these steps to pre-
pare your instrument for installation:
Removing the Shipping Bracket
This step is also covered in the unpacking instruction sheet shipped with the instrument. It is repeated here
for your convenience, or in the event that the step was not completed previously.
To remove the shipping bracket:
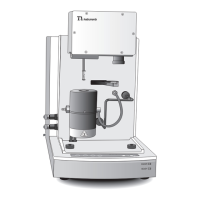
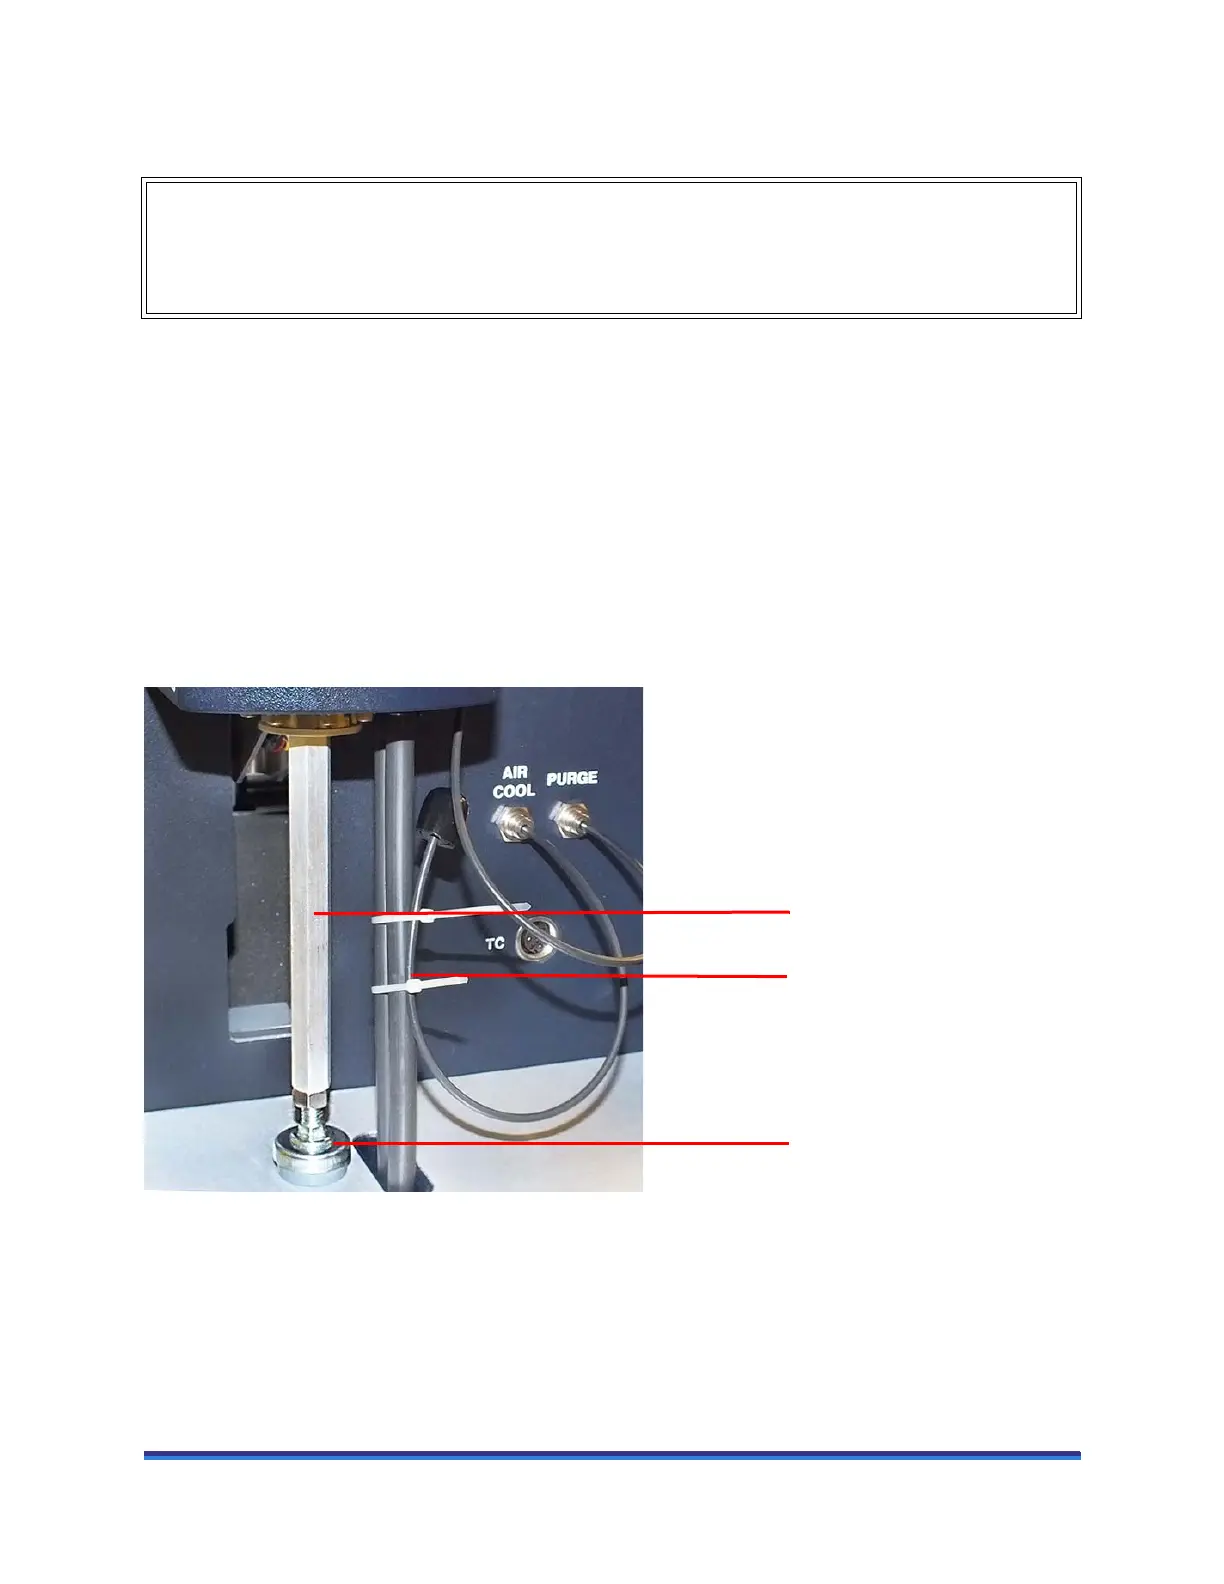
1 Cut the wire-tie securing the air cool line to the water circulator tubing, then loosen the foot of the furnace
shipping bracket. See the figure below.
Figure 9 Shipping bracket on Discovery TGA (TGA 5500 shown).
2 Raise the foot of the bracket and remove the entire bracket.
3 Retain this bracket in case the instrument needs to be shipped in the future.
WARNING: For safety, position the equipment in a manner that allows access to the power cord
for emergency disconnection.
AVERTISSEMENT: Par mesure de sécurité, placez l'équipement de sorte qu'il permette d'accéder
facilement au cordon d'alimentation en cas de débranchement d'urgence.
Air cool line secured to
water circulator tubing
Loosen shipping bracket
here
Shipping bracket