EasyManua.ls Logo

Tally Dascom DL-200 - User Manual

Tally Dascom DL-200
98 pages
Print Icon
To Next Page IconTo Next Page
Loading...
User Manual DL-200 Label & Barcode Printer

Table of Contents

Questions and Answers

  • C
    Christopher PerezAug 18, 2025
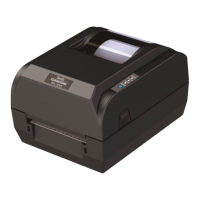
    Why is my Tally Dascom DL-200 printing blurred or spotty labels?
    • B
      Bryan ChristensenAug 18, 2025
      Blurred or spot printing on your Tally Dascom Label Maker can occur due to several reasons: * The media roll may be incorrectly installed, so check and reload it properly. * The media or ribbon might be out of specification; use recommended media and ribbon. * The thermal print head or platen could be dirty, so clean them. * The print density may be too low; increase the print density (heat). * You might be printing with ribbon on direct thermal paper; remove the ribbon.
  • B
    ballardthomasAug 20, 2025
    What to do if my Tally Dascom DL-200 Label Maker has no LEDs on?
    • D
      Danielle AdamsAug 20, 2025
      If no LEDs are lit on your Tally Dascom Label Maker, consider the following: * Ensure the power cord is properly plugged in. * If the printer is off, turn it on. * Check the cable and adapter, or try another cable and adapter. If these steps don't resolve the issue, the PCB may be damaged, and you should contact service representatives.
  • K
    Karen KelleyAug 23, 2025
    What to do if the Error LED blinks and the buzzer alarms on my Tally Dascom Label Maker?
    • J
      Jose MooreAug 23, 2025
      If the Error LED blinks and the buzzer alarms on your Tally Dascom Label Maker, it could be due to: * The thermal print head is overheated. Turn the printer off and wait a few minutes before resuming. * There could be an over-voltage or low-voltage issue. Ensure you are printing with the specified voltage.
  • B
    bradley65Aug 25, 2025
    Why does my Tally Dascom DL-200 skip labels?
    • G
      Gabriel EnglishAug 26, 2025
      Your Tally Dascom Label Maker might skip labels due to a label positioning problem or if the label size setting exceeds the physical size. Execute label calibration. If that doesn’t work, verify that the label size setting is correct.
  • J
    Jason SmithAug 28, 2025
    What does it mean if the Error LED fast blinks on my Tally Dascom Label Maker?
    • L
      Linda DavisAug 28, 2025
      A fast blinking Error LED on your Tally Dascom Label Maker indicates a gap detection error. This can be resolved by: 1. If using continuous paper, ensure 'label paper' is selected in the tool. 2. Cleaning or adjusting the media sensor, as the sensor may not be detecting the gap due to an error or other problem.
  • J
    Jennifer HarrisonAug 30, 2025
    What to do if the Status LED is always on on my Tally Dascom Label Maker?
    • L
      Laura YoderAug 30, 2025
      If the Status LED is always on for your Tally Dascom Label Maker, it means media end. Reload media.
  • J
    Jamie SotoSep 2, 2025
    Why does my Tally Dascom Label Maker feed blank labels?
    • W
      William CookSep 2, 2025
      To resolve the issue of your Tally Dascom Label Maker feeding blank labels, install the ribbon if you are printing without one on transfer thermal paper.
  • O
    omasonSep 4, 2025
    What does it mean when the Power LED and Error LED fast blink three times, and the buzzer alarms three times on my Tally Dascom DL-200 Label Maker?
    • A
      Austin GomezSep 4, 2025
      When the Power LED and Error LED fast blink three times, accompanied by three buzzer alarms on your Tally Dascom Label Maker, it signals a gap sensor error alarm. This means the black mark sensor does not align with the receiving sensor. Move around the black mark sensor, so that the its triangle aligns with another on the center housing.
  • K
    Kristina SmithSep 6, 2025
    What to do if the Status LED blinks on my Tally Dascom Label Maker?
    • M
      Mark ParkerSep 7, 2025
      If the Status LED blinks on your Tally Dascom Label Maker: * Remove any label that remains in the peeler. * Replace the ribbon if it's at the end.
  • S
    Stephanie KempSep 9, 2025
    What does it mean when I press the feed button after powering on my Tally Dascom DL-200 Label Maker, and the Error LED slowly blinks once then fast blinks three times, with four buzzer alarms?
    • J
      juliecollinsSep 9, 2025
      This sequence indicates a cutter error alarm on your Tally Dascom Label Maker. This happens when the cutter function is enabled without a cutter installed. Disable the cutter in the tool's settings.

Summary

Introduction

1.1 Printer Features

Highlights key functionalities including language switching, easy operation, and connectivity options.

1.2 Printer Specifications

Details technical specs like resolution, speed, media handling, emulation, and barcode support.

1.3 Print Media Types

Explains different media types supported, including standard, continuous roll, and tag stock.

1.8 Control Panel

Details the printer's control panel, including LED indicators and button functions for operation.

Printer Setup

2.1 Setup Flow Overview

Outlines the step-by-step process for setting up the printer and its peripherals.

2.2 Printer Placement Guidelines

Provides guidance on selecting an appropriate and safe location for printer installation.

2.3 Attaching Power

Detailed steps for connecting the printer to a power source, including voltage checks.

2.4 Sensor Calibration

Instructions for calibrating the printer's gap and reflective sensors for accurate media detection.

2.5 Loading Roll Media

Instructions on how to load various types of roll media, with tips to avoid jams.

2.6 Loading Transfer Ribbon

Procedure for loading transfer ribbons, matching media and ribbon types for optimal results.

2.7 Connecting to Computer

Essential steps for connecting the printer to a host computer, including driver installation prerequisites.

Network Setup and Configuration

3.1 Installing Printer Driver

Guide to installing the printer driver software on your computer for network connectivity.

3.2 Installing Setup Tool

Steps to install the Tally Dascom Setup Tool for printer configuration and management.

3.3 Setup Tool Application and Settings

Overview of the Setup Tool and procedure to select printer model and configure interfaces.

3.4 LAN Interface Setup

Steps to configure the printer for network connectivity via a LAN interface.

3.5 WLAN Interface Setup

Instructions for setting up wireless network (WLAN) connectivity, including AP and STA modes.

3.6 Bluetooth Adapter Driver Installation

Guide to installing the Bluetooth adapter driver for wireless printer communication.

3.7 Bluetooth Setup

Procedure to configure Bluetooth settings for the printer, including name and password.

3.8 Firmware Update

Instructions for updating the printer's firmware via USB connection.

Printer Modes and Diagnostics

4.1 Print Parameter Setting Page

How to print a configuration status label to verify printer settings and operation.

4.2 Hexadecimal Dumping Mode

Enables checking printer communication by displaying data in hexadecimal format.

4.3 Auto Calibrate Label

Procedure for automatically calibrating the label sensor for accurate printing.

Troubleshooting and Maintenance

5.1 Common Issues

Troubleshooting common printer problems based on LED indications and buzzer alarms.

5.2 Resetting Factory Defaults

Methods to restore printer settings to factory defaults to resolve issues.

5.3 Removing Jammed Labels

Step-by-step guide on how to safely remove jammed labels and ribbons.

5.4 Thermal Print Head Cleaning

Procedure for cleaning the thermal print head to ensure print quality and longevity.

5.5 Printer Maintenance

Recommended periodic maintenance procedures for the printer to ensure reliable operation.

Communication Interface Specifications

6.1 USB Interface Details

Details the USB interface pin assignment and connector diagram.

6.2 Wi-Fi Interface Details

Specifies the Wi-Fi interface standards and capabilities.

6.3 Bluetooth Interface Details

Provides details on Bluetooth version, protocol, frequency, and transmission distance.

6.4 Ethernet Interface Details

Details the Ethernet interface pin assignment for network connectivity.

6.5 Serial Interface Details

Details the serial interface pin assignment, connector diagram, and default settings.

6.6 Parallel Interface Details

Details the parallel interface pin assignment and connector diagram.

6.7 Power Supply Information

Information about the power adapter, including input/output specs and connector details.

Character Code Pages

7.1 USA International Character Set

Presents the character code table for the International Character Set (USA).

7.2 International Character Sets Overview

Shows character configurations for various international character sets used by the printer.

7.3 User-defined Page Mapping

Details the character mapping for user-defined pages.

7.4 PC437: USA & Standard Europe

Presents the character code table for PC437, covering USA and Standard European characters.

7.5 PC850: Multilingual

Shows the character code table for PC850, supporting multiple languages.

7.6 PC852: Latin2

Presents the character code table for PC852, specifically for Latin2 characters.

7.7 PC858: Euro

Details the character code table for PC858, including Euro currency symbol support.

7.8 PC860: Portuguese

Shows the character code table for PC860, designed for Portuguese language support.

7.9 PC863: Canadian-French

Presents the character code table for PC863, supporting Canadian-French characters.

7.10 PC865: Nordic

Details the character code table for PC865, used for Nordic languages.

7.11 PC866: Cyrillic #2

Shows the character code table for PC866, supporting Cyrillic characters.

7.12 PC720: Arabic

Presents the character code table for PC720, designed for Arabic language support.

Command Sets

8.1 ZPL Command Sets

Lists and explains commands for the ZPL printer command language.

8.2 EPL Command Sets

Lists and explains commands for the EPL printer command language.

8.3 TSPL Command Sets

Lists and explains commands for the TSPL printer command language.

Appendices

Appendix I: Cutter Usage

Instructions on how to use the printer's cutter functionality.

Appendix II: Peeler Usage

Instructions on how to use the printer's peeler functionality.

Appendix III: FCC Statement

Contains regulatory compliance information regarding FCC rules.

Appendix IV: DASCOM Representatives

Lists contact information for DASCOM representatives worldwide.

Tally Dascom DL-200 Specifications

General IconGeneral
Print MethodDirect Thermal
Resolution203 dpi
Maximum Print Width108 mm
Maximum Print Length2286 mm
ConnectivityUSB, Serial
Memory8 MB
Power SupplyAC 100-240V, 50/60Hz

Related product manuals