- 14 -
5. Prior to Testing
5.1. Turning the Power on
After turning the main power switch on, the display panel should display the main screen shown in Fig.
5: . Pressing the FUNCTION key at this point will give you access to detailed settings, as shown in
Fig. 6: .
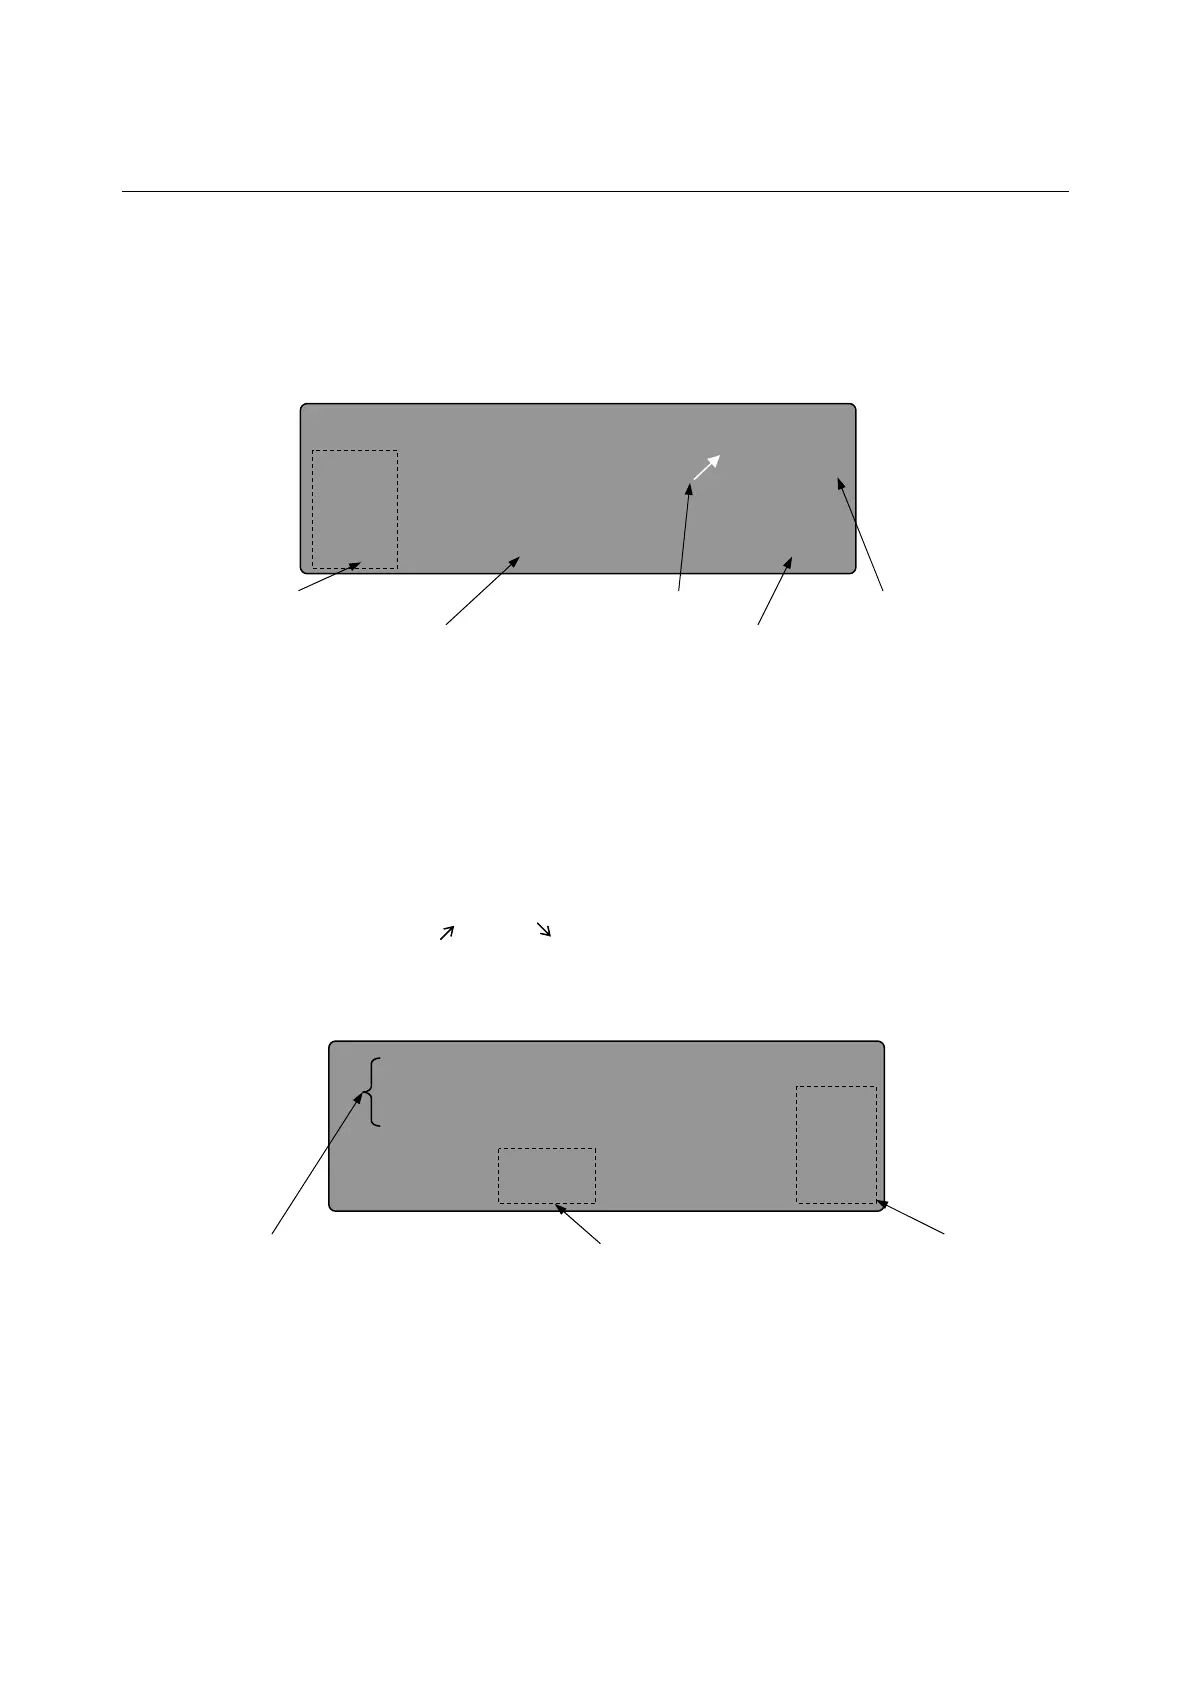
Fig. 5: Main Display Screen
Test mode: Displays the current testing mode. Test type is shown at the top, pressure
in the middle, and detection interval (in °C) at the bottom.
Current Specimen Temperature: Displays the temperature measured by the pour point temperature
sensor. When a pour point (or a cloud point) is detected, this value will
begin flashing and remain constant until reset.
Preheat (Y/N): Indicates if the specimen is to be preheating before cooling by an arrow
( : Yes, : No).
Bath Temperature: Displays the temperature of the bath (before testing only).
Expected Pour/Cloud Point: The Expected pour point or cloud point entered prior to testing.
Fig. 6: Details Screen
Light Intensity: Displays the fraction of light reflected from the bottom of the specimen
cup to the cloud point sensor.
Previous Results: Shows the last measured pour and cloud points. The data is updated
each time a test is completed.
Current Temperature: Displays the current temperatures at the pour point, cloud point and bath
sensors.
Expected Pour/Cloud Point
Test Mode
Current Specimen Temperature
23.5
Preheat (Y/N)
Bath Temperature
EXP.PP
00.0
BATH
23.3
PP
L
SAMPLE TEMP
Received light intensity Previous result Current temperature
Proj 00%
Recv 00%
Prev CP
Prev PP -37.5
PP Sensor 23.5
CP Sensor 23.6
Bath 23.3
 Loading...