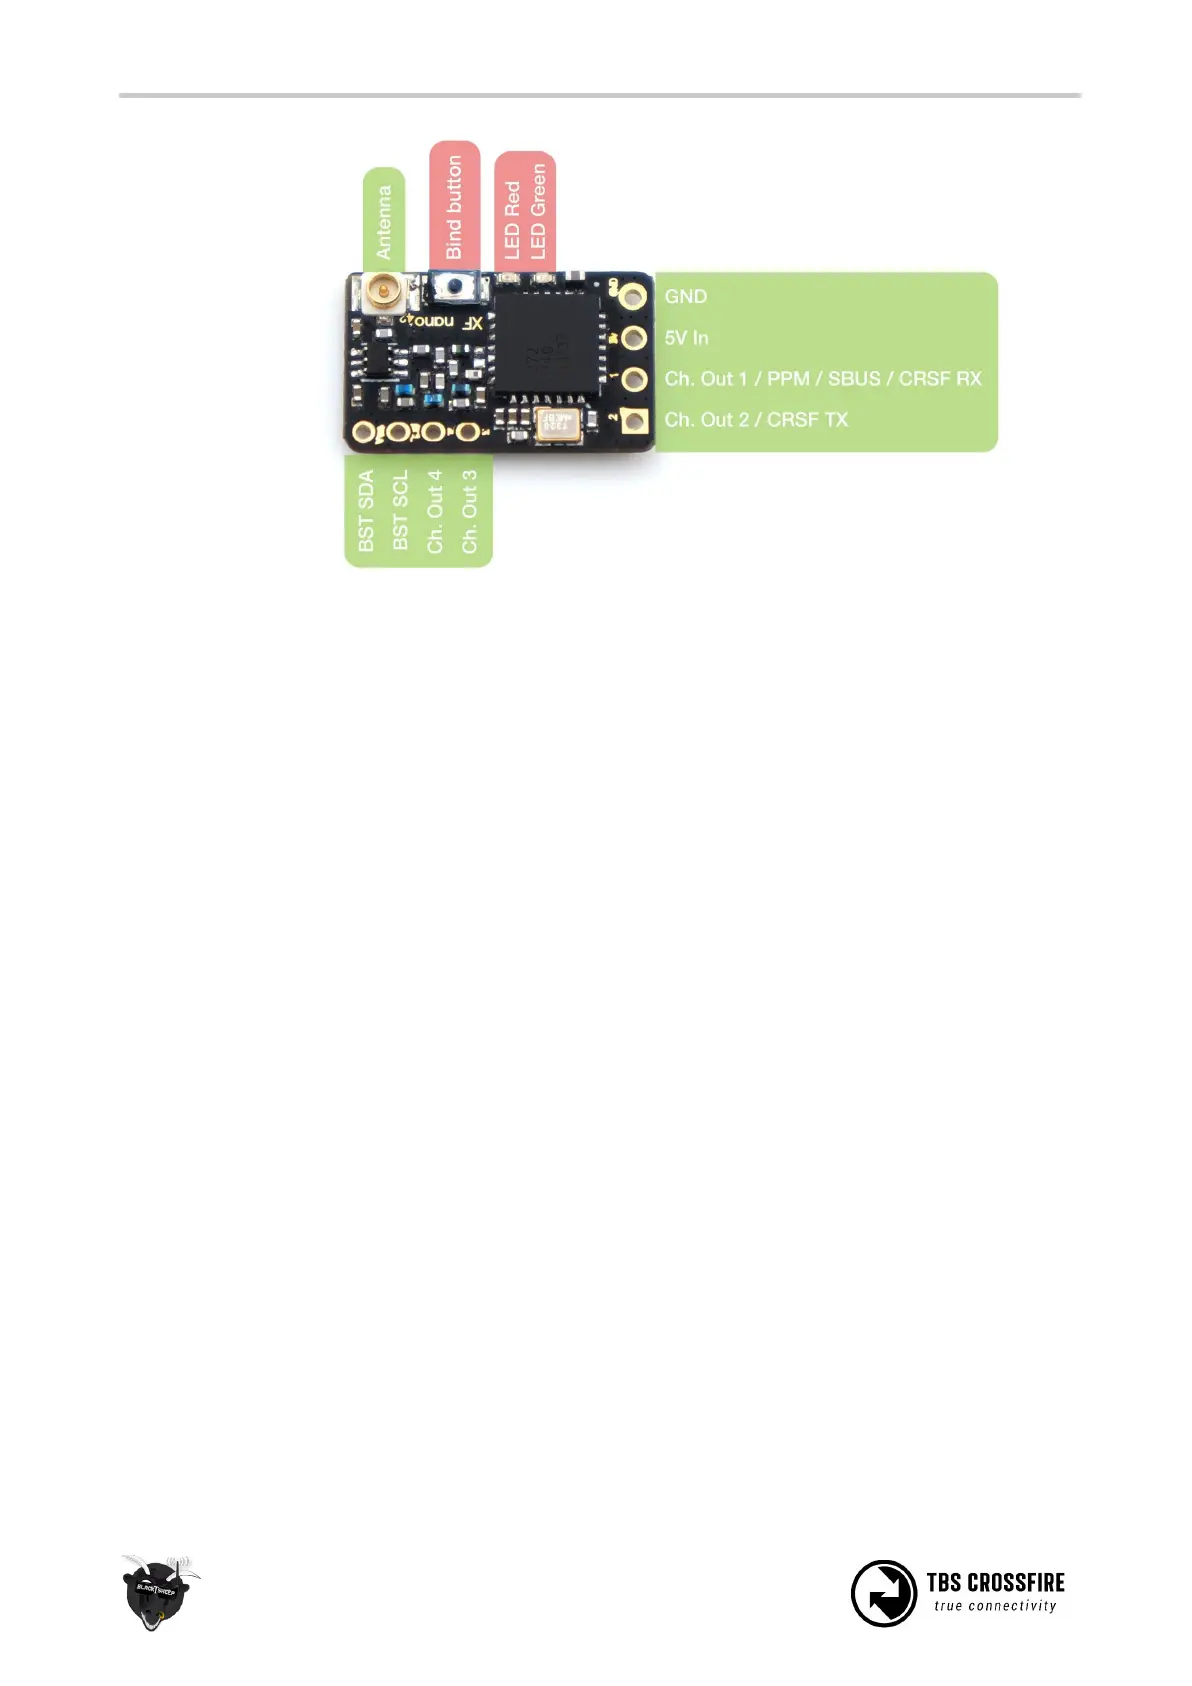
Note that the squared-pin has change in later revisions, but the pinout is still the same.
Connecting antenna
The CROSSFIRE system (all RX and diversity RX) use regular SMA connectors, where the antenna has the
center pin, and U.FL sockets (Micro and Nano RX). The diversity RX comes with two "loaded coil" antennas,
which can be exchanged with hand-tuned rod antenna (90° connection). The Micro and Nano RX come
with a flexible T-antenna, which can be exchanged by the Immortal-T antenna or the PCB Race antenna.
Note:
1. The PCB Race antenna reduces the range of the TBS CROSSFIRE system to that of a very good
2.4GHz system, but without compromising the advantages of the CROSSFIRE.
2. It is never good to operate a radio without an antenna. This affects both the transmitter and the
receiver.
3. The receiver is designed for a maximum of +10dBm. If you operate your transmitter at more than
500mW, holding the transmitter too close may damage the receiver. Always keep at least one
meter separation between transmitter and receiver while powered.
Binding
Binding the transmitter and receiver is super simple.
1. Just power up the TBS CROSSFIRE transmitter
2. On the standard transmitter, enter the configuration menu by pressing and holding the joystick for
3 seconds, select “General” and “Binding” - a message “Binding” will start blinking, waiting for the
receiver. On the micro transmitter, a short press on the button will initiate binding mode. For the
TBS Tango, you can use the “Devices” menu and navigate to “Crossfire TX/ Binding”. For OpenTX,