Do you have a question about the Teac AG-D9300 and is the answer not in the manual?
To maintain proper ventilation, be sure to leave a space around the unit.
Connect the turntable's output jacks to the PHONO IN jacks.
By connecting an external power amplifier, you can increase the number of available outputs.
Be sure to connect the power cord to an AC outlet which supplies the correct voltage.
Connect the video deck (VCR) LINE output (AUDIO OUT) jacks to the IN (VCR/VIDEO 1) jacks.
Connect the TV monitor VIDEO IN jack to the MONITOR OUT jack.
Connect the TV monitor S-VIDEO IN jack to the MONITOR OUT jack.
Details on connecting indoor FM antenna and outdoor FM antenna.
Instructions for connecting indoor loop and outdoor AM antennas.
Strip back the cable covering by about 1 cm and twist the wire strands together.
For private listening, insert the headphones (1/4-inch plug) into the PHONES jack.
Press this to mute the sound from the speakers and headphones when answering the telephone, etc.
This function allows you to preprogram the receiver to switch its own power off automatically.
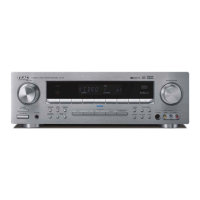
Controls for turning the unit on, off, and standby mode.
Selects direct input for 6 channels, bypassing surround mode displays.
Selects the speaker system (A, B, or A+B) to be used for playback.
Supplies selected source signal directly to amplifier for better sound quality.
Adjusts low (Bass) and high (Treble) frequencies for desired tone.
Adjusts the balance between left and right channels.
Automatically detects and tunes into the next station by pressing UP or DOWN TUNING button.
Alternates between Stereo mode and Mono mode for FM reception.
Tunes to stations broadcasting a weak signal by manually adjusting frequency steps.
Inputs the required frequency directly using numeric keys on the remote control unit.
Stores FM/AM broadcasts from channels 1 to 30 automatically.
Automatically scans for and stores up to 30 stations.
Manually preset stations by selecting frequency and pressing MEMORY button.
Press numeric keys to tune directly to a broadcast.
Scans preset channels at 5-second intervals to find desired broadcasts.
Preserves preset station memories for up to 3 days during power failure.
Shows PS, PTY, RT, CT, TP, TA data from FM stations.
Selects program type (e.g., NEWS, AFFAIRS, INFO) for FM broadcasts.
Displays radio text information (news, messages) received from FM stations.
Searches for traffic program (TP) broadcasts and requests TA reception.
Select PTY mode, press MEMORY, then start search using TUNING/PRESET buttons.
Select PHONO or CD mode, then play the turntable or CD player.
Select MD/TAPE 1 mode, then operate the MD deck or tape deck for playback.
Set TAPE 2 MONITOR to ON, then operate tape deck (TAPE 2) for playback.
Record a program source (disc, CD) onto a cassette deck connected to TAPE 2 MONITOR REC jacks.
Copy from TAPE 2 to MD/TAPE 1 using FUNCTION selector and TAPE 2 MONITOR.
Monitor recorded sound from speakers during recording if tape deck has separate record/playback heads.
Select VCR/VIDEO 1, LD/VIDEO 2, AUX/VIDEO 3, or DVD/VIDEO 4 mode and play the component.
Connect video camera recorder audio and video outputs to AUX/VIDEO 3 INPUT jacks.
Enjoy 5.1 (or 6) discrete channels of high quality digital audio from DTS program sources.
Enjoy up to 5.1 channels of digital surround sound from a Dolby Digital program source.
Provides movie theater or live concert hall effect, with improved channel separation.
Front speakers receive rear speaker signals, improving sound positioning.
Provides concert hall ambiance, directing normal source to main speakers and reverb to surrounds.
Provides a three-dimensional effect similar to movie theater.
Gives an expanded feel to powerful music like dance or rock.
Recreates stadium sound field with echo/hall effects.
Provides church ambiance, enhancing choral work and studio recordings.
Place to the front left and right of the listening position. Required for all surround modes.
Place front and center. Stabilizes sound image and recreates sound motion. Required for 3 STEREO.
Place to the direct left and right. Recreate sound motion and atmosphere. Required for surround playback.
Reproduces powerful deep bass sounds.
Select LARGE or SMALL for front speakers based on their size.
Select LARGE, SMALL, or NONE for center speaker based on its size.
Select LARGE or SMALL for rear speakers based on their size.
Select SUB-ON (if used) or SUB-OFF (if not used) for subwoofer output.
Set delay time simultaneously for DOLBY DIGITAL/PRO LOGIC modes using DELAY TIME buttons.
Adjust speaker volume levels using TEST TONE and LEVEL TRIM buttons.
Select surround mode, press SURROUND ON/OFF, play video software, and adjust volume.
Applies compression to low-level content for clearer sound at night.
Preserves preset memory and most-recent memory functions for up to 3 days during power failure.
Memory settings are erased if power supply is interrupted for 3 days or longer.
Use RESET switch for electrical shock or irregular power.
Allows on-screen display of unit status and functions via remote control.
Selects MONITOR OUT jack (VIDEO or S-VIDEO) at the rear panel.
Shows current unit setup status and allows changing functions via remote.
Allows selection of input sources (VIDEO, AUDIO, DIGITAL) via the OSD menu.
Adjust surround mode based on FUNCTION and DIGITAL INPUT settings.
Select desired language from the list and press ENTER to change.
Configure speaker settings (Front, Center, Rear, Subwoofer) for different surround modes.
Sets display status for TEST TONE, SURROUND MODE, and SLEEP.
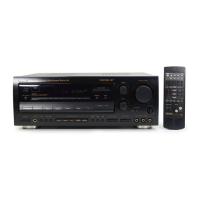
How to point and use the remote control unit to operate the receiver and other TEAC components.
Instructions for inserting batteries correctly and safety guidelines.
Diagram showing remote control of CD player and cassette deck via receiver's infrared sensor.
Details functions of CD SYNC, TAPE I, TAPE II, and CD buttons for operating other TEAC components.
Troubleshooting common issues related to amplifier sound and connections.
Troubleshooting common issues related to tuner reception and noise.
Troubleshooting issues related to remote control operation and battery.
Technical specifications for amplifier power, distortion, delay time, and audio inputs/outputs.
Technical specifications for FM tuner sensitivity, frequency range, and distortion.
Technical specifications for AM tuner sensitivity, frequency range, and distortion.
Technical specifications for digital audio sampling frequency and input levels.
Technical specifications for video input/output sensitivity and impedance.
General specifications including power requirements, dimensions, weight, and accessories.
| Type | AV receiver |
|---|---|
| Surround Sound Formats | Dolby Digital, DTS |
| Tuner | AM/FM |
| Input Sensitivity | 200 mV |
| Power Output | 100W per channel |
| Frequency Response | 10Hz - 100kHz |
| Inputs | 4 x RCA (audio), 1 x optical (digital audio), 1 x coaxial (digital audio) |