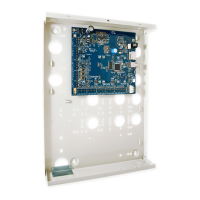
16 Challenger Series Installation and Quick Programming Manual
Description
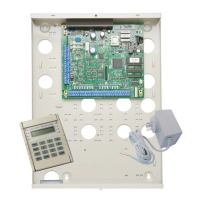
. Connect the D+ and D– terminals to the RS-485 data cable for LAN 1.
If the + and –
terminals are used, consider the current draw as part of the auxiliary power
output. See “Auxiliary power terminals” on page 21.
. Input and common terminals for panel tamper switch (supplied). Short circuit for sealed,
open circuit for unsealed. Must be sealed if not used. Can only be used with normally
closed contacts such as the panel tamper switches.
. Connect the S+ and S– terminals to an external 8 Ω siren speaker. If an external siren is
not used, connect the S+ and S– terminals to a 1K 1/4 watt resistor (supplied). The
maximum current draw for the external 8 Ω siren and the strobe is 700 mA.
The internal and external siren speaker outputs are relay 16 and are mapped to event
flag 1.
. Connect the S+ and S– terminals to an internal 8 Ω siren speaker.
If an internal siren is used, consider the current draw as part of the auxiliary power output.
See “Auxiliary power terminals” on page 21.
. Connect the + and – terminals to the strobe. The maximum current draw for the external
8 Ω siren and the strobe is 700 mA. The strobe output is relay 2 and is mapped to event
flag 2.
. Connect the D+ and D– terminals to the RS-485 data cable for LAN 2 (if required).
If the + and – terminals are used, consider the current draw as part of t
output. See “Auxiliary power terminals” on page 21.
. Zone input terminals. See “Zone inputs” on page 22.
. RJ-12 socket to telephone system (dialler). See “Telephone connection” on page 26.
. Slot for SD card.
. 100BT LED on when Ethernet speed is 100 Mbps.
. Ethernet port.
. Link Active LED flashes to indicate Ethernet activity.
. J18 USB port for “Type A Male to Type B Mini Male” or “Type A Male to Type B Micro
Male” cable (depending on board revision number).
. Transmit and receive LEDs to indicate activity on the serial port (J15).
Tx0 transmit LED flashes to indicate data being sent from the Challenger to a device
connected to J15 (serial port) and is on solid when J15 is ready (inactive).
Rx0 receive LED flashes to indicate data being received from device connected to J15
(serial port).
. J15 terminals (also called STU port) for RS-232 serial connection to computer. See “J15
serial port” on page 26.
Note: Limitations apply to ChallengerSE. See “ChallengerSE functionality” on page 2.
. J14 10-way cable socket for TS0840, TS0841, TS0842, or TS1041 relay or output
expansion modules.
Note: The J14 connector can provide power to one relay controller. If connected to a
device that will be powered from an auxiliary power supply (not powered by the
Challenger panel), then you must ensure that the +12V wire is not connected.
. Test links 1 and 2. Both links are used when updating firmware (see “Firmware upgrade
process” on page 38).
Link 1 is used when resetting the master installer code (“Restoring the default installer
PIN” on page 34) and for defaulting the panel (“Clearing the memory via the Challenger
panel PCB” on page 32).