1Ć9
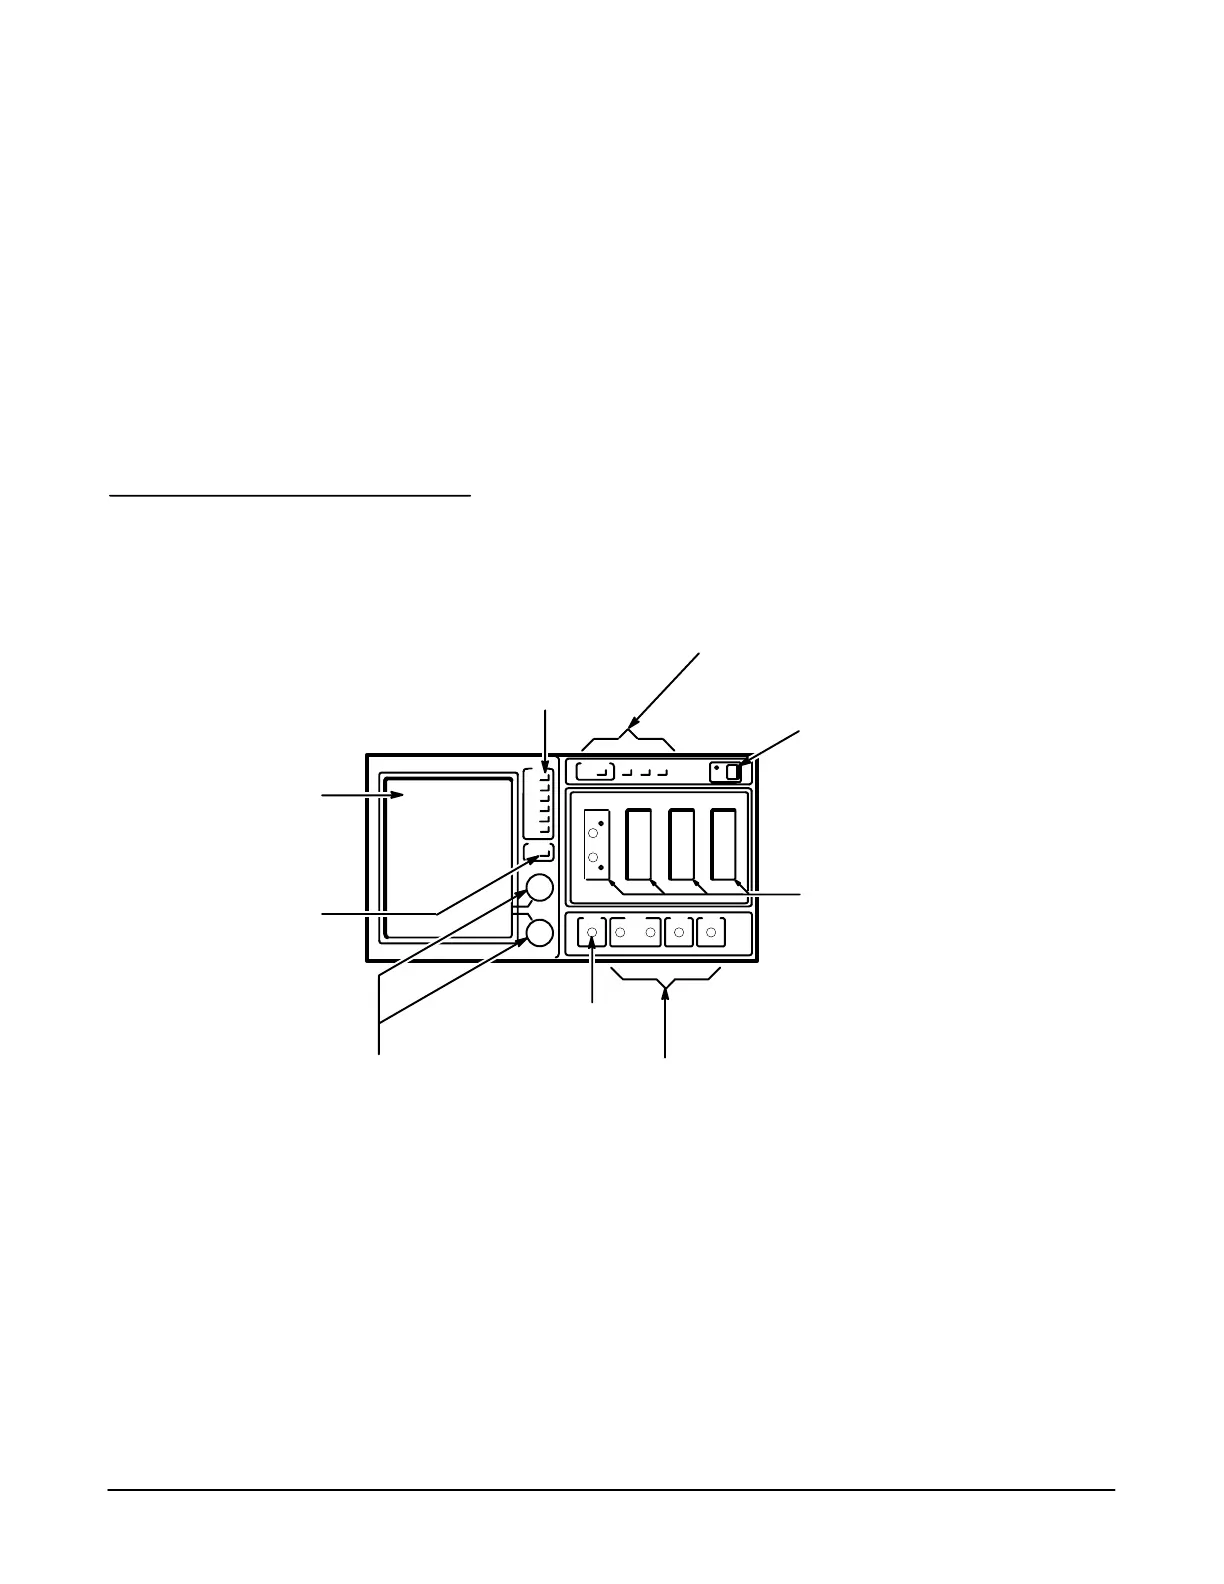
The display shows the
traces and the menus,
which you touch to
activate.
See page 1Ć11.
The two knobs control many
functions of the instrument.
You set the knobs to control
specific functions when you
make menu selections or
touch icons. Using the knobs
is described on page 1Ć13.
The major menu buttons let
you select which of the
major menus appears at
the bottom of the display.
See page 1Ć14.
The Touch Panel On/Off
button lets you turn off
the touch panel so that
you can point to the
display without
inadvertently making
menu selections.
Antistatic
Connector
The ACQUISITION button stops and starts trace
acquisition Ċ see page 3Ć3. The AUTOSET button
quickly sets the instrument parameters for a trace
display Ċ see page 3Ć9. The HARDCOPY button
prints a copy of the display Ċ see page 3Ć89. The
SEQUENCE SETTINGS button lets you cycle
through preĆset instrument settings Ċ see
page 3Ć181.
Use the ON/STANDBY switch as
the power switch once the
instrument is installed.
See page 3Ć157.
You install sampling heads in the
sampling head compartments.
See page 3Ć167.
The CALIBRATOR output provides a known
signal for calibration. See page 3Ć19. The
INTERNAL CLOCK OUTPUT is a trigger
signal synchronized with the CALIBRATOR.
See page 3Ć19. The PRESCALE and DIRECT
inputs let you connect an external signal for
triggering traces. See page 3Ć215.