Do you have a question about the Tektronix TDS3032B and is the answer not in the manual?
Safety precautions to avoid injury and prevent damage, focusing on fire and personal injury hazards.
Defines WARNING, CAUTION, DANGER terms used in the manual and on the product.
Illustrates and explains common safety symbols used on the product.
Provides precautions and steps to prevent damage from electrostatic discharge (ESD).
Guidelines for recycling instruments and components, including mercury and battery disposal.
Information on handling lithium ion batteries, including transportation regulations.
Guidelines for recycling instruments and components, including mercury and battery disposal.
Information on handling lithium ion batteries, including transportation regulations.
Details the product's classification under RoHS Directive and known hazardous substances.
Procedure for connecting the oscilloscope to AC power and using battery power.
Details on operating the oscilloscope using the rechargeable battery pack and its indicators.
Warning and procedures for safe operation when using battery power, emphasizing grounding.
Step-by-step instructions for installing and removing the optional battery pack.
Information on how the battery charges when connected to line power or an external charger.
Procedure for installing optional application packages to extend oscilloscope capabilities.
Instructions for installing and removing optional communication modules.
Overview of the front panel buttons and controls for accessing functions and menus.
Step-by-step guide on how to navigate and use the oscilloscope's menu system.
Explains the function of specific menu buttons on the oscilloscope's front panel.
Describes how dedicated front-panel buttons and controls manage waveforms and cursors.
Explains various readouts and icons that appear on the oscilloscope's display screen.
Introduces the QuickMenu feature for simplifying oscilloscope operation and accessing frequently used functions.
Details the Quick Scope feature for basic oscilloscope control and task performance.
Explains the screen buttons used to control edge trigger, cursors, acquisition, and channels in Quick Scope.
Identifies and describes the purpose of connectors located on the front panel of the oscilloscope.
Identifies and describes the purpose of connectors located on the rear panel of the oscilloscope.
Details the connectors found on optional communication modules.
Procedure for matching the oscilloscope probe to the input channel for accurate measurements.
Routine to optimize the oscilloscope signal path for maximum measurement accuracy.
Instructions for wrapping the cord and storing accessories when transporting the oscilloscope.
Explains how the power supply converts AC line voltage to DC for internal circuits and charging.
Describes the functions of the battery board, including power conversion and interfacing.
Details the core functions of the Main Board: acquisition, trigger, and display systems.
Describes the microprocessor, memory, and interfaces within the oscilloscope's processor system.
Explains the function of the power converter in generating voltages for analog and digital circuitry.
Details the components of the display module, including LCD, driver, and backlight.
Describes the front-panel board's role in reading controls and interfacing with application modules.
Details the 3.5-inch floppy disk drive module and its control.
Lists the necessary test equipment and minimum requirements for performance verification procedures.
Provides a template for recording test results, including serial number, procedure, and pass/fail status.
Lists the conditions and time required before performing verification procedures.
Describes the procedure for running internal self-tests to verify oscilloscope functions.
Procedure to test DC voltage measurement accuracy using the average acquisition mode.
Procedure to test the bandwidth of each channel using a leveled sine wave generator.
Tests edge-trigger sensitivity for each channel at the oscilloscope's maximum bandwidth.
Tests edge-trigger sensitivity for each channel specifically at 50 MHz.
Procedure to check the accuracy of the time base and delay time measurements.
Lists the necessary equipment and minimum requirements for performing adjustment procedures.
Explains the process, requirements, and cautions for performing factory adjustments.
Describes equipment setups for applying DC voltage to instrument input channels during adjustment.
Details the procedure for applying AC voltage signals to individual channels for adjustment.
Describes applying fast rise step signals simultaneously to all channels for adjustment.
Procedure for applying DC voltage to the external trigger input for adjustment.
Step-by-step guide to performing the factory adjustment procedure, including switch operation and setup.
Refers to safety summaries and operating information required before performing maintenance.
Provides precautions to prevent damage to modules from electrostatic discharge (ESD) during maintenance.
Describes procedures for inspecting for dirt/damage and cleaning the oscilloscope for preventive maintenance.
Basic care instructions, including protection from weather and sunlight exposure.
Procedure for inspecting the external surfaces of the oscilloscope for damage or wear.
Steps for cleaning the exterior of the oscilloscope using lint-free cloths and isopropyl alcohol.
Procedure for inspecting internal components for dust, dirt, or damage.
Detailed steps for cleaning internal components, including dust removal and potential spray washing.
Describes how to remove and install major mechanical and electrical modules.
Provides information on where to find a list of replaceable modules for the oscilloscope.
Lists removal and installation procedures by complexity and indicates the starting page for each.
Lists the specific tools needed to perform module removal and replacement procedures.
Procedure for removing and installing the oscilloscope handle, including detailed steps and diagrams.
Procedure for removing and installing the rear case, feet, communication module cover, and disk drive.
Procedure for removing the rear chassis, battery board, power supply, fan, and cables.
Steps for removing the battery board from the rear chassis.
Steps for removing the power supply board from the rear chassis.
Procedure for removing the parallel port cable, AC filter, and fan from the rear chassis.
Procedure for removing the main board, including disconnecting cables and clips.
Procedure for removing the front chassis and the display module.
Procedure for removing the display module inverter board and back light tubes.
Procedure for removing the front panel, buttons, flex circuit, and bezel buttons.
Flowcharts to guide troubleshooting of instrument failures, starting with the primary procedure.
Flowchart for troubleshooting AC power supply issues, including voltage checks.
Procedure to isolate failed modules based on power-up diagnostics results.
Information on how to unpack the oscilloscope upon receipt and repack it for shipment or storage.
Lists options for power cords and documentation packages available for international customers.
Refers to the Mechanical Parts List chapter for a complete description of replaceable parts.
Refers to Figure 3-1 for the block/interconnect diagram of the oscilloscope.
Details on how to order replacement parts, including required information and part number revisions.
Outlines options for servicing modules: exchange, repair, or purchasing new modules.
Explains the format and columns used in the replaceable parts list for identification and ordering.
Introduces module-level exploded views of the oscilloscope, indexed to the parts list.
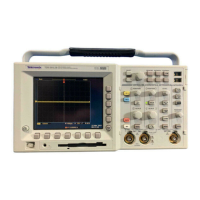
| Brand | Tektronix |
|---|---|
| Model | TDS3032B |
| Category | Test Equipment |
| Language | English |