Installation Instructions
TDS5000B Series (Option 1R) Rackmount Kit
13
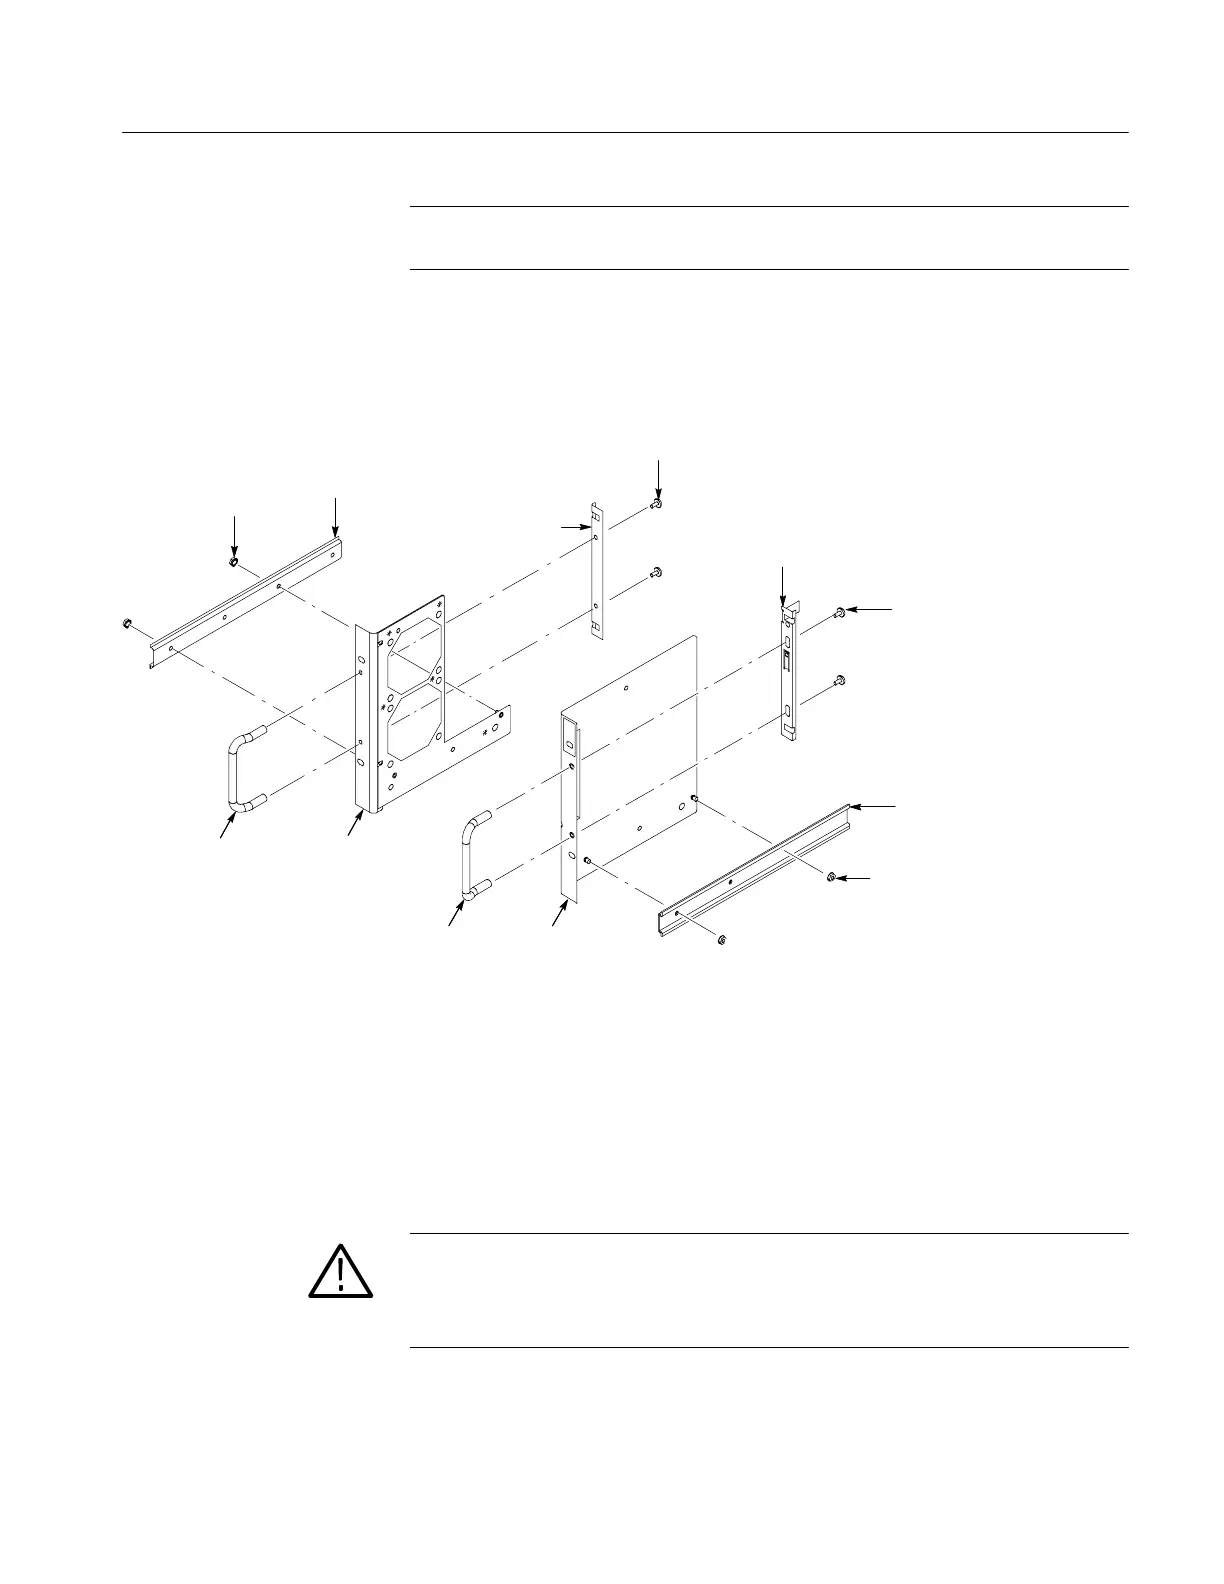
NOTE. Assemble all subparts on the right and left-side panels before installing
the rackmount panels on the instrument. Refer to Figure 6.
2. Install the bracket handle and bracket/guard to the right-side rackmount
panel. Secure by using the two 10-32 pan-head, Phillips screws, applying
15 inch-lbs of torque. Refer to Figure 6 on page 13.
Bracket
handle (1)
Bracket
handle (1)
Bracket /guard (1)
10-32 Lock
nut (2)
Right-side
rackmount
panel (1)
Left inside
track (1)
Right inside
track (1)
10-32 Pan-head
Phillips screw (2)
Left-side
rackmount
panel (1)
10-32 Lock nut (2)
Bracket (1)
10-32 Pan-head
Phillips screw (2)
Figure 6: Rackmount panel preassembly
3. Install the right-side rackmount track (the tracks are interchangable) over the
two screw posts on the right-side rackmount panel. Use two 10-32 locking-
nut washer assemblies to secure the track onto the rackmount panel, applying
28 inch-lbs of torque.
WARNING. To avoid Injury or death, ensure that the rackmount track locks.
Check that the track button latches are oriented correctly: the right-side latch is
located toward the bottom of the rackmount panel and the left-side latch is
located toward the top of the rackmount panel. Refer to Figure 7 on page 14.

 Loading...


