30
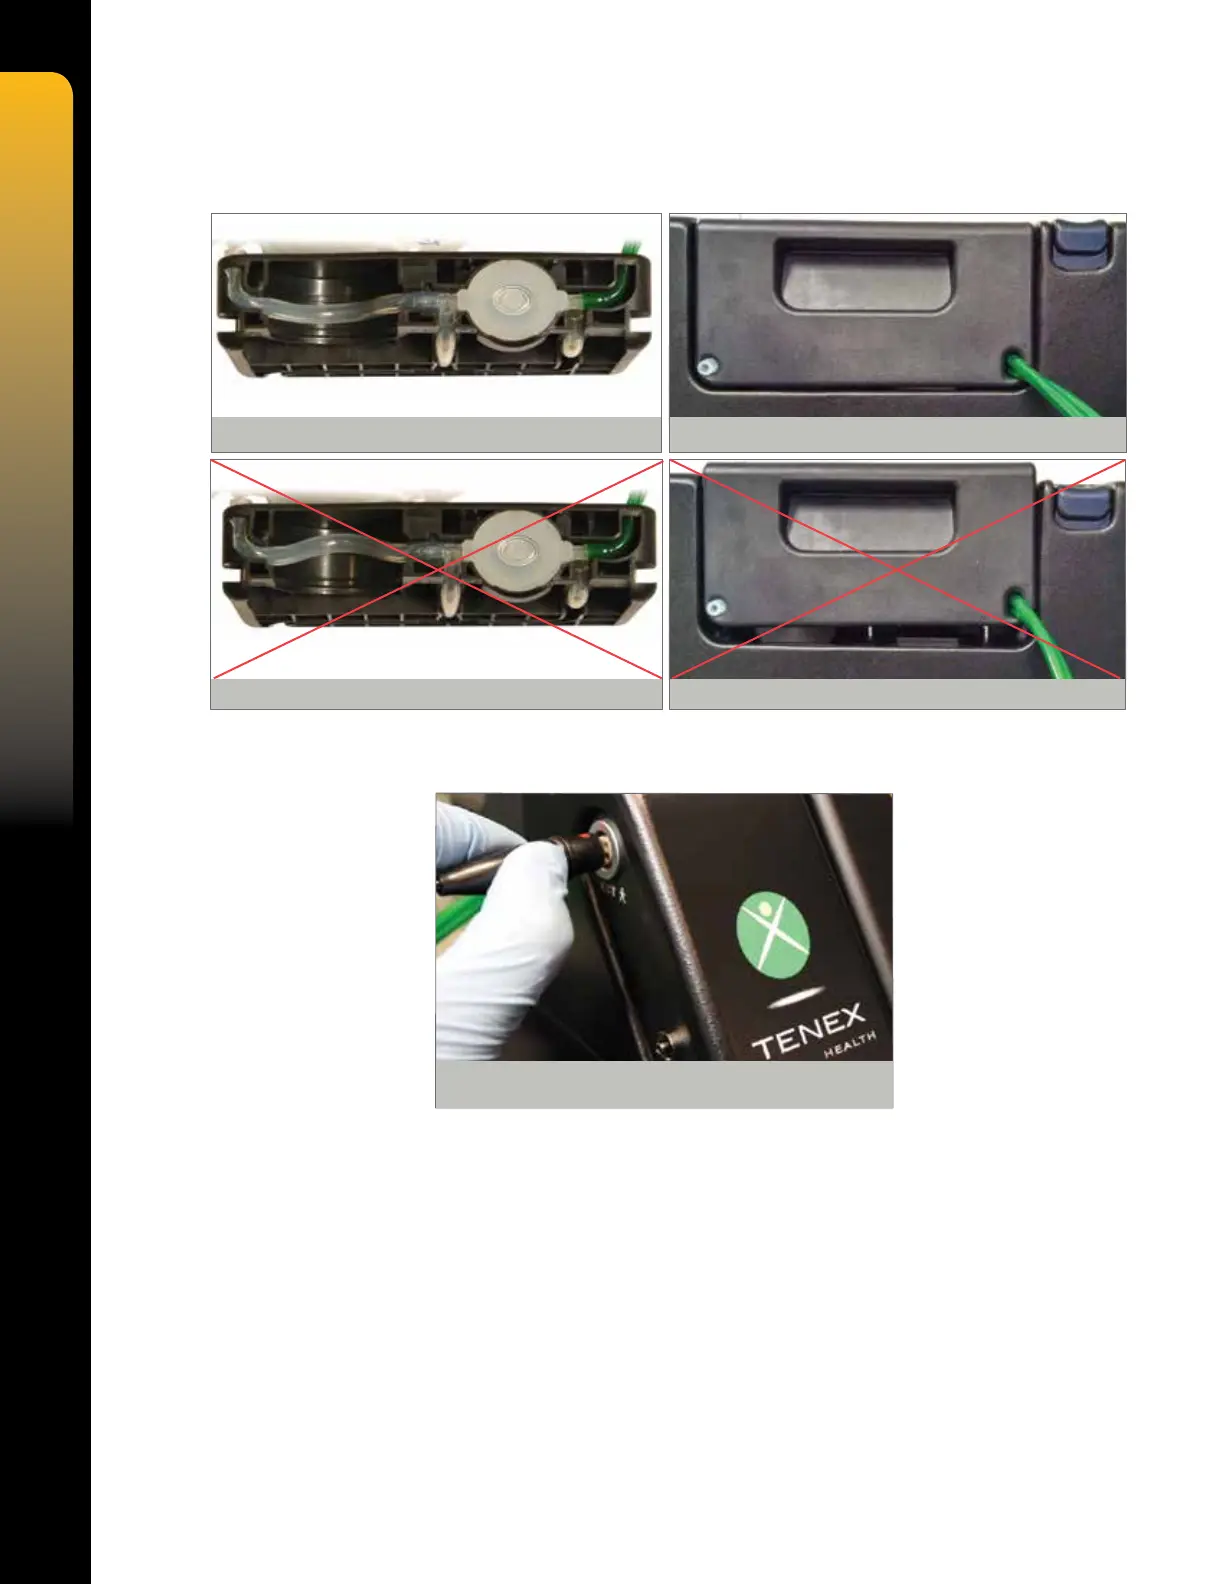
9. Ensure that the aspiration tube is properly centered on the bottom side of the cartridge and
then insert cartridge into side of console, pressing straight down rmly until locked in place.
NOTE: The TX Console is not sterile.
10. Align the Red Dot on the TX MicroTip electrical connector with the Red Dot on the console
side panel CUT receptacle, and then insert straight into the receptacle.
CAUTION: Failure to align the Red Dot on the MicroTip connector with the Red Dot on the
console receptacle may damage the connector pins.
11. Spike saline irrigation bag.
12.
With the tip cap on, hold the MicroTip handpiece in a vertical position (needle pointing
upward) and press the PRIME key on the TX Console.
13. After successful priming, leave the tip cap on. Select IRRIGATION to ON, ASPIRATION
to MEDIUM or HIGH, CUTTING POWER to MEDIUM or HIGH and COAGULATION to
OFF, then depress foot pedal to test for acoustic signal.
CAUTION: Ensure successful priming cycle and presence of acoustic signal prior to incising
the patient.
WARNING: DO NOT check function of the MicroTip by placing hand or nger against the tip or
unintended damage to healthy tissue may result.
NOTE: For a description of setup related error messages, consult the Troubleshooting and
Factory Default Settings sections of the TX Console Operator’s Manual.
Figure 12. CORRECT Aspiration Tube Alignment
Figure 13. CORRECT Insertion
Figure 14. INCORRECT Aspiration Tube Alignment Figure 15. INCORRECT Insertion
Figure 16. Electrical Connector Orientation