Installation Premier 48, 88, 168 & 640 Installation Manual
16 INS176
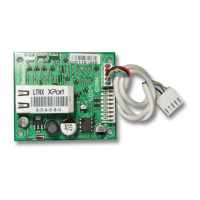
60IXD Zone Expander
The 60iXD expander provides the following facilities:
• Two iD loops each supporting up to 30 biscuits
• Fused 12V output for powering detectors
• Engineer’s keypad port for local iD diagnostics
The 60iXD expander module is only supported on Premier
640 control panels from version 1.0 onwards, Premier
88/168 control panels from version 5.0 onwards and
Premier 48 from version 2.0 onwards. The Premier 48 can
only support a maximum of 48 zones/biscuits.
Installation
Before connecting the 60iXD expander module, isolate ALL
power from the control panel (AC mains and battery), do not
continue if there is still power present on the control panel.
1. Connect the iD expander to the control panel, see
60iXD installation manual (INS261) for details.
2. Connect the iD devices to the expander module, see
“iD Connections”.
3. Reapply power to the control panel and program the
necessary options on the panel see 60IXD
installation manual (INS261) for details.
iD Connections
Each iD biscuit is connected across a two-wire detector loop.
Apart from observing the correct polarity, any wiring
configuration can be used, as shown in the diagram below:
60iXD
LOOP 1
+
-
09 10 11 12 13
03 04 05 0601 02
08
07
14
LOOP 2
+
-
As LOOP 1
* The 60iXD expander module is supplied with 4 off 10nF
capacitors in the spares pack. It is recommended that you
connect a 10nF capacitor approximately at the half way
point of each iD spur. It is especially important to do this on
iD spurs that are less than 30 metres.
Cabling Considerations
The iD loop can be wired using standard 4-core alarm cable,
this allows 2 cores to be used for the iD biscuit and 2 cores
for supplying 12V power for PIR's etc.
The number of biscuits that can be connected per cable run
is determined by the impedance of the cable used. Standard
4-core alarm cable (7/0.2mm) has a resistance of
approximately 8 Ohms per 100 metres. The following table
shows the maximum number of biscuits that can be
connected at the end of a single cable run using standard 4-
core alarm cable:
Cable Length Maximum Number of Biscuits
100m 30
200m 15
400m 7
800m 3
If a different type of cable is used, the distances should be re-
calculated. e.g., if 7/0.4mm cable is used, a single run of
200m would support 30 devices on the end as the resistance
of the cable is halved.
When installing the iD loop it is usually more practical to run
several cables from the expander module to the different
areas of protection. This effectively reduces any distance
problems and makes fault finding much easier.
To reduce the risk of induced interference and wherever
possible, cables should not be positioned along side mains
power, telephone or other data transmission cables, or run
within the same ducting or trunking as any other cables.
The wiring for the system’s internal sounders (loudspeakers)
should not be connected in the same multi-core as the iD
loop.
Biscuit Connections
Each iD biscuit is identified by its own number 01 to 30 and
contains its own internal sensor that is continuously
monitored by the expander module. The diagram below
shows the connections to the biscuit for monitoring both
tamper and alarm contacts.
iD Biscuit
Alarm
Ta m p er
LOOP +
LOOP -
White
Yel low
Blue
Biscuit iD
01
When the tamper switch is opened, the iD biscuit is taken
offline and a tamper condition is generated by the control
panel. If the alarm switch is opened the biscuit's internal
sensor changes state and the control panel will see this as an
active condition and will respond as appropriate.
The diagram below shows the typical wiring of a biscuit to a
standard PIR.
+12V
ALARM TAMPER
From Expander To next detector
Red
Black
Blue
Yellow
Red
Black
Blue
Yellow
White
Blue
Yellow
0V
“iD” is a registered trade mark of Chloride Safety System Limited.

 Loading...

