INS303-5 10/22
Using the Address switches, set the address of the module to one of the7.
available remote keypad address slots, (see chapter 3.1)
Re-apply power to the control panel and select the engineer’s programming8.
mode.
Select the “Confirm Devices” option within the “Engineer Utils” menu and9.
confirm that the module is being “seen” as a remote keypad on the system.
If the relay on the iProx is utilized, it is controlled by the relevant keypad10.
output. Select the “Keypad Outputs” option within the “System Outputs”
menu and program it to the required type, e.g. “Door Strike”.
Learn any new tags (see below) then exit the engineer’s mode.11.
Check that the iProx and proximity tags operate correctly.12.
Learning 3rd Party Tags on the Premier Elite 24/48/88/168/640
When using 3rd party tags via a Wiegand reader, the tag or card is encoded with a
unique 6 digit code. This code is learnt onto the control panel and is stored
separately from the user code, this allows for users to have a tag and access code
with different codes. To learn 3rd party tags proceed as follows:
Select the “Setup Users” menu on the control panel.1.
Enter the user number that you want to assign the tag or card.2.
Press [Yes] and program the user code and options as required, when the3.
remote keypad displays “Add TAG to User?”. Press [2] to select Import TAG.
The remote keypad will now display “IMPORTING TAG Present TAG Now”.4.
Present the tag or card to the Wiegand reader, you will hear an acceptance5.
tone when the tag is imported successfully.
Repeat steps 2 - 5 for other tags or cardsNetwork Mode Operation6.
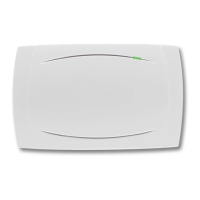
When installed in the Network mode, the operation of the iProx is as
follows:
When a valid proximity tag is presented to the module or via the Wiegand
reader you will hear a beep from the internal sounder (if the Internal Sounder
jumper is set to ON). The status LED will momentarily change from green to
yellow indicating a valid tag read. If the alarm system is in a disarmed state
 Loading...
