EasyManua.ls Logo

Thermal Dynamics A120 - User Manual

Thermal Dynamics A120
126 pages
Print Icon
To Next Page IconTo Next Page
Loading...
380-
400
AUTOMATED PLASMA
CUTTING SYSTEM
A120
CUTMASTER
Rev. AB Date: September 19, 2008 Manual # 0-4989
Operating Features:
Operating Manual

Table of Contents

Questions and Answers

  • B
    Benjamin BlackSep 8, 2025
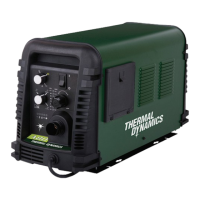
    What to do if the Thermal Dynamics Cutter ON/OFF switch is on but the A/C Indicator does not light?
    • J
      Joseph FoleySep 9, 2025
      If the ON/OFF switch is activated on your Thermal Dynamics Cutter but the A/C Indicator remains unlit, follow these steps: First, ensure the primary power disconnect switch is in the ON position. Then, have a qualified technician inspect the primary fuses or breakers and verify the unit is connected to a functioning primary power receptacle. If necessary, replace the fuse. Should the fuse blow again, the unit should be returned to an authorized service center for repair or replacement.
  • A
    anthonyfischerSep 12, 2025
    What to do if FAULT and 80 PSI indicators are flashing and gas flow is cycling on and off on Thermal Dynamics A120?
    • G
      goodwinmonicaSep 12, 2025
      If the FAULT and 80 PSI indicators are flashing and the gas flow is cycling on and off on your Thermal Dynamics Cutter, try the following: First, hand-tighten the shield cup, but avoid overtightening. If that doesn't resolve the issue, turn off the power supply, remove the shield cup, and install any missing parts. Next, turn off the power supply again, bleed down the system pressure, and remove the shield cup, tip, and start cartridge to check the start cartridge's lower end fitting for free movement; replace it if it doesn't move freely. Consider replacing the torch and leads.
  • M
    michael65Sep 13, 2025
    What to do if GAS LED is off, FAULT and MIN pressure indicators are flashing on Thermal Dynamics Cutter?
    • J
      Jorge PageSep 13, 2025
      If the GAS LED is off and the FAULT and MIN pressure indicators are flashing on your Thermal Dynamics Cutter, connect the gas supply to the unit and turn the gas supply on. Set the air supply inlet pressure to 120 psi and adjust the regulator to set the air pressure.
  • R
    Richard WatkinsSep 14, 2025
    What to do if nothing happens when torch or remote switch is closed on Thermal Dynamics A120?
    • H
      houseannaSep 14, 2025
      If nothing happens when the torch switch or remote switch is closed (or the CNC START signal is active) and there is no gas flow with the DC LED off on your Thermal Dynamics Cutter, take the torch and leads (remote pendant) to an authorized repair facility. Contact the controller manufacturer.
  • J
    Judith ConnerSep 16, 2025
    How to troubleshoot diminished torch cutting on Thermal Dynamics Cutter?
    • G
      Gregory WoodSep 17, 2025
      If your Thermal Dynamics Cutter's torch cutting performance is diminished, check and adjust to the proper setting. Inspect the torch consumables and replace them as needed. Verify the connection of the Work Lead to the workpiece. Reduce the cutting speed.

Summary

SECTION 1: GENERAL INFORMATION

1.01 Notes, Cautions, and Warnings

Defines types of annotations (Note, Caution, Warning) used for emphasis or potential hazards.

1.02 Important Safety Precautions

Covers electrical hazards, gases, fumes, noise, arc rays, and lead warnings for safe operation.

1.07 Declaration of Conformity

States the product's conformity to applicable EU directives and national legislation.

1.08 Statement of Warranty

Outlines the limited warranty terms, conditions, and exclusions for the product.

SECTION 2 SYSTEM: INTRODUCTION

2.01 How To Use This Manual

Guides users on how to effectively read and understand the manual for safe operation.

2.04 Power Supply Specifications

Details technical specifications for the power supply, including input power, output, and duty cycle.

2.05 Input Wiring Specifications

Specifies requirements for input power connections, including voltage, frequency, and wire sizing.

SECTION 2 TORCH: INTRODUCTION

2 T.01 Scope of Manual

Defines the scope of this section regarding the 1Torch models and service restrictions.

2 T.03 Specifications

Lists specifications for torch configurations, lead lengths, and other technical details.

2 T.05 Introduction to Plasma

Explains the principles of plasma, plasma cutting, and gouging processes.

SECTION 3 SYSTEM: INSTALLATION

3.01 Unpacking

Instructions for unpacking the equipment, checking contents, and inspecting for damage.

3.03 Power Supply location and Mounting

Guidance on selecting a suitable location and mounting the power supply securely.

3.04 Primary Input Power Connections

Instructions for making primary input power connections, including voltage and phase configurations.

SECTION 3 TORCH: INSTALLATION

3 T.01 Torch Connections

Explains how to connect the Thermal Dynamics torch to the power supply.

3 T.03 Setting Up Automation or Machine Torch

Guides on setting up automation or machine torches for cutting operations.

SECTION 4 SYSTEM: OPERATION

4.01 Front Panel Controls; Features

Identifies and explains the functions of the front panel controls and indicators.

4.02 Preparations for Operation

Outlines essential steps for preparing the system before starting operation.

SECTION 4 TORCH: OPERATION

4 T.01 Machine and Automated Torch Operation

Details operation procedures for machine and automated torches, including cutting and piercing.

4 T.04 Cut Quality

Discusses factors influencing cut quality and characteristics like kerf width and bevel angle.

4 T.06 Hand Torch Operation

Details how to perform standoff and drag cutting using the hand torch.

4 T.08 Recommended Cutting Speeds for Machine and Automated Torches With Exposed Tip

Provides cutting speed recommendations for mild steel with exposed tips for automated torches.

SECTION 5 SYSTEM: SERVICE

5.02 Maintenance Schedule

Details routine maintenance tasks for the power supply unit based on frequency of use.

5.03 Common Faults

Lists common operational problems, their possible causes, and recommended solutions.

5.05 Basic Troubleshooting Guide

Provides a guide to diagnose and resolve specific operational issues and error indicators.

SECTION 5 TORCH: SERVICE

5 T.02 Inspection and Replacement of Consumable Torch Parts

Instructions for inspecting and replacing consumable parts like tips, electrodes, and shield cups.

SECTION 6: PARTS LISTS

6.02 Ordering Information

Explains how to order replacement parts by catalog number, description, model, and serial number.

6.06 Torch Replacement Parts SL100 SV Torch (with Solenoid on Mounting Tube)

Provides a detailed parts list for the SL100SV torch assembly and its components.

APPENDIX 1: SEQUENCE OF OPERATION (BLOCK DIAGRAM)

Sequence of Operation

Illustrates the operational sequence of the system using a block diagram.

APPENDIX 2: DATA TAG INFORMATION

Data Tag Information

Explains the various sections and symbols found on the equipment's data tag.

APPENDIX 3: TORCH PIN - OUT DIAGRAMS

Hand Torch Pin - Out Diagram

Shows the pin-out configuration for the hand torch's ATC male and female connectors.

Mechanized (Machine) Torch Pin - Out Diagram

Details the pin-out configuration for mechanized torch connectors, including CNC interface.

APPENDIX 4: TORCH CONNECTION DIAGRAMS

Hand Torch Connection Diagram

Illustrates the electrical connections for a hand torch to the power supply.

Mechanized Torch Connection Diagram

Shows the electrical connections for a mechanized torch to the power supply and CNC.

APPENDIX 5: SYSTEM SCHEMATIC, 208;460 V UNITS

System Schematic

Presents the electrical schematic for 208/460V units of the plasma cutting system.

APPENDIX 6: SYSTEM SCHEMATIC, 400 V UNITS

System Schematic

Displays the electrical schematic for 400V units of the plasma cutting system.

Thermal Dynamics A120 Specifications

General IconGeneral
Open Circuit Voltage (OCV)300 VDC
Input Phase3-Phase
Output Current120 A
Duty Cycle60% @ 120 A
Gas TypeAir, Nitrogen

Related product manuals