Refrigeration Service Operations
107
Installation
1. Place the evaporator coil in the housing.
2. Install the mounting bolts and tighten.
3. Clean the tubes for soldering.
4. Solder the suction line and drain pan hot gas
line connections to the evaporator coil.
5. Connect the distributor to the expansion valve
assembly.
6. Connect the air switch hoses and install the
high temperature cutout switch and electric
heaters (Model 50).
7. Pressurize the low side and test for leaks. If no
leaks are found, evacuate the unit.
8. Open the refrigeration valves and place the
unit in operation. Install the refrigerant charge
and compressor oil and add as required.
Expansion Valve Assembly
Removal
1. Pump down the low side and equalize pressure
to slightly positive.
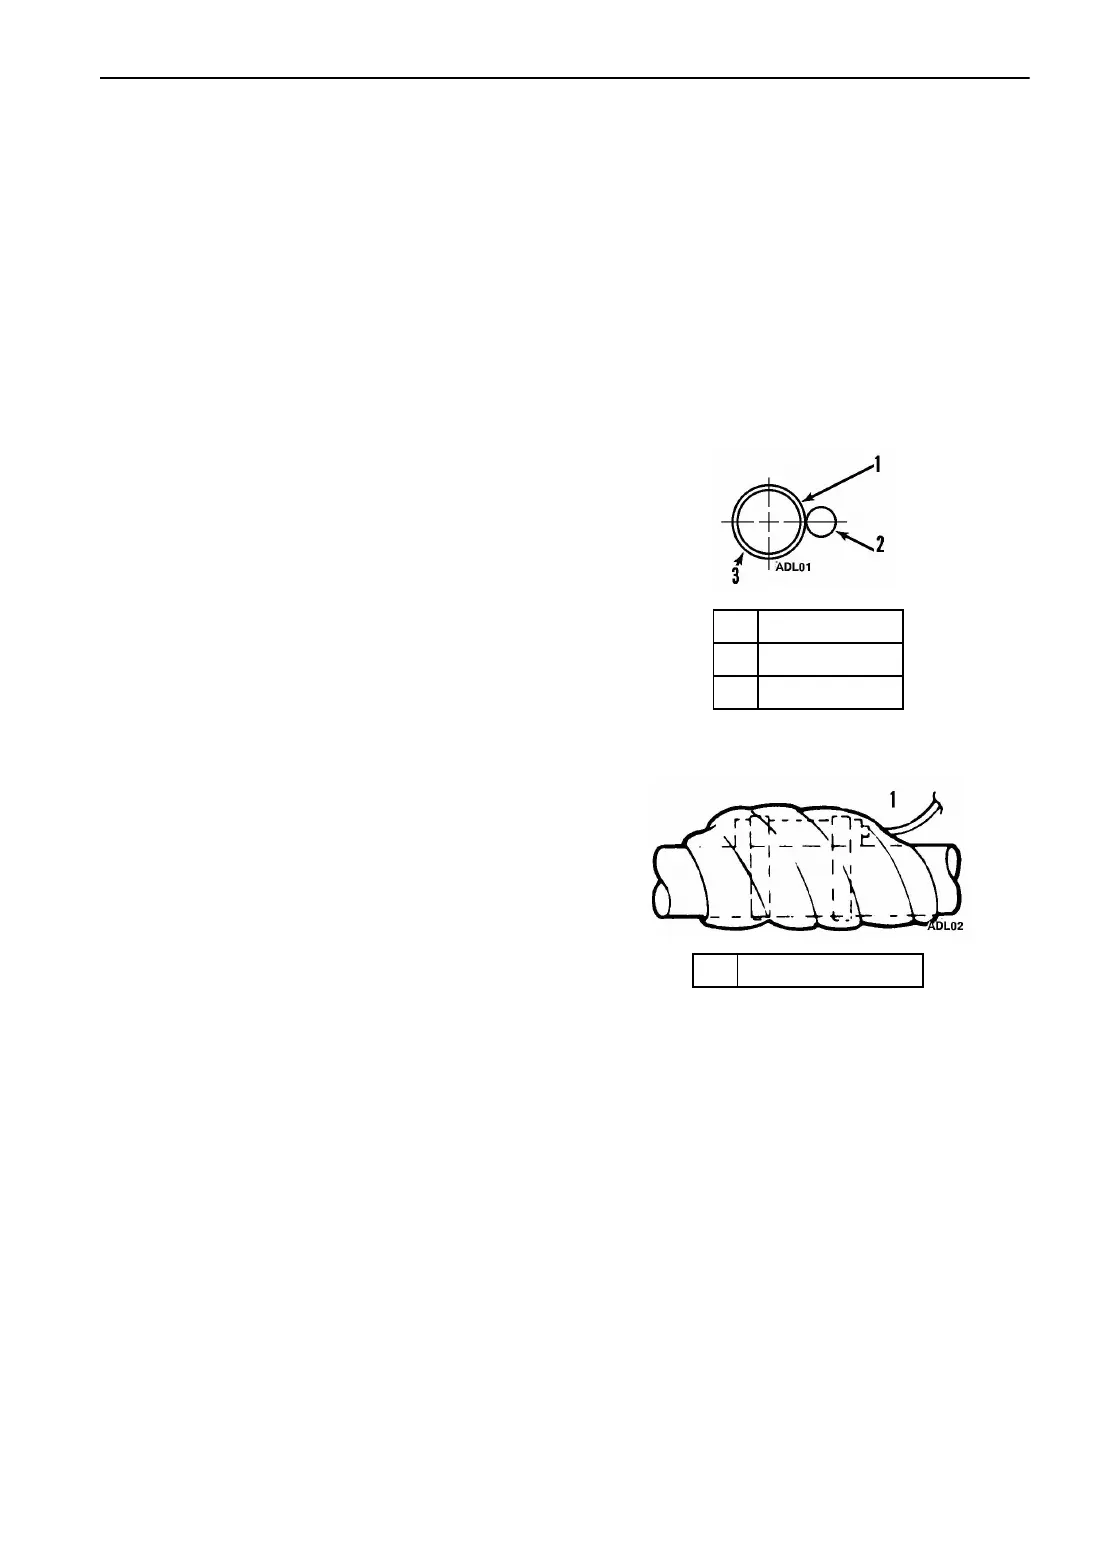
2. Remove the feeler bulb from the suction line
clamp. Note the position of the feeler bulb on
the suction line.
3. Unsolder the equalizer line from the
expansion valve.
4. Unsolder the inlet liquid line and the
distributor from the expansion valve.
5. Remove the expansion valve mounting bolt
and remove the expansion valve from the unit.
Installation
1. Install and bolt the expansion valve assembly
in the unit.
2. Solder (95-5 Solder) the inlet liquid line and
the distributor to the expansion valve.
3. Solder (95-5 Solder) the equalizer line to the
expansion valve.
4. Clean the suction line to a bright polished
condition. Install the feeler bulb clamps and
the feeler bulb on the side of the suction line
in its former position. The feeler bulb must
make good contact with the suction line or the
operation will be faulty. Wrap with insulating
tape.
5. Pressurize the low side and test for leaks. If no
leaks are found, evacuate the low side.
6. Open the refrigeration valves and place the
unit in operation.
7. Test the unit to see that the expansion valve is
properly installed.
1. Suction Line
2. Capillary Bulb
3. End View
Figure 60: Location of Expansion Valve Bulb
1. Top View
Figure 61: Completely Wrap Bulb with Tape
 Loading...