Refrigeration Service Operations
110
3. Solder the filter drier line to the receiver tank
outlet valve.
4. Tighten the receiver tank mounting hardware
securely.
5. Pressurize the refrigeration system and check
for leaks. If no leaks are found, evacuate the
system.
6. Recharge the unit with refrigerant.
Three-Way Valve Condenser
Pressure Bypass Check Valve
Repair
Removal
1. Remove the refrigerant charge.
2. Unscrew the condenser pressure bypass check
valve cap from the check valve.
3. Remove the snap ring.
4. Unscrew the check valve stem by using a
screwdriver in the slot provided.
NOTE: Spring and valve are held in by the
stem. While removing the stem, use care so
the spring and valve are not lost.
5. Remove the spring and Teflon valve.
6. Inspect the check valve seat in the three-way
valve.
7. If replacement parts are needed, a kit must be
used which includes the Teflon valve, spring,
o-ring, valve stem and snap ring.
Installation
1. Coat the o-ring with compressor oil (use same
type of oil that is used in the system) and
install it on the check valve stem.
2. Insert the spring into the hole in the check
valve stem and then install the Teflon check
valve on the other end of the spring with the
hole in the valve towards the spring.
3. Coat the entire assembly with compressor oil
and install the assembly into the check valve
seat in the three-way valve.
4. Screw the check valve stem into the three-way
valve until the snap ring can be installed.
5. Install the snap ring.
6. Unscrew (back seat) the check valve stem
against the snap ring.
NOTE: Valve stem must be back seated
during normal unit operation.
7. Coat sealing area in cap with compressor oil
(use same type of oil that is used in the
system), install and tighten the cap on the
three-way valve.
8. Pressurize the refrigeration system and test for
leaks. If no leaks are found, evacuate the
system.
9. Recharge the unit.
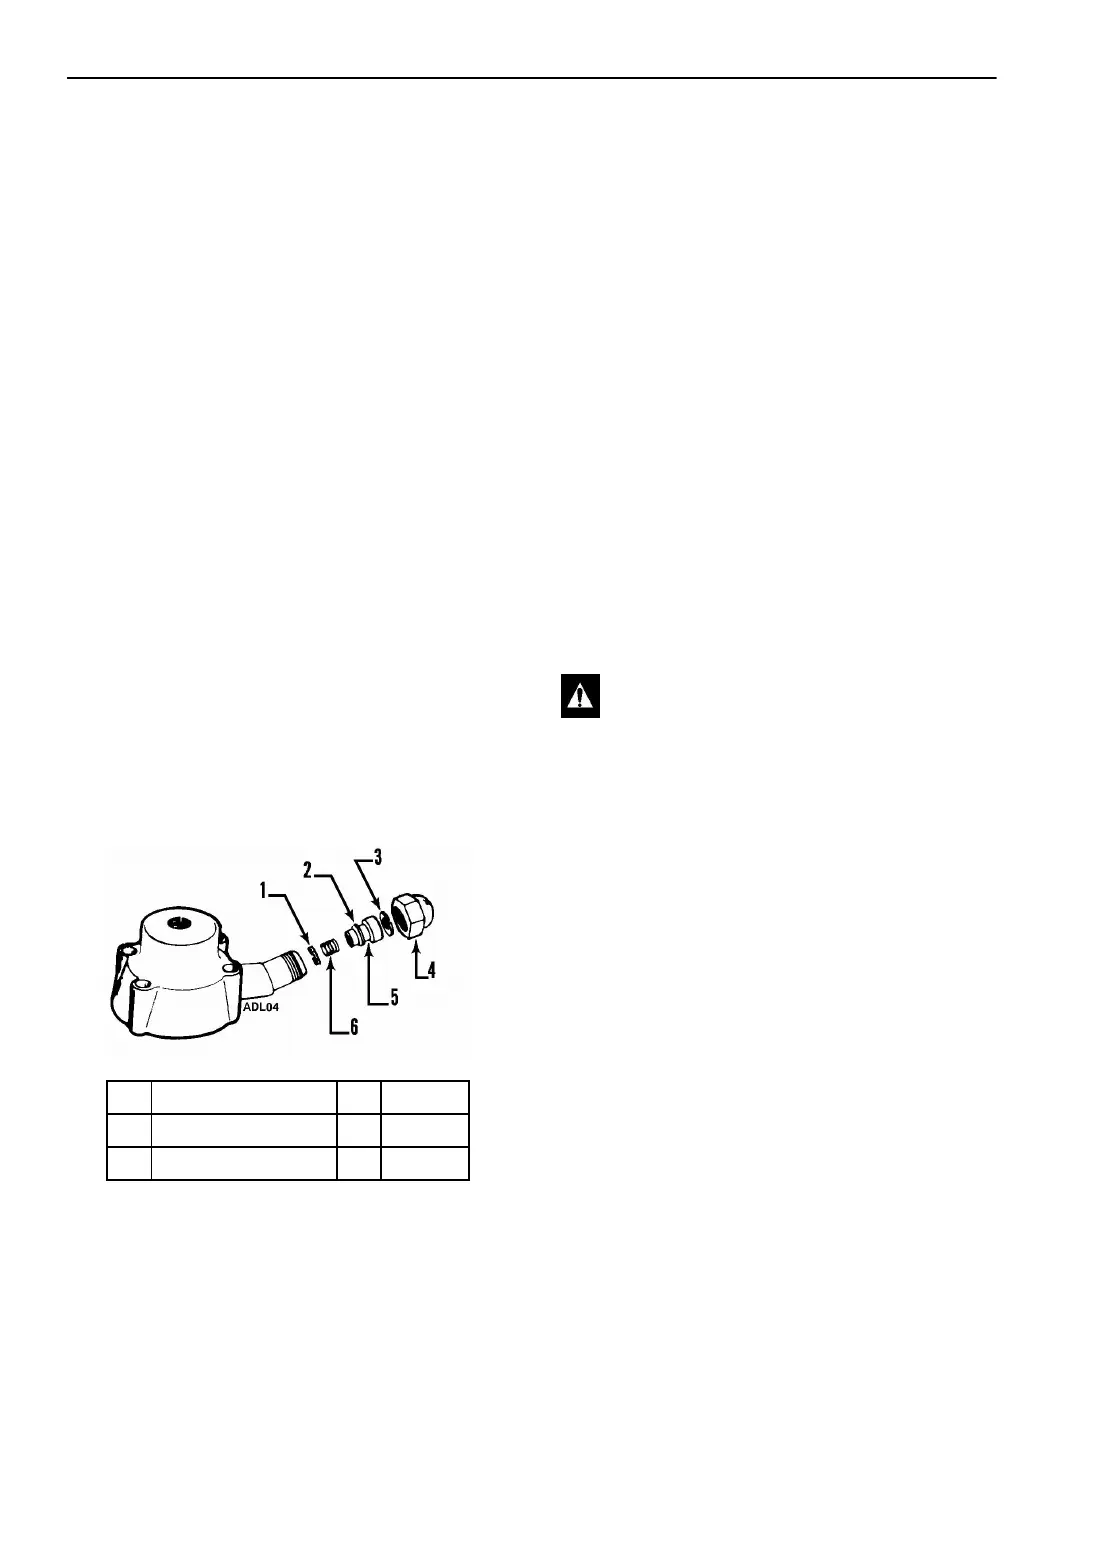
1. Teflon Check Valve 4. Cap
2. O-ring 5. Stem
3. Snap Ring 6. Spring
Figure 63: Condenser Pressure Bypass Check
Valve
CAUTION: The Teflon valve must be
inserted with the flat side against the valve
seat to ensure proper sealing.
 Loading...