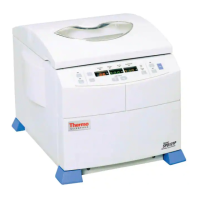
RC12
BP™
Operation
4-3
NOTE Do not attempt to open the door unless End is in the
SPEED display. Doing so when the interlock is to be
moving could cause the interlock to bind, requiring cy-
cling the main POWER switch several times.
2. Prepare the rotor according to the rotor manual. Open the
chamber door, wipe the chamber and drive spindle dry (if wet)
and install the rotor, making sure the rotor is fully seated and
locked to the drive spindle. Load the rotor, install its cover, and
close the chamber door. (In future use, if new rotors have been
added) make sure that the SET rotor specifies the installed rotor.
If not, press ROTOR repeatedly until it does.
3. Check the settings in all other fields in the SET display – input
changes to specific parameters as follows:
a. If you require a change to the SPEED (rpm) or RCF (g force)
field, press SPEED and input the desired value. Values in
excess of the maximum for the specified rotor will not be
accepted (the value will continue to blink). To change mode
from rpm to RCF, or from RCF to rpm, press SPEED more
than once; an equivalent value will be calculated (based on
the maximum radius of the specified rotor) and displayed.
b. If you require a change to the TIMED/HOLD/ACE field,
press TIME, HOLD, or ACE to select a run duration control
method and, if you did not select HOLD, input a desired
termination value (in minutes and seconds up to 99:99, or in
ACE up to 9.99e30 [9.99 x 10
30
]). Always be sure of the
control method and value before starting the run.
c. If you require a change to the DEG C field, press TEMP and
input the desired sample temperature between –10 and
40°C.
Read the sections regarding Temperature Control and
Rotor Temperature Equilibration found on pages 4-11
and 4-12.
4. If using WatchLog Network™ run logging software, be sure it is
running, then press START (START indicator will blink, then
stay lit once the rotor starts to spin).
The rotor will accelerate to the set run parameters, and continue until
run termination. At termination, the STOP indicator will light and the
rotor will decelerate to a stop. After it stops, START and STOP
indicators will turn off, and "End" will appear in the RUN TEMP
display and remain there until the door is opened.
NOTE Do not attempt to open the door unless End is in the
SPEED display. Doing so when the interlock is to be
moving could cause the interlock to bind, requiring cy-
cling the main POWER switch several times.