BA EN 12.2019 Modification 02 from 01.12.19. Copies are not subject to the change service. 32 of 41
9.3 Maintenance schedule
Schedule regular maintenance intervals in order to facilitate secure operations.
t = daily, w = weekly, m = monthly, j = half-yearly
The time-wise specifications constitute a recommendation of the manufacturer.
9.4 Servicing work
We recommend that thermowave’s customer service department be contacted before the PHE is
serviced.
9.4.1 Replacing the gaskets
Information regarding the types of gaskets can be found in the order-related documents. We recommend that
all plate gaskets be replaced at the same time. Only use original plate gaskets by thermowave.
Clip-on system for gasketed heat exchanger plates and modules
The system guarantees optimal and slip-free seating. This makes it possible to carry out a shock-proof and
vibration-proof installation operation by utilising the fastening nipples; gaskets can thus be removed and re-
installed.
Warning against damage to the PHE in case of lack of precisely-fitting sitting of the gaskets.
Incorrectly-installed gaskets can lead to leakages and damage to the PHE.
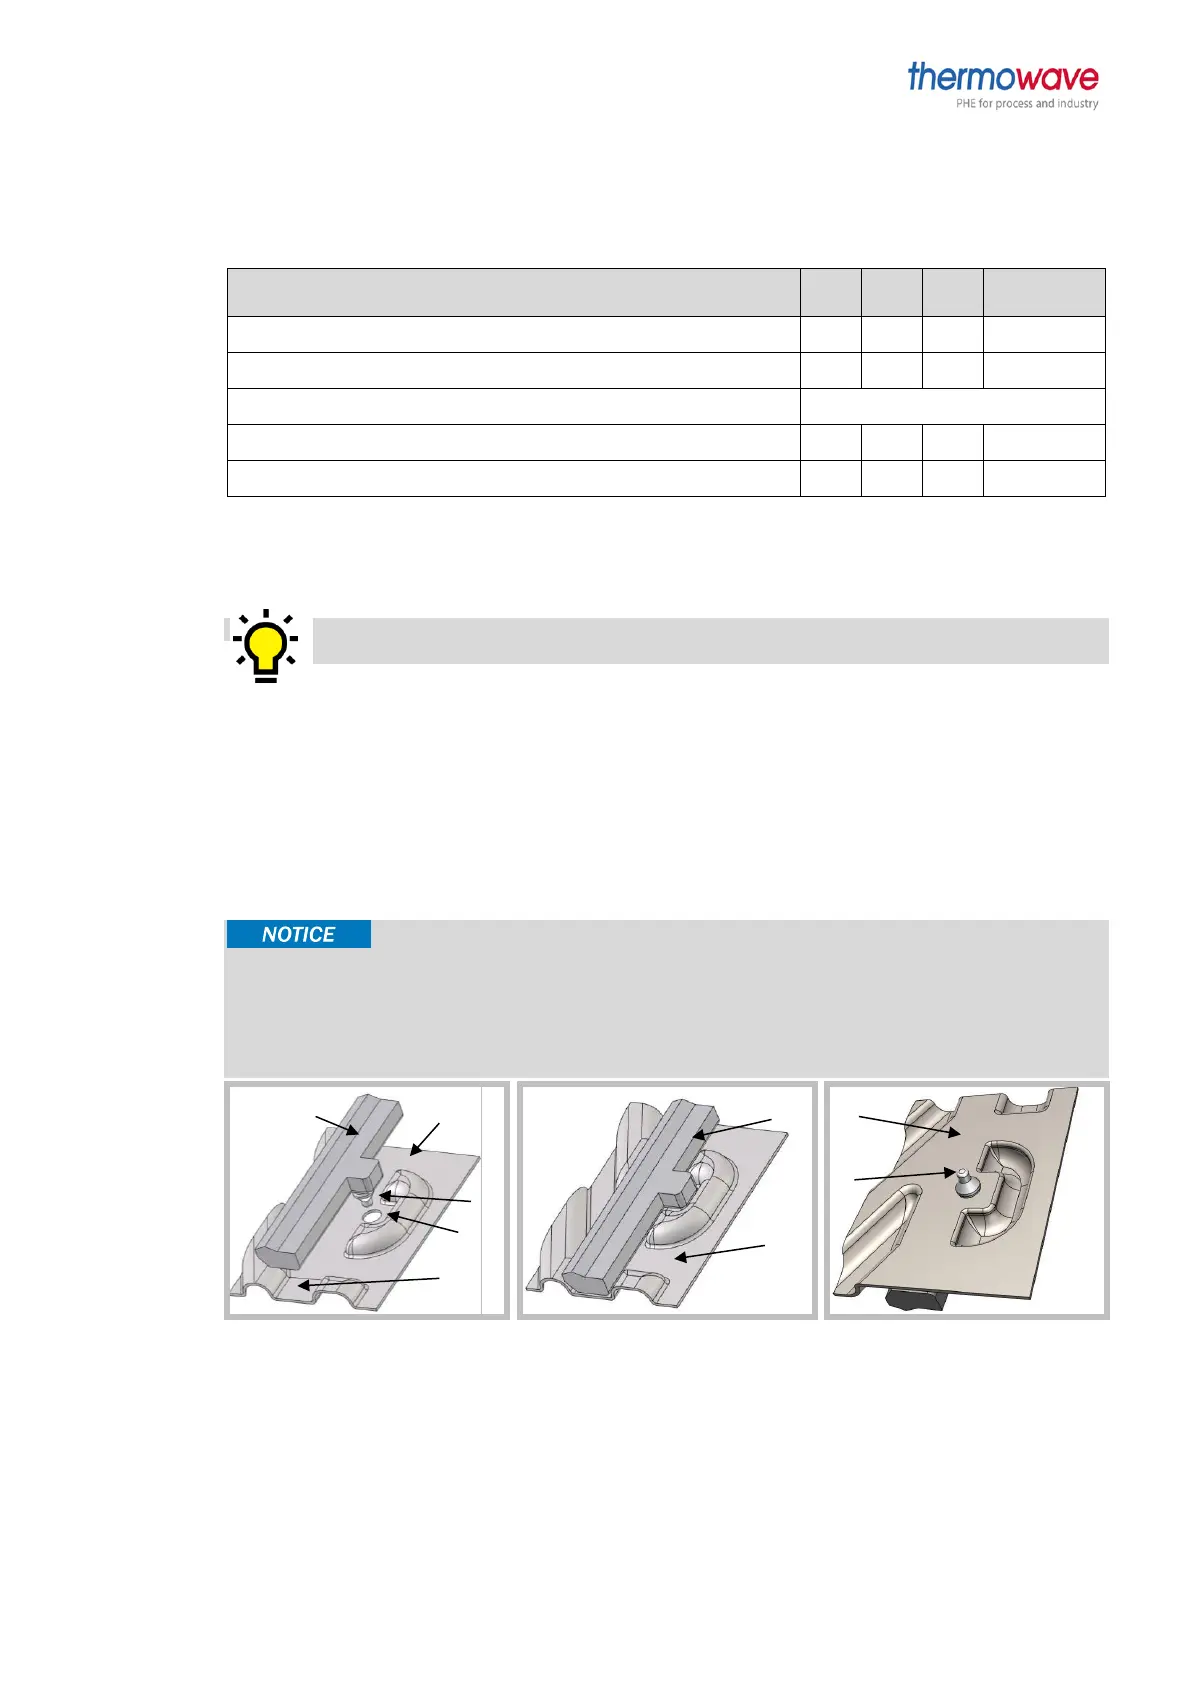
➢ Ensure that the gaskets [2] are in the designated slot [5], and that the fastening nipples [4] are in the
designated holes [3] of the heat exchanger plate [1] (figures 29 through 31).
Figure 29: Section of Figure 30: Section of Figure 31: Section of
heat exchanger plate [1] heat exchanger plate [1] with heat exchanger plate [1] with
and gasket [2] inserted gasket [2] fastening nipple inserted [4]
from below



 To Next Page