35 of 41
BA EN 12.2019 Modification 02 from 01.12.19. Copies are not subject to the change service.
9.5.2 Closing the plate packet
1. Check once again whether the plates have been installed in the correct order.
2. Push the moving frame cover as close to the plate packet as possible, and place the tensioning screws in
the tensioning screw slots. The seating of the gaskets should be checked once again after light straining.
In this regard, the fundamental rule is that the plate packet should have a uniform appearance.
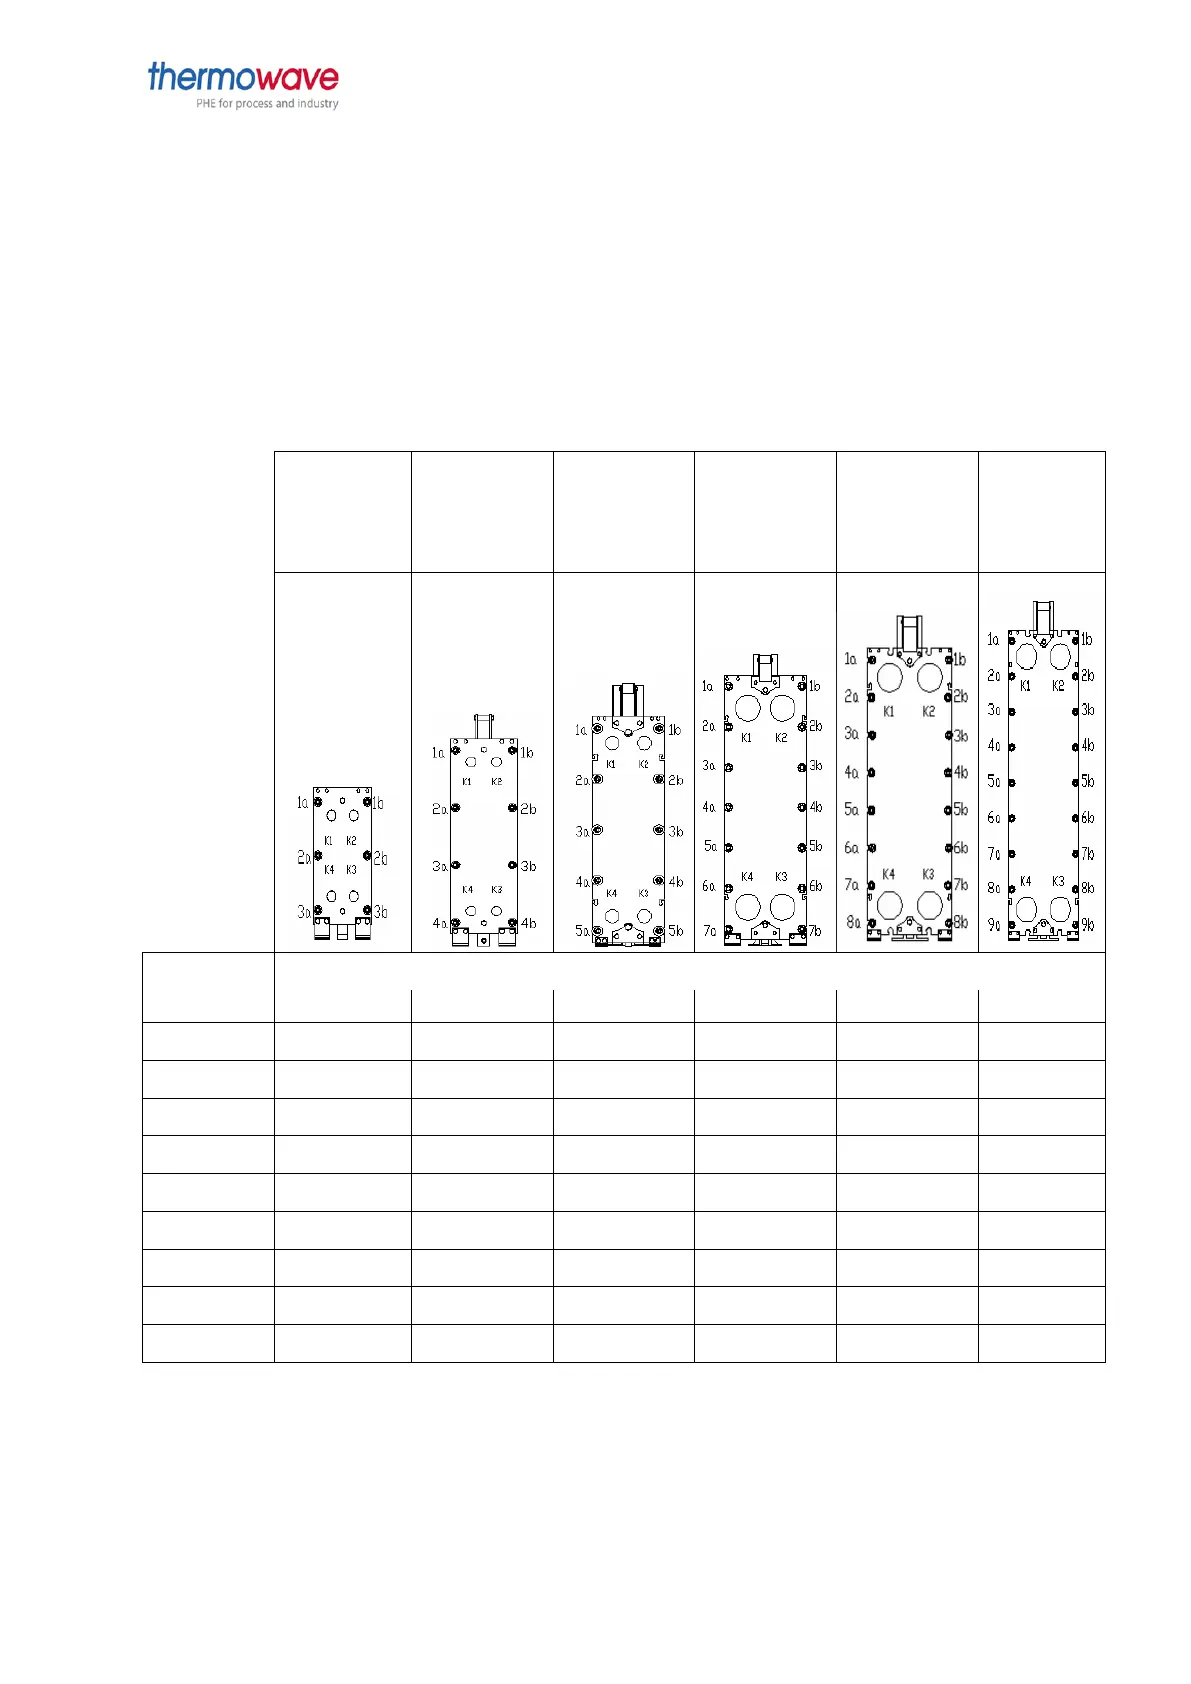
3. The nuts of the tensioning screws are tightened as per the sequence depicted in figure 33. In order to
facilitate parallel motion of the plate packet, the nuts should only be tightened by a maximum of 2
rotations per pass. The procedure should be repeated in the specified sequence until the specified
tensioning dimension (refer to the order-related documents in the annexe) has been attained. Ensure that
an authorised person performs a leak test before the plate heat exchanger is reactivated!



 To Next Page