45
4.7 Testing the weld
Testing of the weld in continuous production monitoring is
restricted to a visual inspection of the welded stud. Further
testing is possible, but complex. Consult your TWS specialist
advisor or study DVS Guideline*) 0905 Part 2 in this regard.
If a weld is thought to be defective, an impact bending test
must be carried out on the welding studs concerned according
to section 4.7.2.
*) DVS Guideline 0905 Part 2: Ensuring the quality of stud welds "Stud
welding with tip ignition"
**) DIN 8563 Part 10: Ensuring the quality of stud welds (edition:
December 1984)
4.7.1 Visual inspection
Every welded welding element must be checked visually.
Besides
assessing the weld bead for form, size and appearance, you
should also check the nominal length of the welded stud.
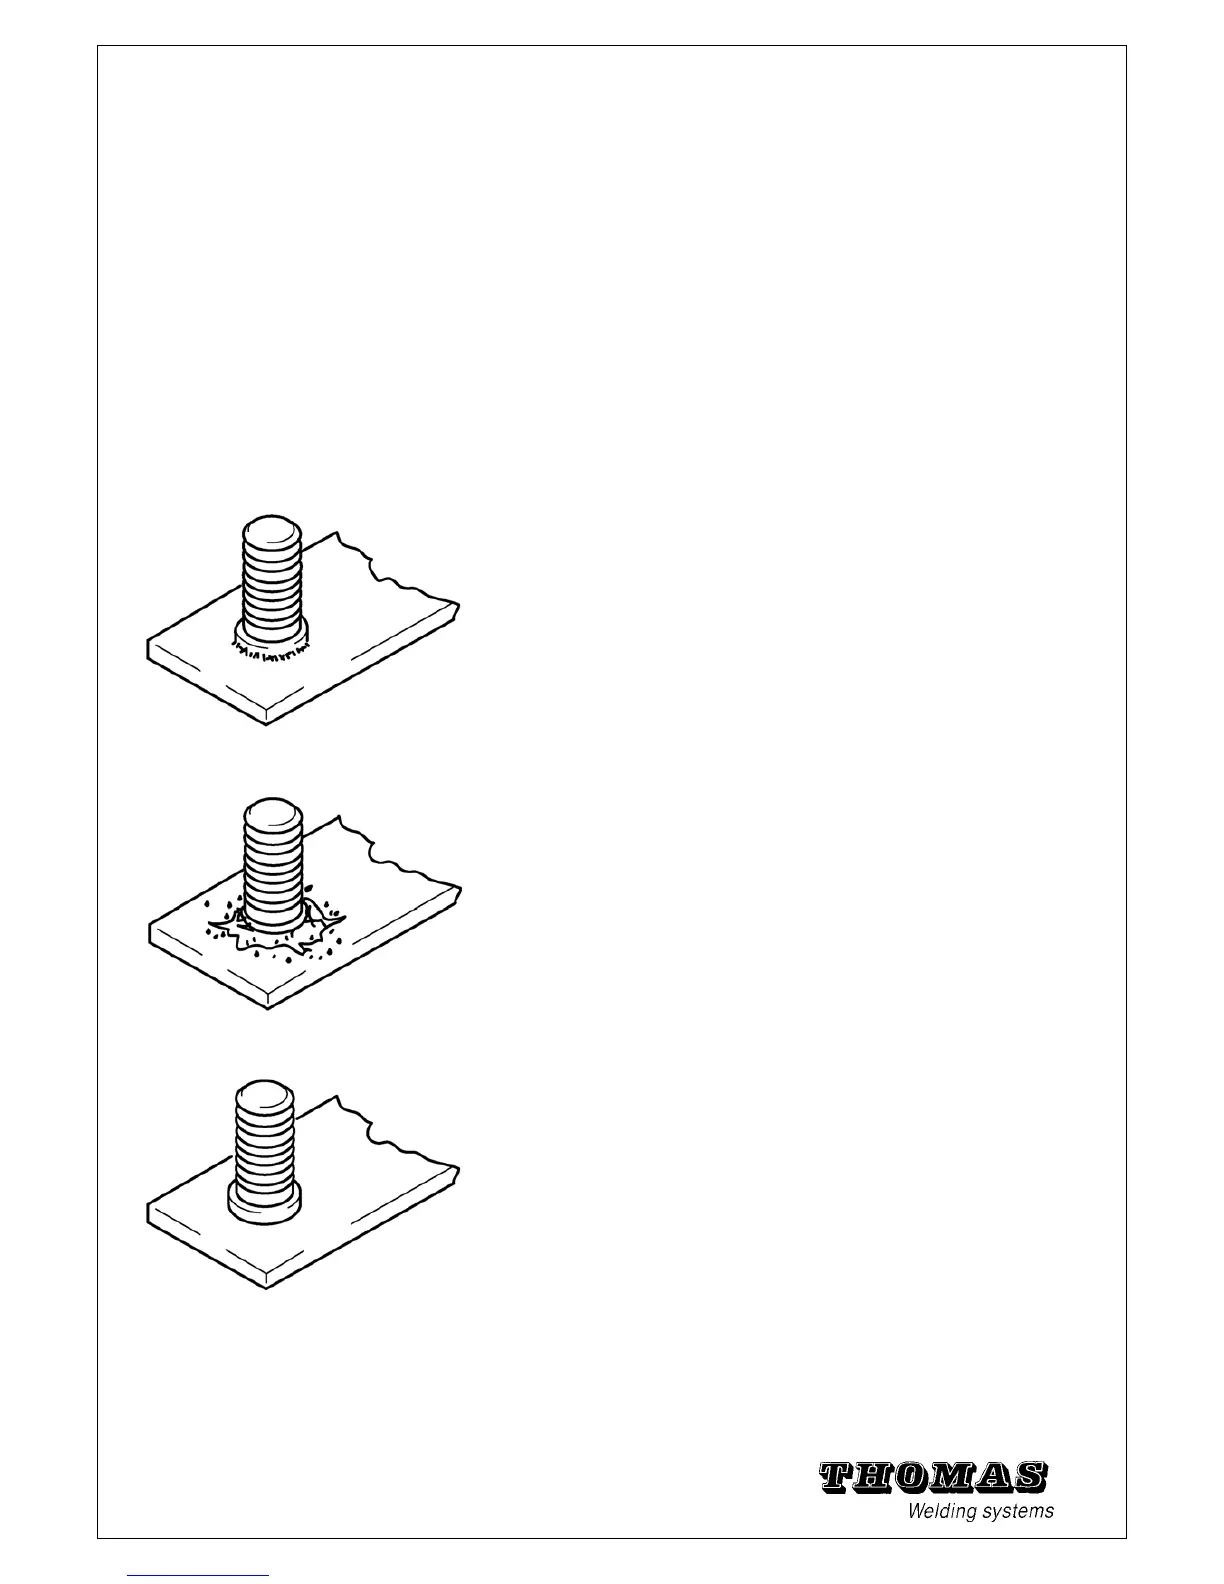
1. Good welding:
The bead is closed and has a shiny surface. There is no visible
undercutting at the bottom of the welding element. Small
notches
between weld bead and stud shaft are unavoidable and can be
ignored.
2. Welding too hot:
Deep notches can be seen between weld bead and stud shaft.
Due to the strong melting, the melt zone at the stud middle is
recessed.
The excess weld metal was flung out of the welding zone.
(Spring force or lift too low.)
3. Welding too cold:
The form and height of the weld bead are irregular. Distinct
undercutting
can be seen at the stud edge. Due to the low energy, the
melt zone under the complete stud cross-section is very flat.
(Spring force or lift too high.)