16
9.3 Configuring your computer/device
Your computer must be configured properly to be able to connect to the Internet and the
computers network card and network properties must be configured to obtain an IP address
from the home gateway’s built-in DHCP server.
This means that you must check that your computer network settings are set to TCP/IP
protocol and that the IP address will be obtained automatically.
For detailed instructions how to set up your home network check instructions/Help for your
operating system on your computer.
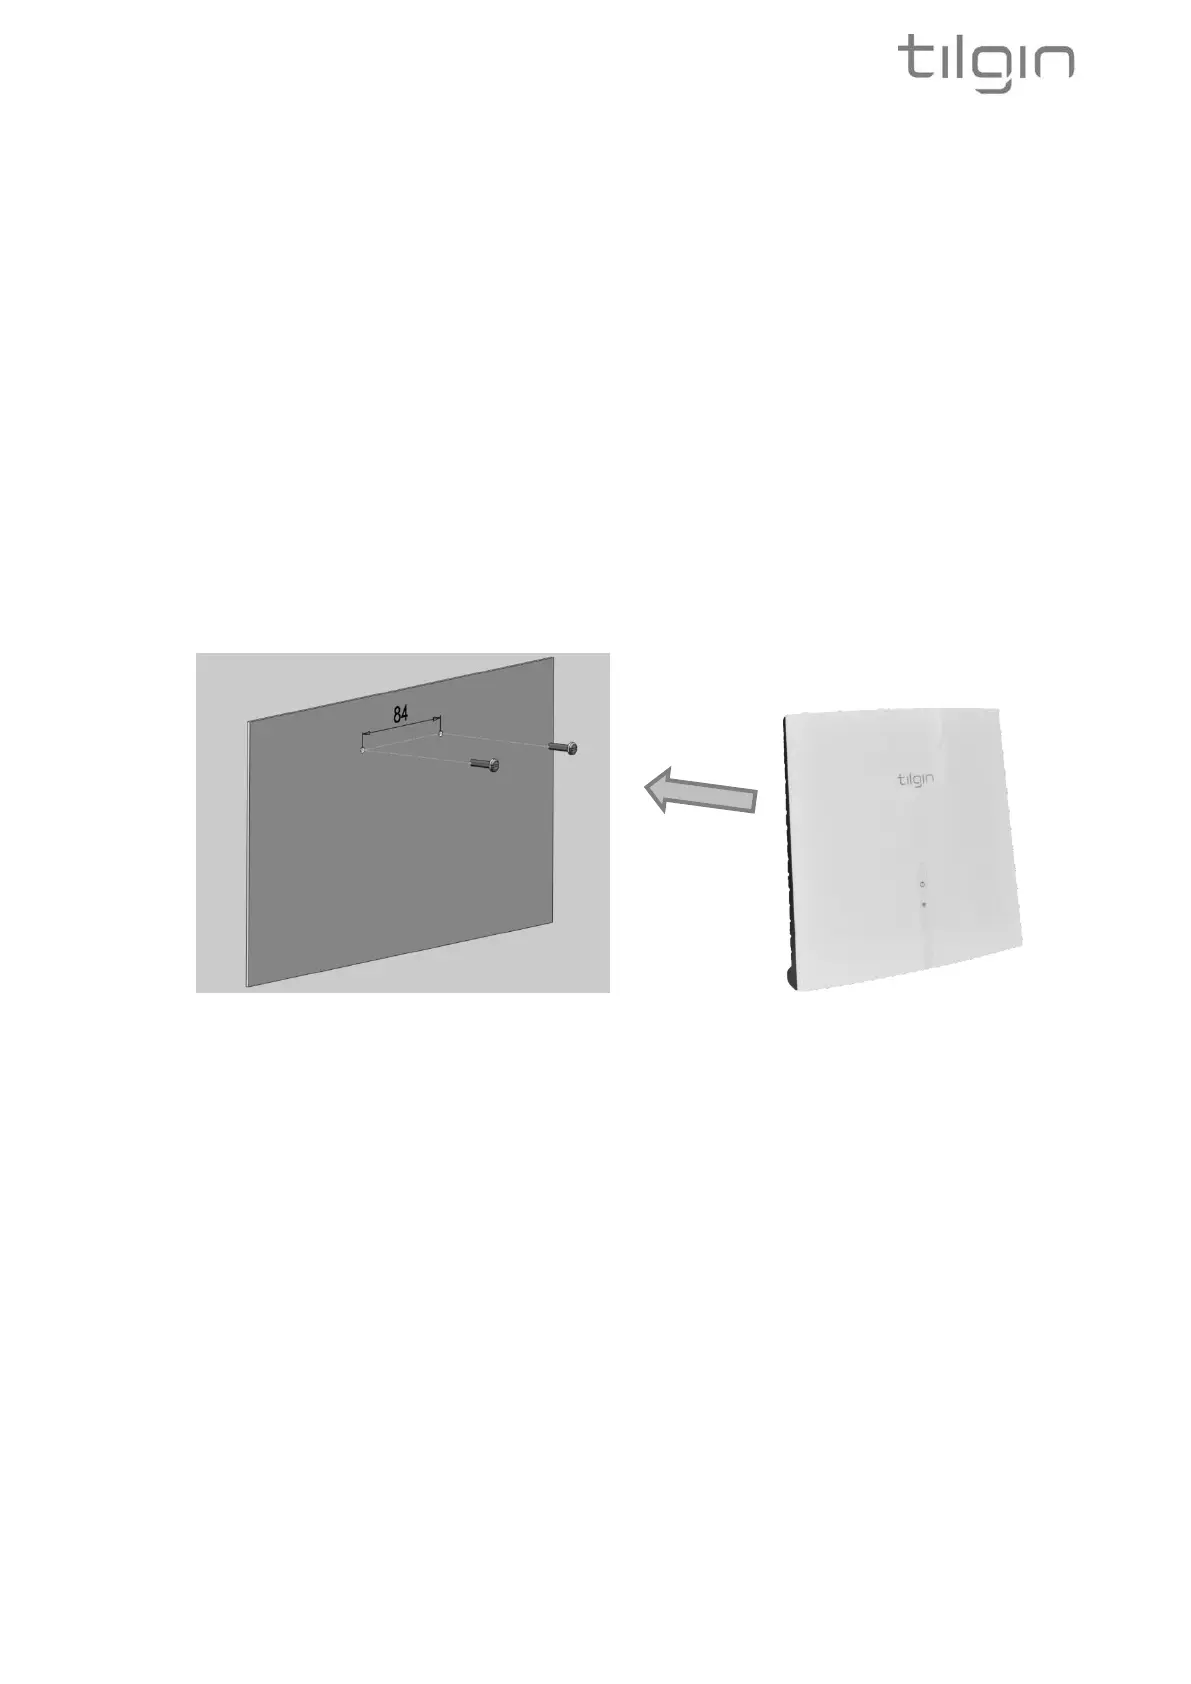
10. Mount the Wi-Fi extender to the wall
1. Screw two suitable screws to the wall. The screws should be in a horizontal position and
with a distance of 84mm. The distance between the screw head and the wall should be
approximately 6mm. This could be adjusted depending on the wall structure. Fig 1.
2. Attach the gateway to the screws. Fig 2.
Fig1 Fig 2
11. Troubleshooting Tips
If the Wi-Fi extender is not working as expected, please try out the following troubleshooting
tips.
• Check that cables are connected properly.
• Check if the connection status LED is lit. If not try to power cycle the device
• If the connection LED has not turned stable green within 30 minutes reboot (plug out and
plug in the power adaptor). If the connection status LED still has not turned stable
GREEN after reboot, contact your service operator.
• Verify that the LEDs lights according to the information in the guide.
• When there is slow, or no connection over WLAN, try to restart the device. It will re-
optimize the configuration for your Wi-Fi environment.
• If these actions still do not solve the problem, contact your operator or the vendor
that supplied your Wi-Fi extender.