9
E
N
G
L
I
S
H
For Markers without E-Trigger, continue with Step 3 below.
For Markers with E-Trigger, rst read E-Trigger Operating Instructions
on pages 10-13 before completing step 3 below.
3. Air/CO2 Cylinder Installation
Read the Air/CO2 Cylinder Warnings, Safety Tips, and Removal on pages 13-14 before
beginning the cylinder installation. Do not pressurize a partially assembled paintball marker.
a. Put the Trigger Safety in Safe mode (page 6) and install the barrel blocking device
(page 4).
b. Cock the marker by pulling the Rear Bolt Handle all
the way back. Always keep marker in the cocked
position when attaching the air supply and whenever
the air supply is attached to the marker. This will
help prevent an accidental discharge.
c. Lubricate the air/CO2 cylinder valve O-Ring with Tippmann Certied Marker Oil.
d. Insert the air/CO2 cylinder valve into the Air Supply Adapter (ASA) at the back end
of the marker grip.
e. Twist the air/CO2 cylinder clockwise into the ASA until it stops. Use caution as the
marker is now capable of ring after you put the Trigger Safety in Fire mode. If you
do not hear the full air/CO2 cylinder engage, the pin valve could be too short or the
pin valve seal is damaged. Follow the Air/CO2 Cylinder Removal instructions on
page 14 and take your air/CO2 cylinder to a “C5” Certied Airsmith for inspection or
contact the cylinder manufacturer.
4. Loading the Hopper
The barrel blocking device must be installed (see page 4) and the Trigger Safety in Safe mode
(see page 6).
a. Make sure that the Hopper is clean and free of sharp edges or debris. This keeps
the paintballs from breaking prematurely, and allows paintballs to feed into the
marker’s chamber smoothly.
b. Install the hopper neck into the Feed Elbow of your marker and tighten the Hopper
with a 3/16” Allen wrench included with your marker. NOTE: Do not overtighten or
the Feed Elbow may break.
c. With the barrel blocking device installed (page 4), and the Trigger Safety in Safe
mode (page 6), you are now ready to load your hopper with .68 caliber paintballs.
Do not force an excessive number of paintballs into the hopper.
5. Rate of Fire Adjustments
For markers with E-Trigger, read and follow E-Trigger Operating Instructions (on pages
10-13) before performing step 6.
For markers without E-Trigger, go to step 6 below.
6. Firing the Marker
a. Eye protection designed for paintball use must be worn by the user and any person
within range.
b. Point the marker in a safe direction.
c. Remove the barrel blocking device from the marker.
d. Verify that the marker is cocked.
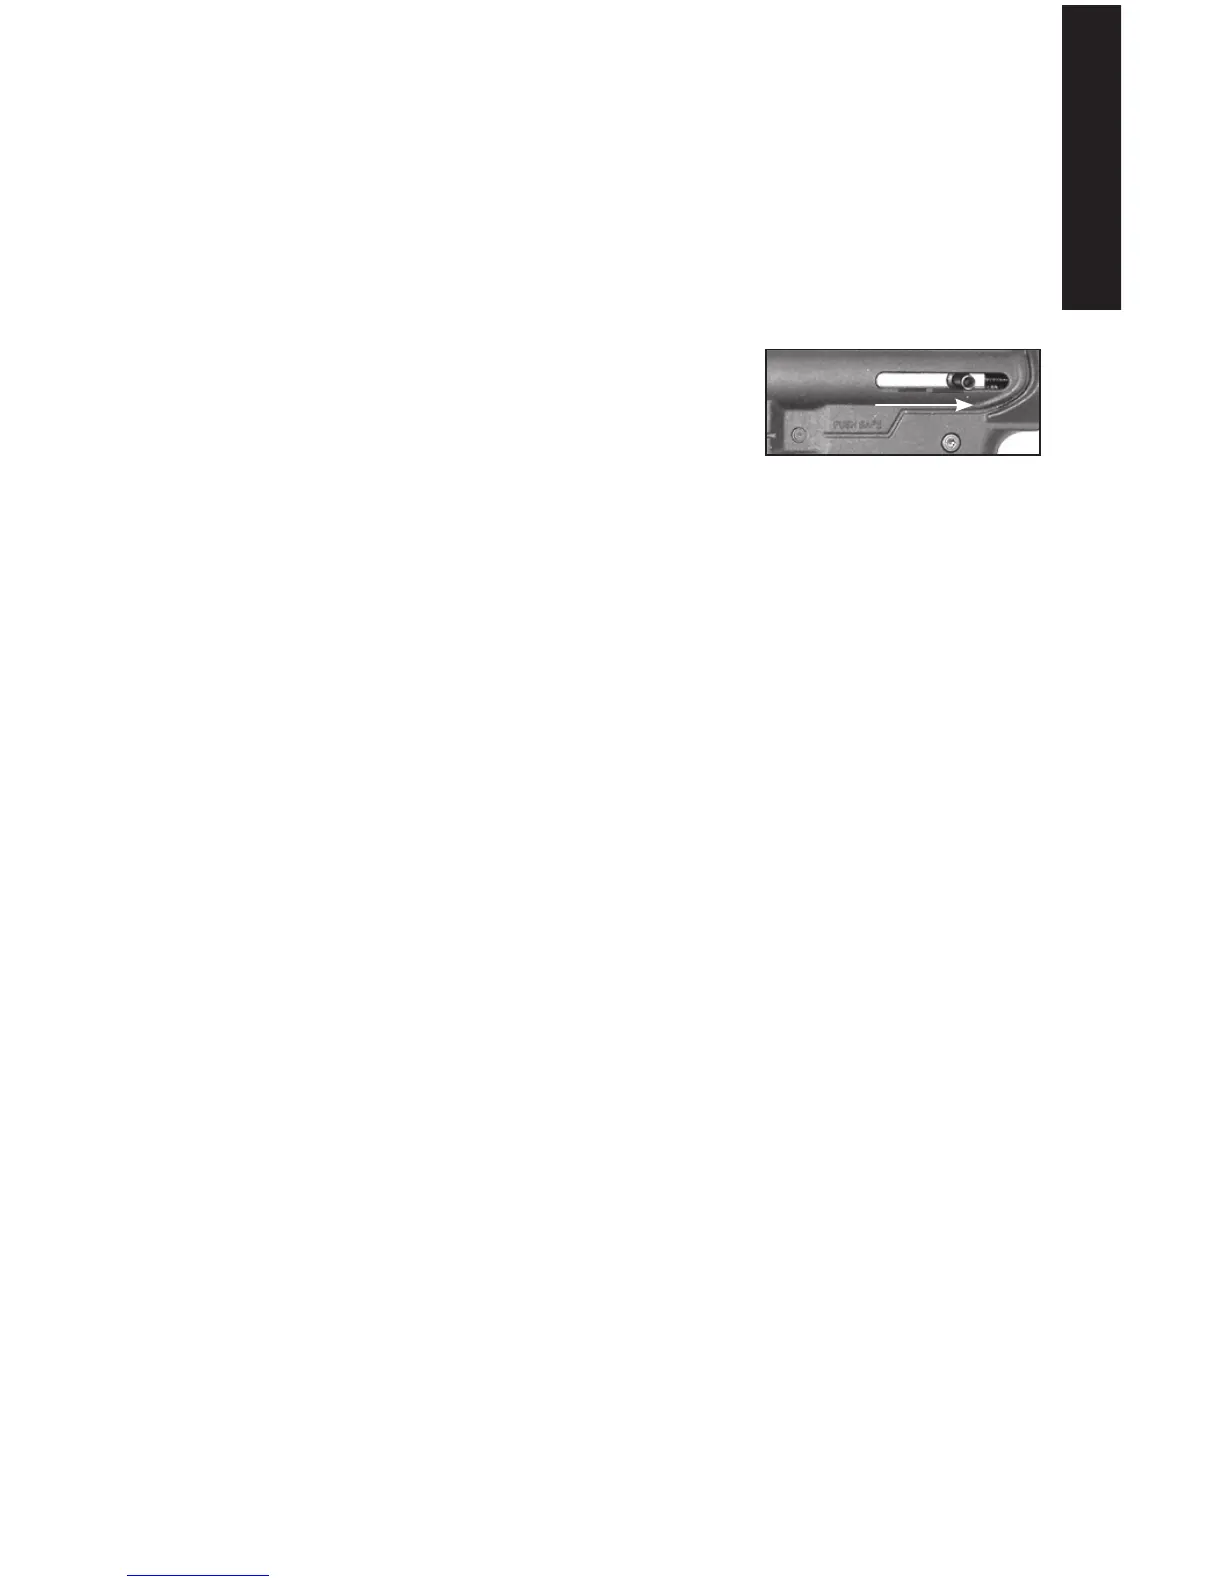
e. Move the Trigger Safety from Safe mode to Fire Mode.
f. Pull the Trigger to re the marker.
Figure 3: Rear Bolt Handle