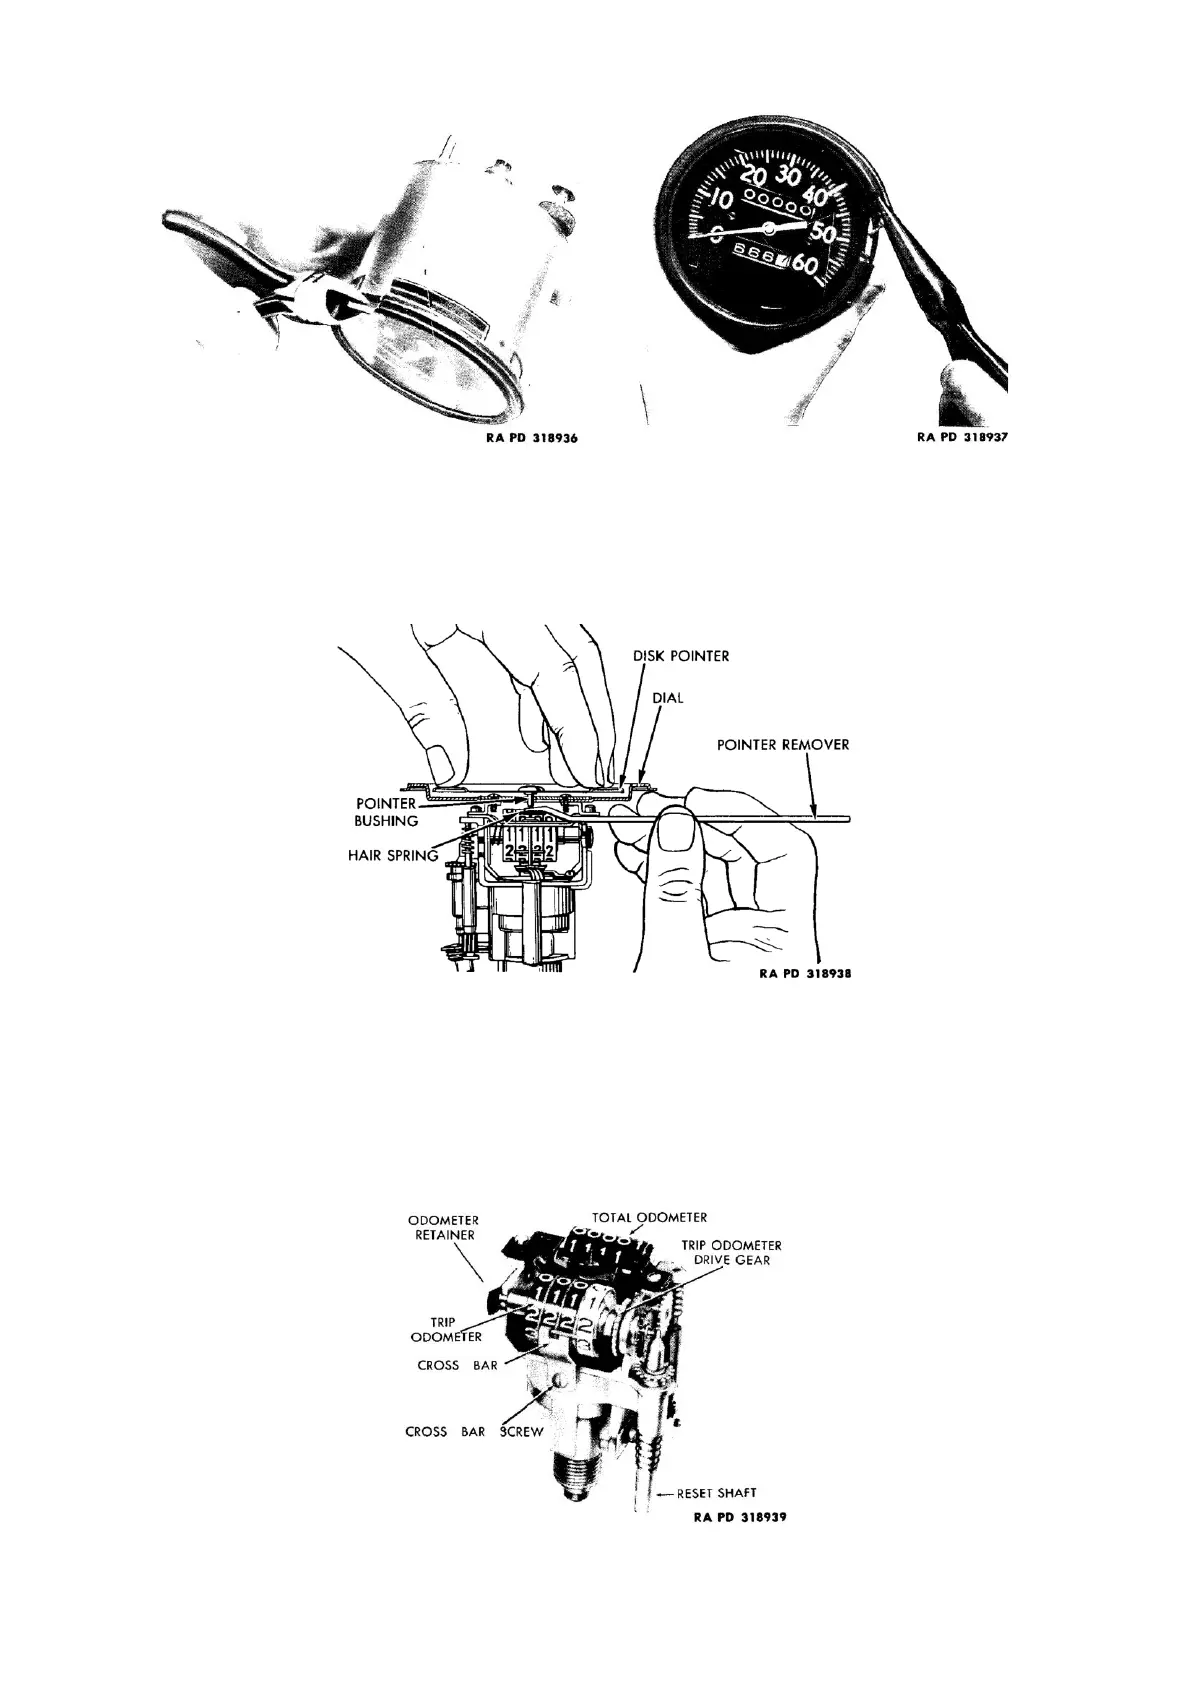
b. Remove pointer and dial: The regular-type pointer is removed by grasping pointer hub between thumb and
forefinger and twisting gently in counterclockwise direction (against stop), at the same time pulling pointer
outward carefully (fig. 78). To remove disk-type pointer, twist counterclockwise to loosen, then insert slot of
puller (T-131105) under pointer bushing and pry upward, continuing to twist pointer counterclockwise until
it is forced loose from staff (fig. 53). Then remove two dial retaining screws, and lift off dial.
Figure 53: Removing disk-type pointer, using special puller (T-131105)
c. Remove odometer assemblies: There are two methods used in mounting odometers in these types of
speedometers:
(1) On speedometers with total odometer above and trip odometer below speed cup staff (fig. 54), pry up
end of total odometer retainer and pull total odometer out of frame. To remove trip odometer, remove
cross bar (one screw), pry up end of retainer, squeeze drive gear against the trip odometer tenth dial and
pull trip odometer out of frame. Note: Removing trip odometer also releases reset gear, drive gear, and
reset spring.
Figure 54: Speedometer mechanism (dial removed)