TM 9-1829A, April 1944 63/100 2021-07-07
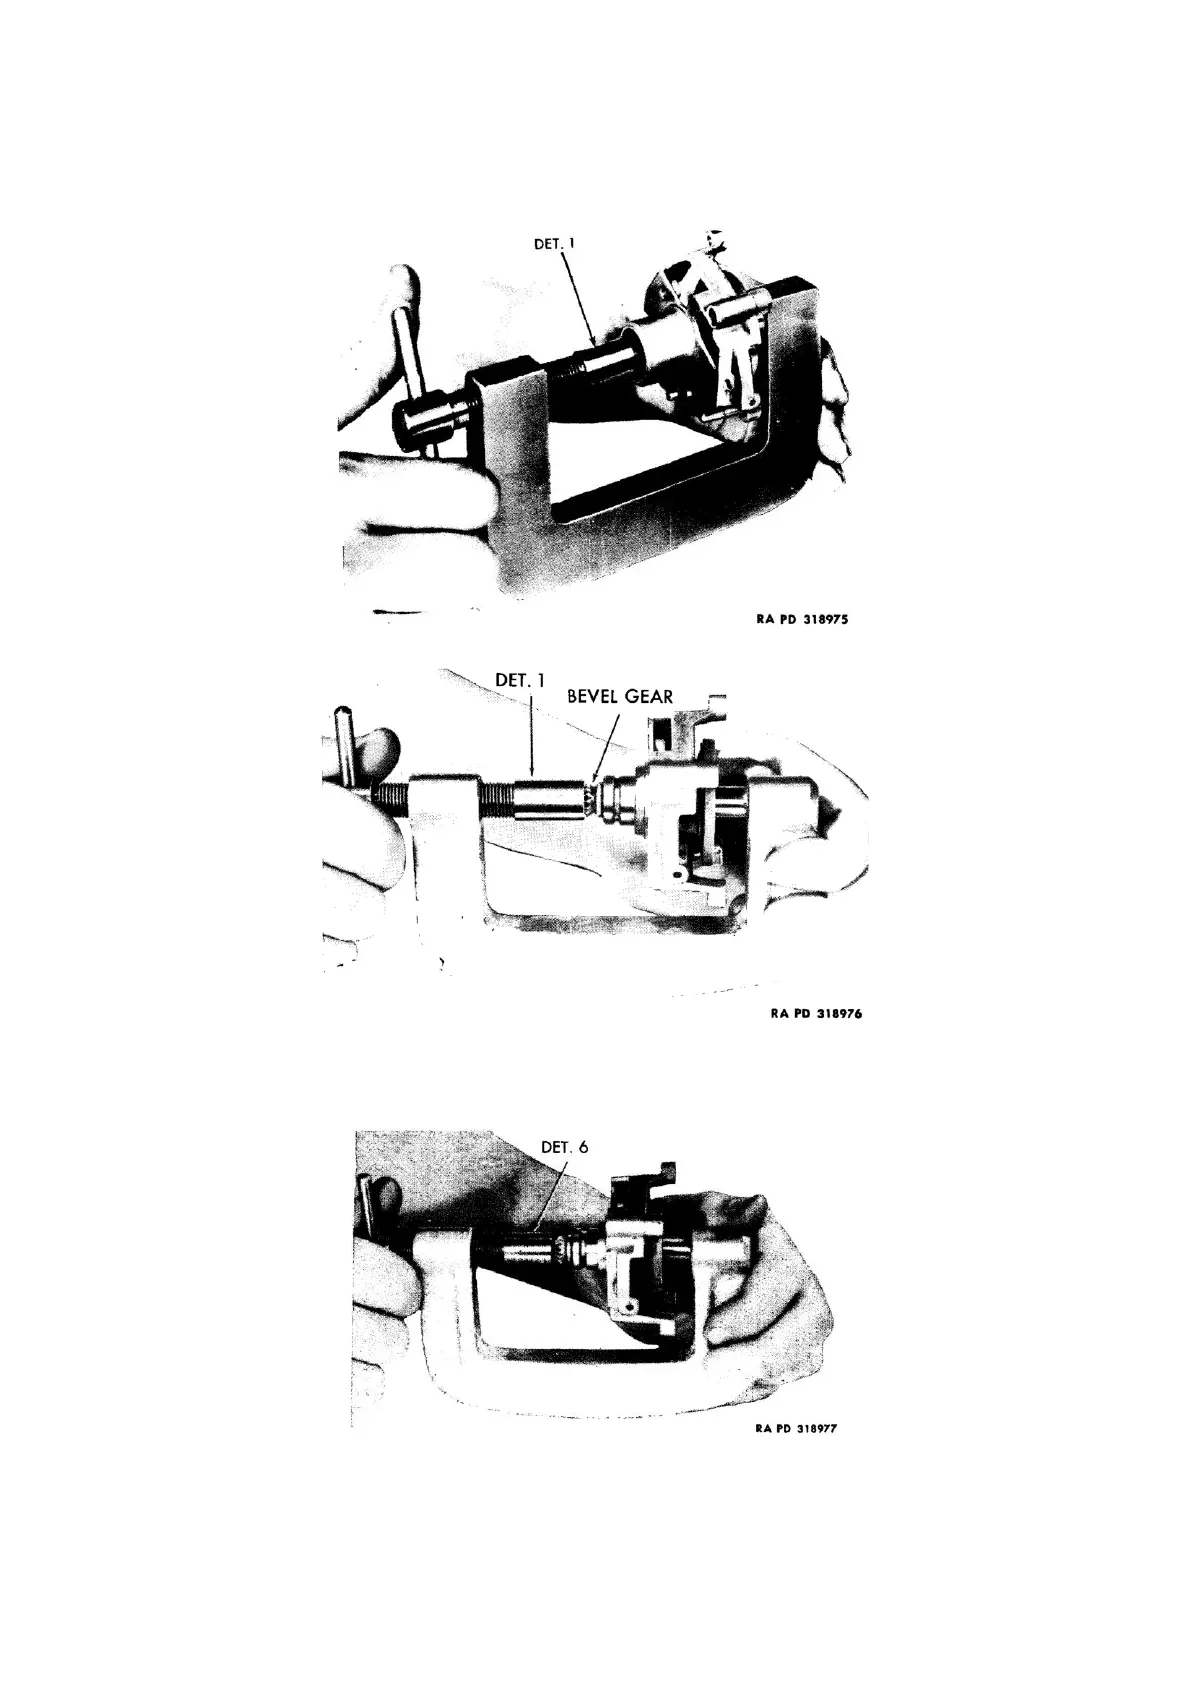
Place rear thrust washer and brass collar (or bevel gear) over end of shaft. Using magnet assembly fixture (T-
170666 with Det. 1) tighten down (figs. 90 and 91) until collar (or bevel gear) is pressed all the way onto
shaft. Caution: Care must be taken when using fixture to make sure that it does not come in contact with steel
portion of magnet, causing it to be weakened.
Figure 90: Pressing collar on magnet shaft, using fixture (T-170666 with Det. 1)
Figure 91: Pressing bevel gear on magnet shaft, using fixture (T-170666 with Det. 1)
Using fixture (T-170666 with Det. 6), flare end of magnet shaft (fig. 92). Allow about 0.003 inch end play
(barely perceptible) in magnet shaft. Check to see that magnet turns freely.
Figure 92: Flaring magnet shaft, using fixture (T-170666 with Det. 6)
b. Replace oil wick and plug: Saturate oil wick in watch and clock oil and place in frame. Using punch, tap oil
wick plug into place (fig. 67).