5
2400bps⇒19200bps⇒9600bps⇒4800bps⇒2400bps
7⇒8⇒7bit
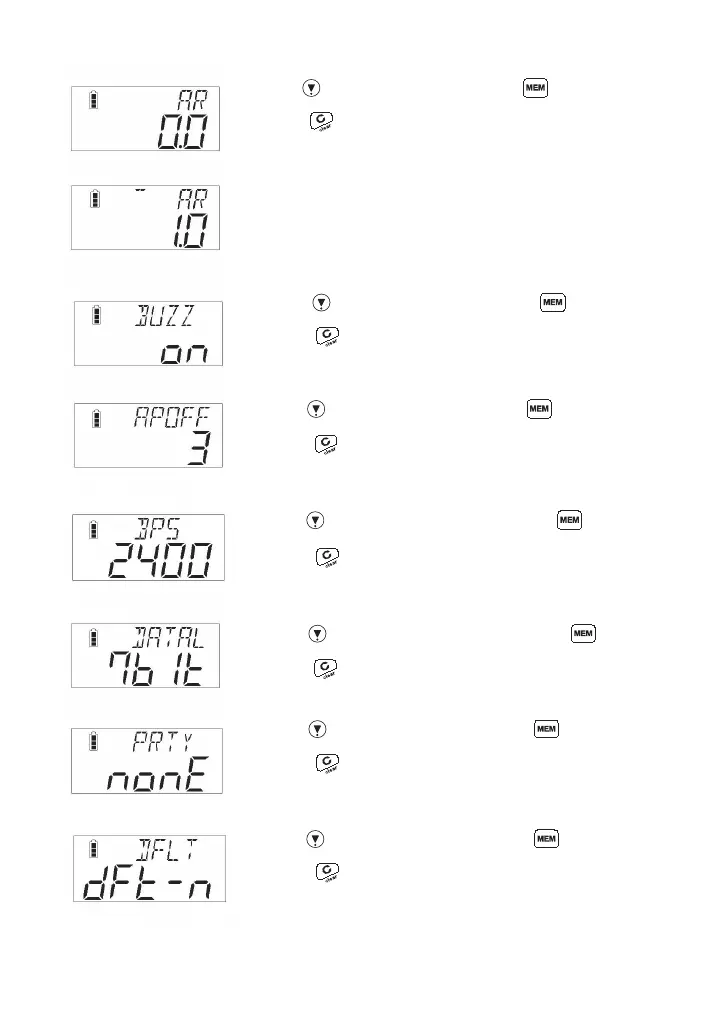
⑥Setting the auto memory/reset
Use the key to select a time. Press the key to proceed to
the next step.
Press the key to return to the measurement screen.
0.0 => 5.0 => 4.0 => 3.0 => 2.0 => 1.0 => 0.5 => 0.4 => 0.3 => 0.2 => 0.1 => 0.0 sec.
If any value other than 0.0 is set, “- - ” appears as shown in the left
figure, indicating that the auto memory/reset has been set.
⑦Setting the buzzer
Use the key to select ON/OFF. Press the key to proceed to
the next step.
Press the key to return to the measurement screen.
ON => OFF => ON
⑧Setting the auto power off
Use the key to select a time. Press the key to proceed to the
next step.
Press the key to return to the measurement screen.
3 minutes => nonE (no auto power off) => 30 minutes => 10 minutes => 3 minutes
⑨Setting the baud rate
Use the key to select a baud rate. Press the key to proceed to
the next step.
Press the key to return to the measurement screen.
⑩Setting the data length
⑪Setting the parity
⑫Setting the default
Use the key to select a data length. Press the key to proceed
to the next step.
Press the key to return to the measurement screen.
Use the key to select a parity. Press the key to proceed to the
next step.
Press the key to return to the measurement screen.
nonE (none) => odd (odd number) => EvEn (even number) => nonE (none)
Use the key to select a default. Press the key to proceed to the
next step.
Press the key to return to the measurement screen.
dFt-n => dFt-y (return to the factory default) => dFt-n