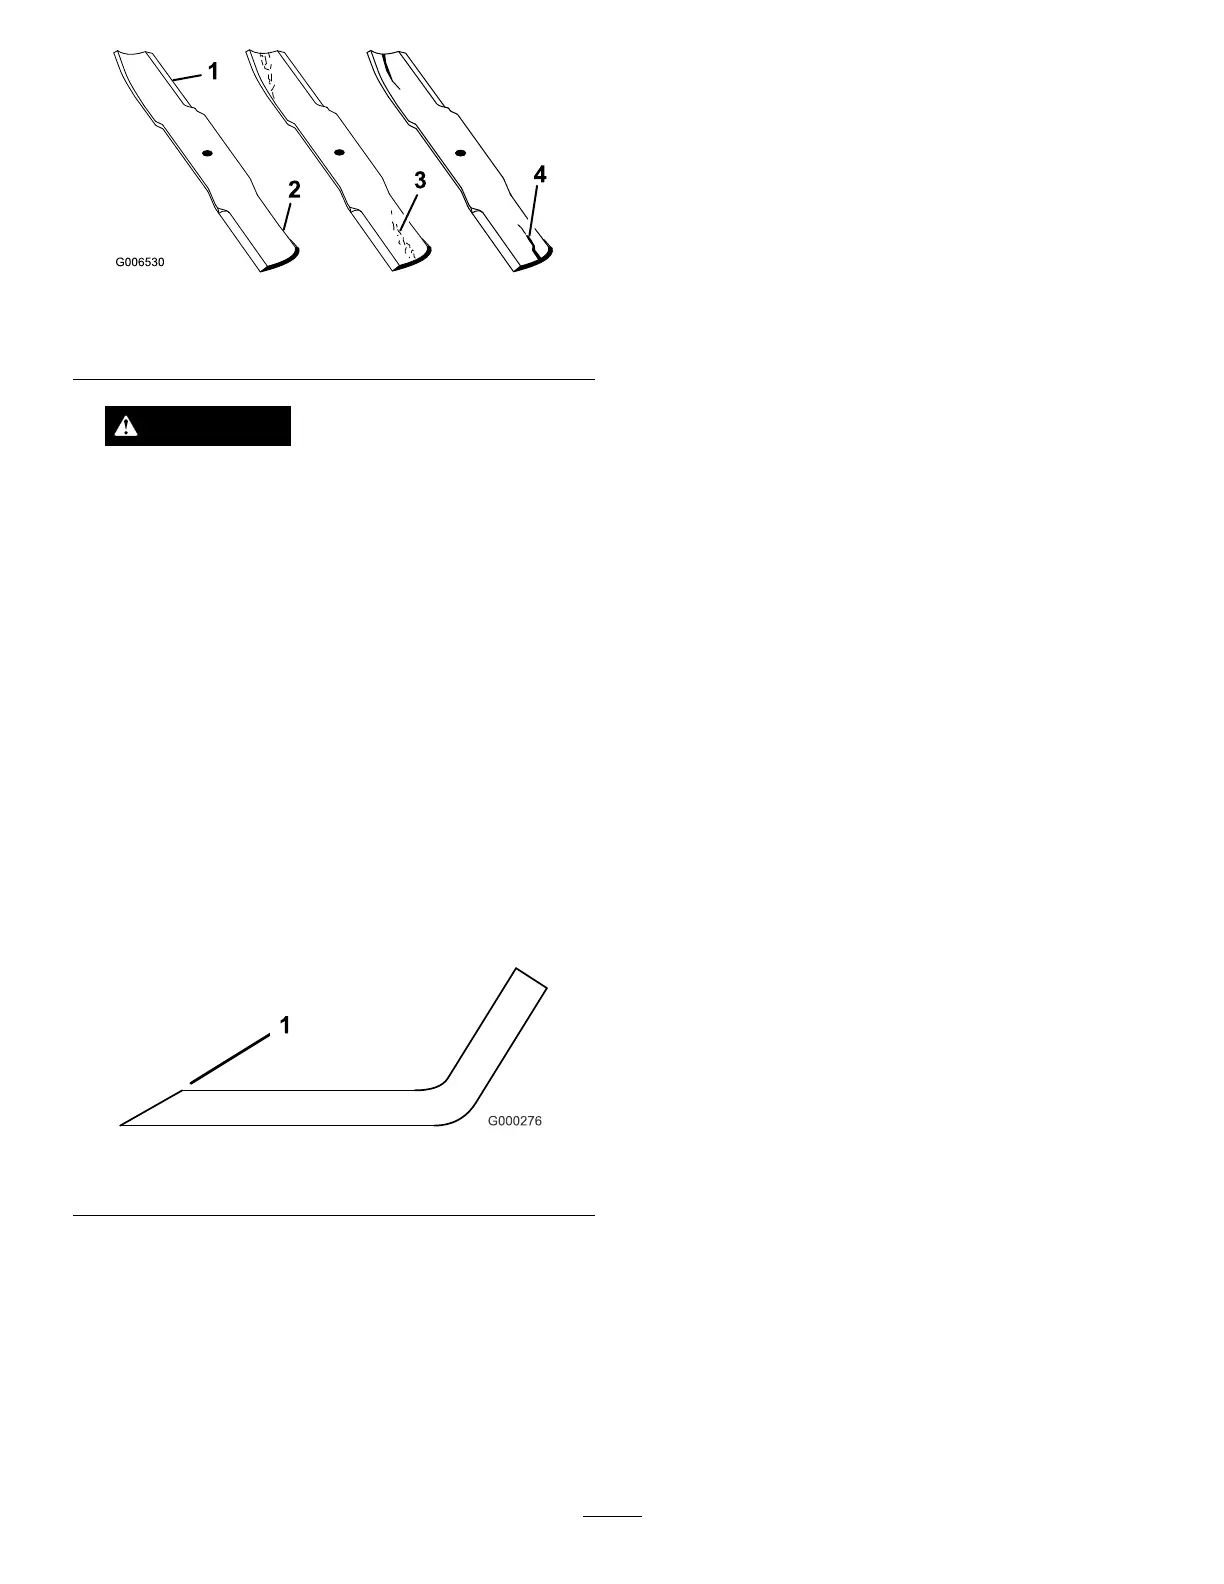
Figure28
1.Cuttingedge3.Wear/slotforming
2.Curvedarea/sail4.Crack
WARNING
Ifthebladeisallowedtowear,aslotwillform
betweenthesailandatpartoftheblade
(Figure28).Eventually,apieceoftheblademay
breakoffandbethrownfromunderthehousing,
possiblyresultinginseriousinjurytoyourself
orbystanders.
•Inspectthebladeperiodicallyforwearor
damage.
•Replaceawornordamagedbladewitha
newTorobladetoensurecontinuedsafety
certicationoftheproduct.
3.Examinethecuttingedgesofallblades.Sharpenthe
cuttingedgesiftheyaredullornicked.Sharpenonly
thetopsideofthecuttingedgeandmaintainthe
originalcuttingangletoensuresharpness(Figure29).
Thebladewillremainbalancedifthesameamount
ofmetalisremovedfrombothcuttingedges.
Figure29
1.Sharpenatoriginalangle
Note:Removethebladesandsharpenthemona
grinder;refertoRemovingtheCuttingBlades.After
sharpeningthecuttingedges,installthebladewith
theanti-scalpcupandbladebolt.Thebladesails
mustbeontopoftheblade.Tightenthebladebolt
to85-110ft-lb(115-149N-m).
CheckingandCorrecting
MismatchofBlades
Ifthereismismatchbetweentheblades,thegrasswill
appearstreakedwhenitiscut.Thisproblemcanbe
correctedbymakingsurethatthebladesarestraightand
allofthebladesarecuttingonthesameplane.
1.Usinga3foot(1meter)longcarpenterslevel,nd
alevelsurfaceontheshopoor.
2.Raisetheheight-of-cuttothehighestposition;refer
toAdjustingtheHeight-of-Cut.
3.Lowerthecuttingunitontotheatsurface.Remove
thecoversfromthetopofthecuttingunit.
4.Rotatethebladesuntiltheendsfaceforwardand
backward.Measurefromtheoortothefronttipof
thecuttingedge.Rememberthisdimension.Then
rotatethesamebladesothattheoppositeendis
forward,andmeasureagain.Thedifferencebetween
thedimensionsmustnotexceed1/8inch(3mm).
Ifthedimensionexceeds1/8inch(3mm),replace
thebladebecauseitisbent.Makesuretomeasure
alloftheblades.
5.Comparethemeasurementsoftheouterbladeswith
thecenterblade.Thecenterblademustnotbemore
than3/8inch(10mm)lowerthantheouterblades.
Ifthecenterbladeismorethan3/8inch(10mm)
lowerthantheouterblades,proceedtostep
6and
addshimsbetweenthespindlehousingandthe
bottomofthecuttingunit.
6.Removethebolts,atwashers,lockwashers,and
nutsfromtheouterspindleintheareawhere
theshimsmustbeadded.Toraiseorlowerthe
blade,addashim,PartNo.3256-24,betweenthe
spindlehousingandthebottomofthecuttingunit.
Continuetocheckthealignmentofthebladesand
addshimsuntilthetipsofthebladesarewithinthe
requireddimension.
Important:Donotusemorethanthreeshimsat
anyoneholelocation.Usedecreasingnumbers
ofshimsinadjacentholesifmorethanoneshim
isaddedtoanyoneholelocation.
7.Installthebeltcovers.
ReplacingtheDriveBelt
Thebladedrivebelt,tensionedbythespringloaded
idlerpulley,isverydurable.However,aftermanyhours
ofuse,thebeltwillshowsignsofwear.Signsofaworn
beltare:squealingwhenbeltisrotating,bladesslipping
whencuttinggrass,frayededges,burnmarksandcracks.
Replacethebeltifanyoftheseconditionsareevident.
22