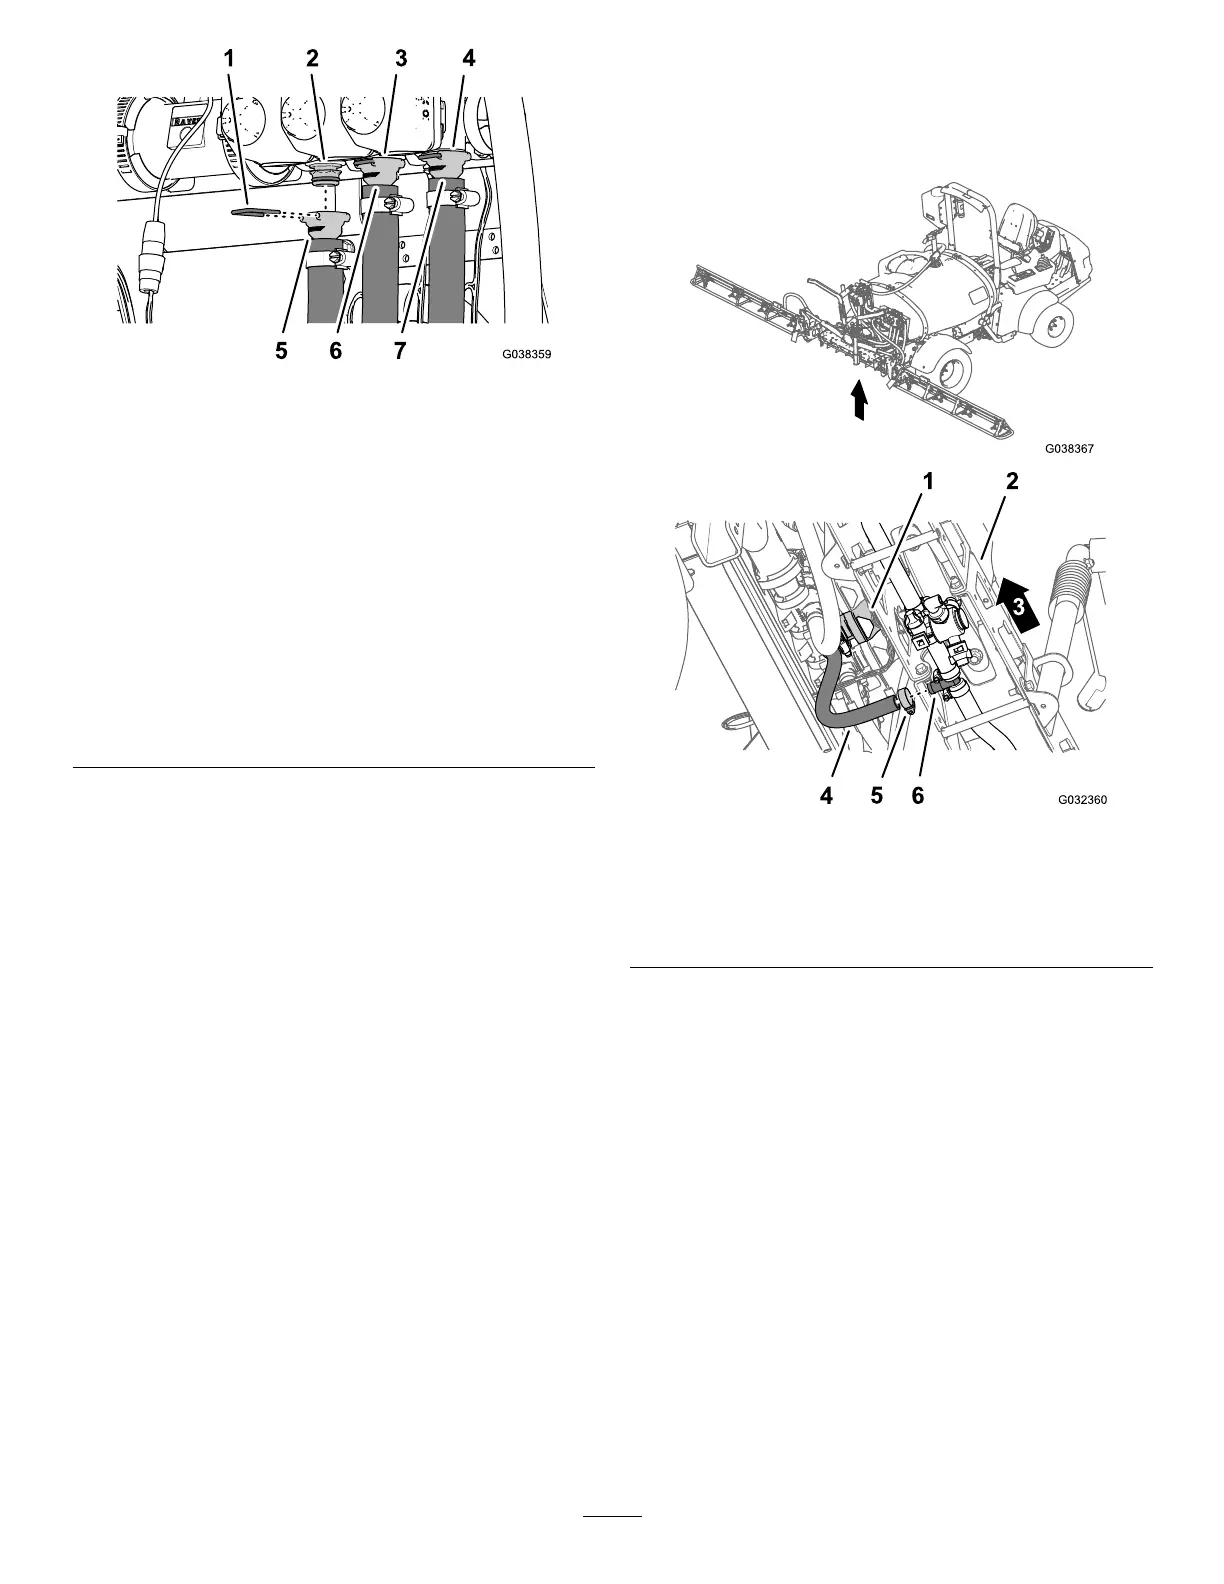
Figure80
1.Retainer
5.Straightbarbed
tting—supplyhoseforthe
left-boomsection—2x205
cm(3/4x80-13/16inches)
2.Quick-connecttting
(left-boom-sectionvalve)
6.Straightbarbed
tting—supplyhoseforthe
center-boomsection—2
x58cm(3/4x22-13/16
inches)
3.Quick-connecttting
(center-boom-section
valve)
7.Straightbarbed
tting—supplyhosefor
theright-boomsection—2
x170cm(3/4x66-13/16
inches)
4.Quick-connecttting
(right-boom-sectionvalve)
3.Securethestraightbarbedttingtothequick-connect
ttingwiththeretainerthatissuppliedwiththehose
(Figure80).
InstallingtheSupplyHosestothe
BoomSections
1.Assemblethecenterboom-supplyhoseontothe
T-ttingatthecenter-boomsection(Figure81).
Figure81
1.Centerboom-sectionvalve4.Supplyhose(center-boom
section)
2.Center-boomsection
5.Hoseclamp
3.Leftsideofthemachine6.BarbedT-tting
2.SecurethehosetotheT-ttingwithahoseclampthat
youremovedinstep5ofRemovingtheBoom-Section
Hoses(page11).
3.Routetherightboom-supplyhosethroughthesupport
clampattheendofthecenter-boomsection(Figure
82).
39
 Loading...


