Maintenance
Air
Cleaner
Servicing of the air cleaner is recommended after every
25
hours of operation or more often in very dusty
conditions.
See
Figure
1.
1.
2.
3.
4.
5.
6.
7.
AIR
FILTER
GRID
FOAM FILTER
FILTER SCREEN
Figure
1
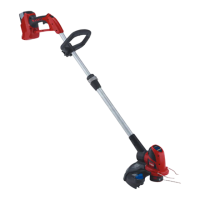
Maintenance Muffler
Decarbonizing the muffler is recommended after every
50
hours of operation or
if
engine speed decreases
drastically. See Figure
2.
Remove the
two
screws securing the air cleaner
cover to the trimmer
Carefully remove the filter grid, foam filter and filter
screen.
Wash the foam filter in a soap and water solution
and dry thoroughly.
If
the filter shows any sign of
damage replace
it.
Saturate the foam filter with 5ml (one teaspoon) of
SAE
30
oil, then squeeze to distribute the oil evenly
and to remove excess oil. The element should be
damp but not wet.
Wash the filter screen in a clean solvent and air dry.
If
the filter screen shows any signs of damage,
replace
it.
Reinstall the air cleaner components as shown in
Figure
1.
Note that the flat side of the filter grid
faces the foam filter.
Tighten the air cleaner screws to
0.15
to
0.20
kg m
(13
to
17.5
in Ibs)
Figure
2
1.
Remove the three screws securing the muffler
cover to the trimmer.
2.
Remove the
two
nuts securing the muffler to the
engine.
3.
Rotate the engine crankshaft until the piston totally
covers the exhaust port. Clean the exhaust port
area by using a clean flat piece of hard wood.
Remove all loose particles.
IMPORTANT
Use extreme care
when
cleaning
the exhaust port. Stay clear
of
the piston
so
it
will
not be damaged.
4.
Inspect the inside of the muffler for excessive
carbon buildup.
If
carbon buildup appears to be
restricting the exhaust flow, replace the muffler.
Otherwise, clean the muffler by holding
it
with a
vice grips and heating with a propane torch. Once
hot, break the carbon loose by hitting the muffler
on
a
hard surface. Ensure that the muffler is
completely free
of
all carbon particles before
reinstalling.
5.
Reinstall muffler using a new muffler gasket and
tighten all fasteners securely.
6.
Reinstall
the
muffler cover as shown in Figure
1.
8