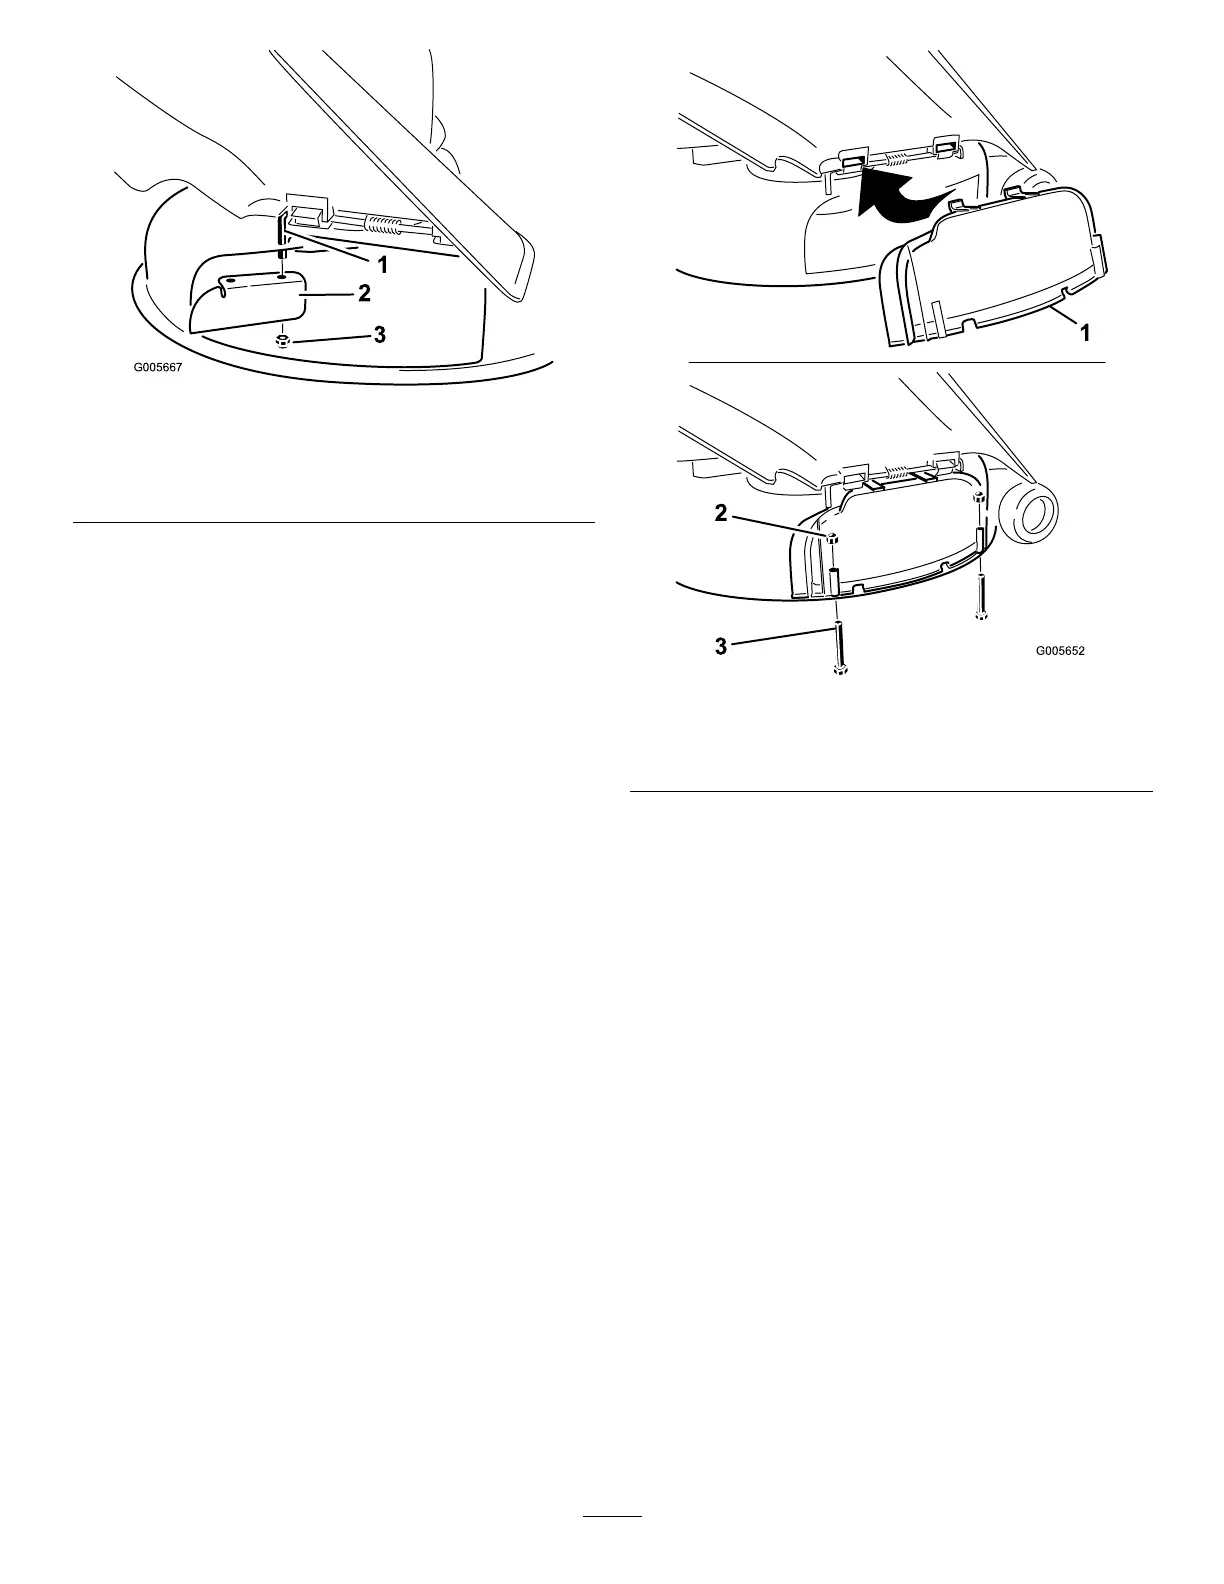
Figure26
1.Pivotrod
3.Existingthinnut(3/8inch)
2.Cutoffbafe(originally
shippedwiththemachine)
8.Torquethefastenerto7to9N-m(14to18ft-lb).
9.Lowerthegrassdeectoroverthedischargeopening
Important:Ensurethatthemowerhasahinged
grassdeectorthatdispersesclippingstotheside
anddowntowardtheturf,whileinside-discharge
mode.
InstallingtheDischargeCoverfor
Mulching
1.Parkthemachineonalevelsurfaceanddisengagethe
blade-controlswitch.
2.Movethemotion-controlleversoutwardtothepark
position,stoptheengine,removethekey,andwait
forallthemovingpartstostopbeforeleavingthe
operatingposition.
3.Removethecutoffbafefromthemowerdeck(Figure
26).
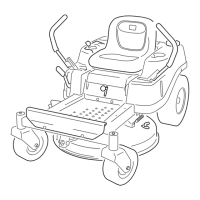
4.Liftthegrassdeectorandslidethetabsontopofthe
dischargecoverunderthegrassdeectorretainingrod.
5.Rotatethedischargecoverdownovertheopening,and
ontothelowerlipofthemower(Figure27).
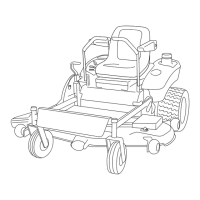
Figure27
1.Dischargecover
3.Bolt(1/4x2-1/2inches)
2.Capnut(1/4inch)
6.Securethedischargecovertothelowerlipofthe
mowerwith2bolts(1/4x2-1/2inches)and2capnuts
(1/4inch)asshowninFigure27.
Note:Donotovertightenthenuts;thiscoulddistort
thecoverandcausebladecontact.
ConvertingtoSideDischarge
(formodelswith127cm
(50-inch)decks)
Themowerdeckandmowerbladesshippedwiththismachine
weredesignedforoptimummulchingandsidedischarge
performance.
RemovingtheRightBafeforSide
Discharge
1.Parkthemachineonalevelsurfaceanddisengagethe
blade-controlswitch.
2.Movethemotion-controlleversoutwardtothepark
position,stoptheengine,removethekey,andwaitfor
allmovingpartstostopbeforeleavingtheoperating
position.
3.Removetherightmowerblade;refertoRemovingthe
Blades(page44).
27