7.Installtherightmowerblade;refertoInstalling
theBlades(page47).
8.Liftupthegrassdeectorandinstall2bolts
(5/16x3/4inch)intothe2holesalongthedeck
cutout.
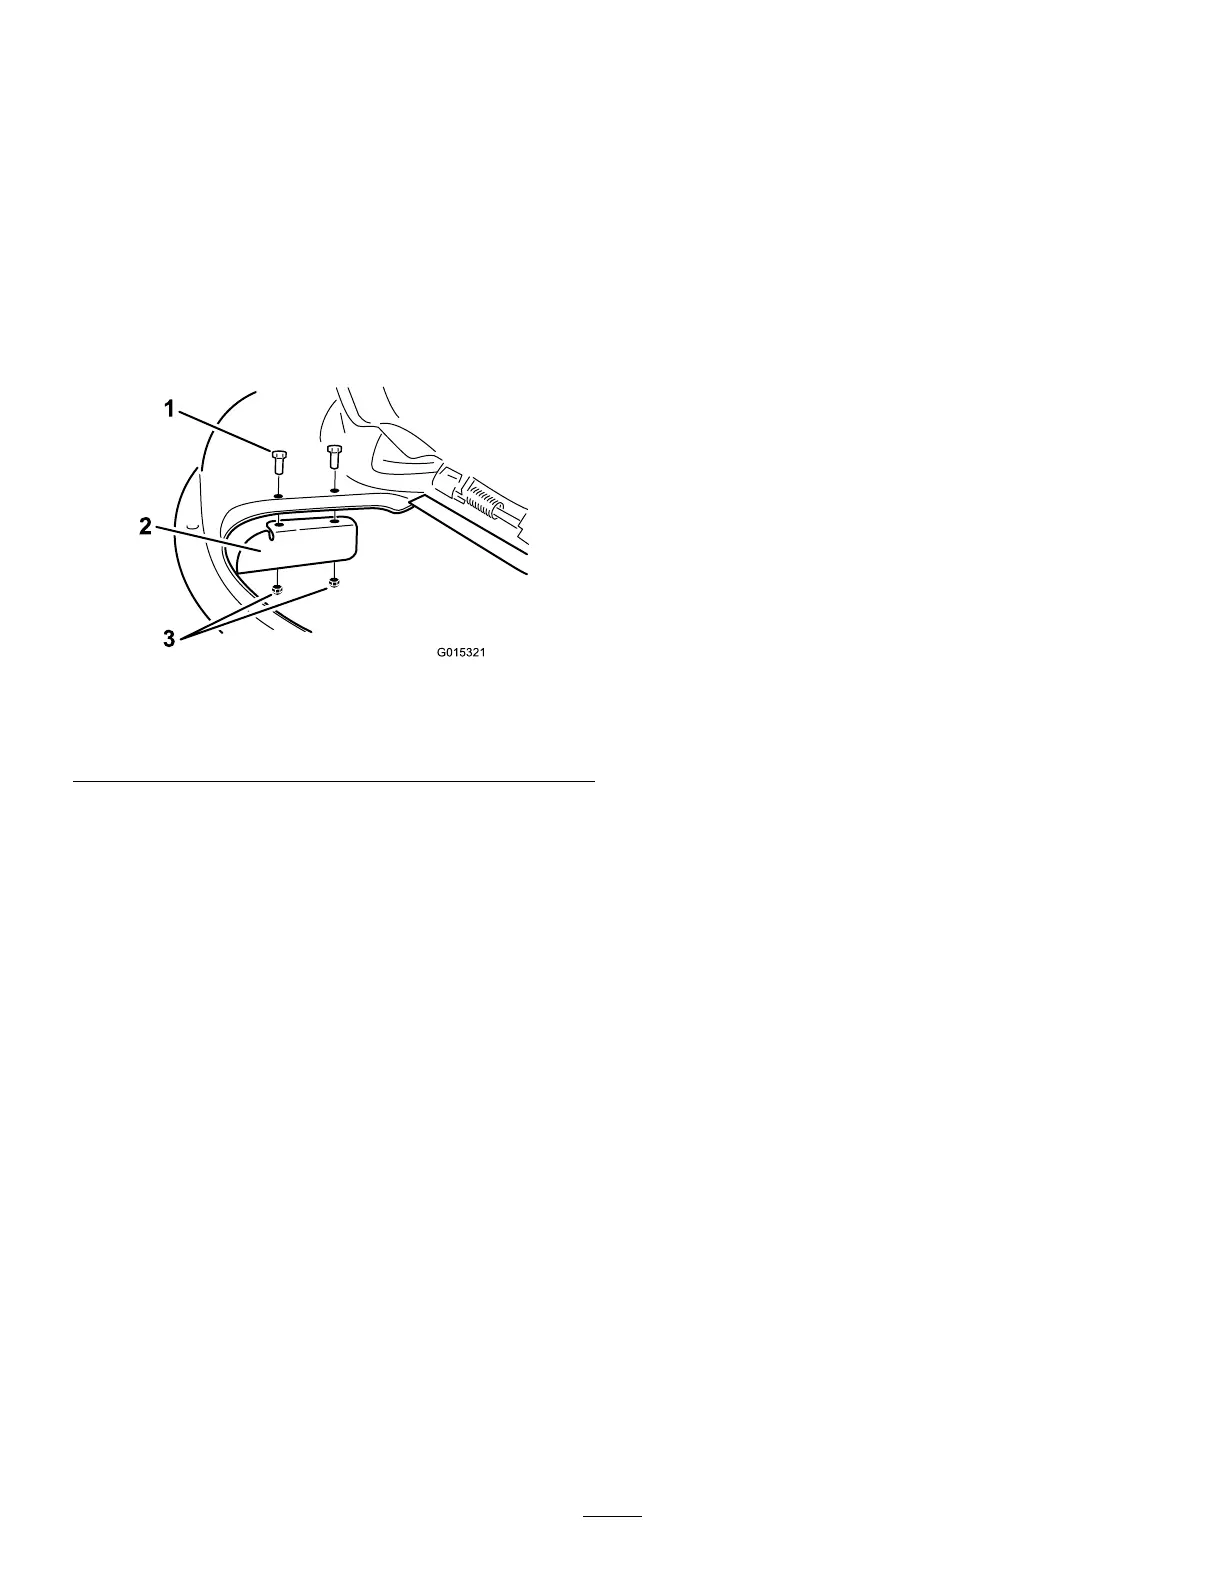
9.Installthecutoffbafetothemowerdeck(Figure
28).
Note:Usethe2locknuts(5/16inch)tosecure
thebafetothemowerdeck.
Note:Thecutoffbafewasshippedwiththe
machineasaloosepart.
g015321
Figure28
1.Bolt(5/16x3/4inch)3.Locknut(5/16inch)
2.Cutoffbafe
10.Torquethefastenersto7to9N∙m(14to18
ft-lb).
11.Lowerthegrassdeectoroverthedischarge
opening.
Important:Ensurethatthemowerhas
ahingedgrassdeectorthatdisperses
clippingstothesideanddowntowardthe
turf,whileinside-dischargemode.
InstallingtheRightBafefor
Mulching
1.Parkthemachineonalevelsurfaceand
disengagetheblade-controlswitch.
2.Movethemotion-controlleversoutwardtothe
PARKposition,shutofftheengine,removethe
key,andwaitforallmovingpartstostopbefore
leavingtheoperatingposition.
3.Removethecutoffbafefromthemowerdeck
(Figure28).
4.Removetherightmowerblade;referto
RemovingtheBlades(page47).
5.Slidetherightbafeunderthemowerdeckand
secureitusing2knobsandthecurvedwashers
(cuppedsidefacingthemower)asshownin
Figure26andFigure27.
Important:Ensurethatthetabonthefar
rightsideoftherightbafeisoutsideofthe
mowerandisushwiththemowerwall.
6.Installtherightmowerblade;refertoInstalling
theBlades(page47).
29