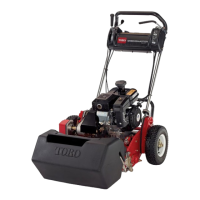
Greensmaster Flex 1800/1820/2100/2120 Page 6 − 5 Chassis and Controls
8. Remove handle clamps from handle assembly (Fig.
2 or 3):
A. Remove carriage screws and flange nuts that se-
cure handle clamps to offset handle clamps.
B. Remove flange nuts that secure shoulder bolts at
bottom of handle clamps.
C. Remove inner handle clamps. Leave shoulder
bolts and outer handle clamps in place on handle.
9. Remove the handle assembly from the machine.
10.If rubber bumpers (item 7 in Fig. 2 or 3) need to be
replaced, cut bumpers to remove from handle clamps.
Apply soapy water to inside of new bumpers to ease
installation onto clamps.
Handle Installation (Fig. 1)
1. Position handle assembly to outer handle clamps on
machine.
2. Fit inner handle clamps to the handle assembly and
secure with removed fasteners (Fig. 2 or 3). Adjust han-
dle height before fully tightening the fasteners.
NOTE: The handle is traditionally operated with the
handle adjusted to the maximum height.
3. Attach reel clutch, traction clutch and brake cables to
transmission (see Cable Replacement in this section).
Check cable operation and adjust if necessary.
4. Attach throttle cable to engine (see Throttle Cable
Replacement in this section). Check cable operation
and adjust if necessary.
5. Attach wire harness connections to electrical com-
ponents on handle.
6. Secure console cover to handle assembly.
7. Attach spark plug wire to spark plug.
1. Handle
2. Offset handle clamp
3. Carriage screw
4. Carriage screw
5. Shoulder bolt
6. Bushing
7. Rubber bumper
8. Handle retainer
9. Hair pin
10. Side plate (LH shown)
11. Flange nut
12. Flange nut
13. Handle clamp
Figure 2
FRONT
RIGHT
2
3
6
8
9
10
1
5
7
4
6
6
11
12
13
Flex 2100
1. Handle
2. Offset handle clamp
3. Carriage screw
4. Carriage screw
5. Shoulder bolt
6. Bushing
7. Rubber bumper
8. Handle retainer
9. Hair pin
10. Side plate (LH shown)
11. Flange nut
12. Flange nut
13. Handle clamp
Figure 3
FRONT
RIGHT
Flex 1800
8
9
6
10
13
2
3
4
12
7
5
12
6
6
11
1
Chassis and
Controls
 Loading...