8. Tighten the jam n ut.
9. Inser t the 2 screws y ou previously remo v ed on the belt
co v er .
10. If the aug er/impeller cable is properly adjusted but a
problem remains , contact an A uthorized Ser vice Dealer .
Checking the Auger Gearbox
Oil Level
Chec k the aug er g earbo x oil yearly and add oil if necessar y .
1. Mo v e the sno wthro w er to a lev el surface .
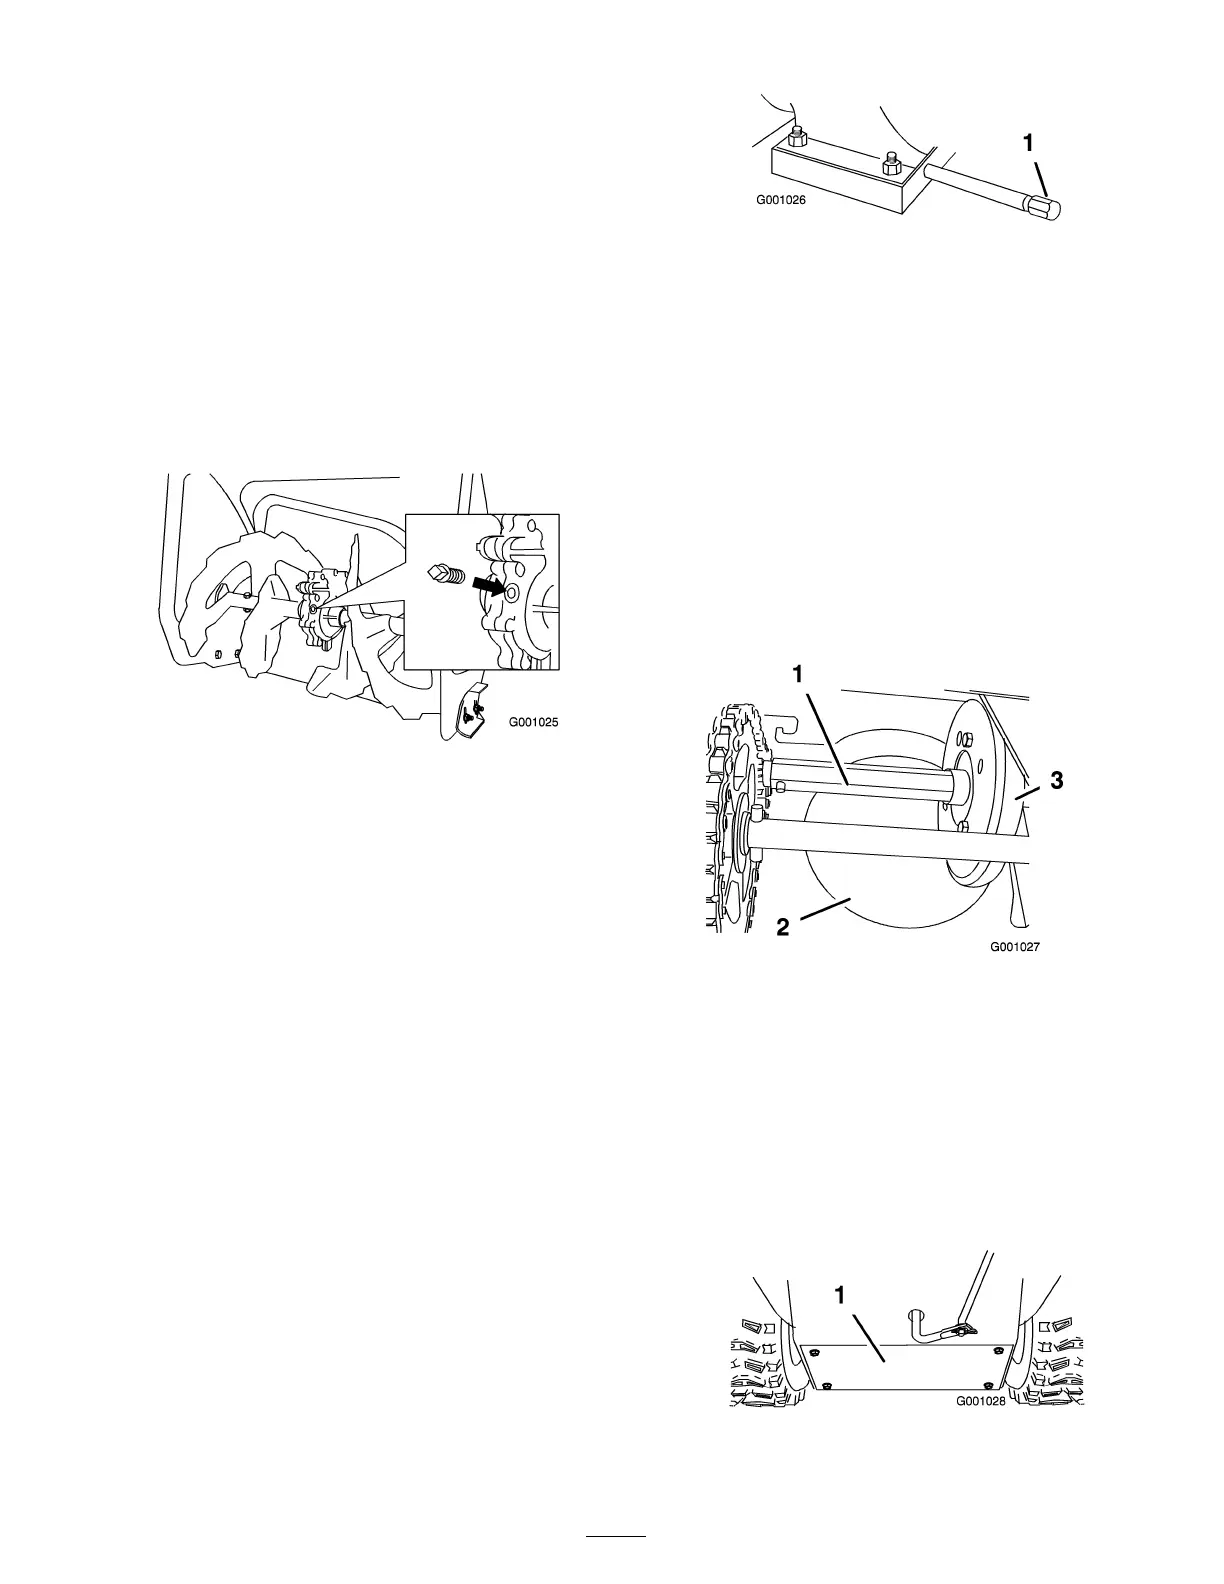
2. Clean the area around the pipe plug ( Figure 42 ).
Figure 42
3. R emo v e the pipe plug from the g earbo x.
4. Chec k the oil lev el in the g earbo x. T he oil should be at
the point of o v erflo wing at the filler opening .
5. If the oil lev el is lo w , add GL-5 or GL-6, SAE 85-95
EP transmission oil to the g earbo x until the point of
o v erflo w .
Note: Do not use synthetic oil.
6. Install the pipe plug in the g earbo x.
Changing the Engine Oil
Chang e the engine oil after the first 2 operating hours , then
yearly thereafter . If possible , r un the engine just before
c hanging the oil because w ar m oil flo ws better and car ries
more contaminants .
Max. fill: 26 oz. (0.77 l), type: automoti v e deterg ent oil with
an API ser vice classification of SF , SG , SH, SJ , SL, or higher .
• F or temperatures abo v e 32°F (0°C), use SAE 30W .
• F or temperatures betw een 0°F and 32°F (-18°C to 0°C),
use SAE 5W30 or SAE 10W .
• F or air temperatures belo w 0°F (-18°C), use SAE 0W30.
1. Clean the area around the oil drain cap ( Figure 43 ).
Figure 43
1. Oil drain cap
2. Slide an oil drain pan under the drain extension and
remo v e the oil drain cap .
3. Drain the oil.
Note: Dispose of the used oil properly at a local
recycling center .
4. Install the oil drain cap .
5. Fill the crankcase with oil. R efer to Filling the Engine
Crankcase with Oil.
Lubricating the Hex Shaft
Lightly lubricate the hex shaft yearly with automoti v e engine
oil ( Figure 44 ).
Figure 44
1. Hex shaft 3. Rubber wheel
2. Aluminum friction plate
Important: Do not get oil on the r ub ber wheel or
the alumin um friction dri v e plate because the traction
dri v e will slip ( Figur e 44 ).
1. Drain the g asoline from the fuel tank.
2. Tip the sno wthro w er forw ard onto its aug er housing
and bloc k it so that it cannot fall.
3. R emo v e the bac k co v er ( Figure 45 ).
Figure 45
1. Back cover
17
 Loading...