unsafeoperatingcondition.ContactanAuthorized
ServiceDealer.
RecyclingtheClippings
Thismachinecomesfromthefactoryreadytorecycle
grassandleafclippingsbackintothelawn.Toprepare
themachinetorecycle:
•Iftheside-dischargechuteisonthemower,remove
itandlowertheside-dischargedeector;refer
to
RemovingtheSide-dischargeChute(page14).
•Ifthegrassbagisonthemachine,removeit;refer
to(page9).
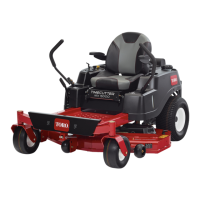
•Iftherear-dischargeplugisnotinstalled,gripitby
thehandle,raisethereardeector,andinsertitinto
therear-dischargechuteuntilthelatchlocksinto
place;referto
Figure24.
Figure24
1.Reardeector
3.Therear-dischargeplug
installed
2.Inserttherear-discharge
plug
WARNING
Ensurethattherear-dischargeplugisinplace
beforeyourecycletheclippings.Neverengagethe
bladeswithouteithertherear-dischargeplugorthe
grassbaginstalled.
BaggingtheClippings
Usethegrassbagwhenyouwanttocollectgrassand
leafclippingsfromthelawn.
WARNING
Aworngrassbagcouldallowsmallstonesandother
similardebristobethrowntowardtheoperatoror
bystandersandresultinseriouspersonalinjuryor
death.
Checkthegrassbagfrequently.Ifitisdamaged,
installanewTororeplacementbag.
Iftheside-dischargechuteisonthemower,
removeitbeforebaggingtheclippings;referto
RemovingtheSide-dischargeChute(page14).
WARNING
Thebladesaresharp;contactingthebladescan
resultinseriouspersonalinjury.
Stoptheengineandwaitforallmovingpartstostop
beforeleavingtheoperatingposition.
InstallingtheGrassBag
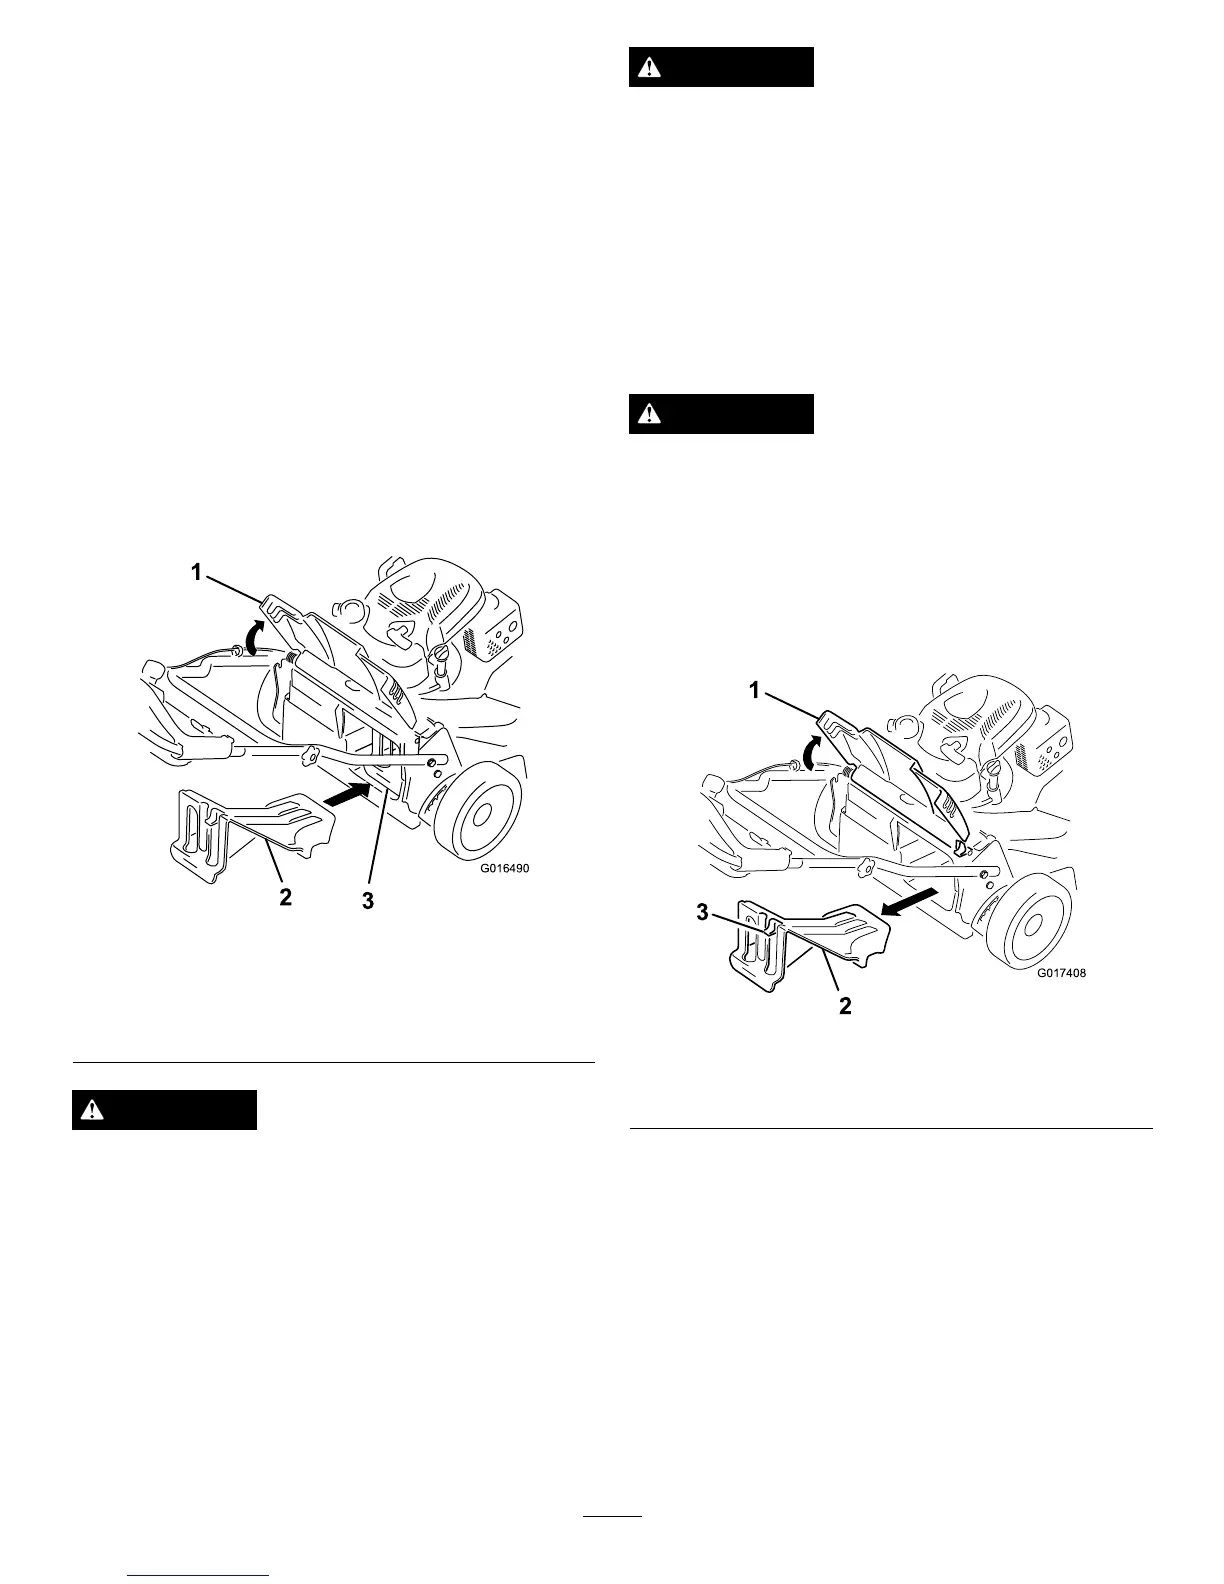
1.Raiseandholdupthereardeector(Figure25).
Figure25
1.Reardeector
3.Latch
2.Rear-dischargeplug
2.Removetherear-dischargeplugbypullingdownon
thelatchwithyourthumbandpullingtheplugout
fromthemachine(Figure25).
3.Installthebagrodintothenotchesatthebaseofthe
handleandrockthebagbackandforthtoensure
thattherodisseatedatthebottomofbothnotches;
refertoFigure26.
13