201
13Outdoor Unit Parts Replacement Methods
No. Part to be replaced Work procedure Remarks
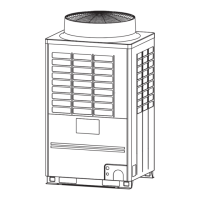
1Cabinet
WARNING
Wear a pair of gloves.
Otherwise, you will risk an injury involving
a replacement part or some other object.
1. Detachment
1)Stop the air conditioner operation, and turn
off the circuit breaker.
2)Remove the screws for the discharge
cabnet.
(M5 × 0.4' (10 mm), 4 pcs.)
3)Remove the screws for the lower cabinet.
Front and rear: (M5 × 0.4’ (10 mm), 7 pcs.
for front and 6 pcs. for rear)
4)Remove the screws for the service panel.
(M5 × 0.4’ (10 mm), 2 pcs.)
5)Remove the screws for the suction cabinet.
Front and rear: (M5 × 0.4’ (10 mm), 4 pcs.
each)
6)Remove the protective plate (back).
Remove the upper hook from the middel
partition plate, and then remove the lower
hook from the center hole of the bottom
plate.
7)Remove the screws for the discharge
cabinet side cabinet.
Left and right: (M5 × 0.4’ (10 mm), 6 pcs.
each)
For 096 type and 114 type, remove the
screws from the discharge cabinet.
(M5 × 0.6' (15 mm), 4 pcs.)
For 096 type and 114 type, remove the
screws from the left and right sides of the
discharge cabinet.
In the case of a 096 type and 114 type:
M5 × 0.4’ (10 mm), 5 pcs. each
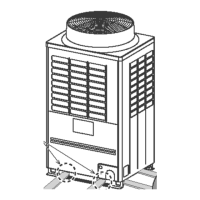
Screws (4 corners)
Screws (4 corners)
Discharge cabinet
side cover
Discharge cabinet
5) Suction cabinet (front and rear)
7) Side cabinet
(left and right)
4) Service panel
3) Lower cabinet (front and rear)
6) Protective plate
(back) Remove
the upper hook
6) Protective plate (back)
6) Remove the lower
hook of the protective
plate (back)
 Loading...