100
Chapter 13
1. Visit http://tplinkwifi.net, and log in with the username and password you’ve set for
the router.
2. Go to Advanced > System Tools > System Log.
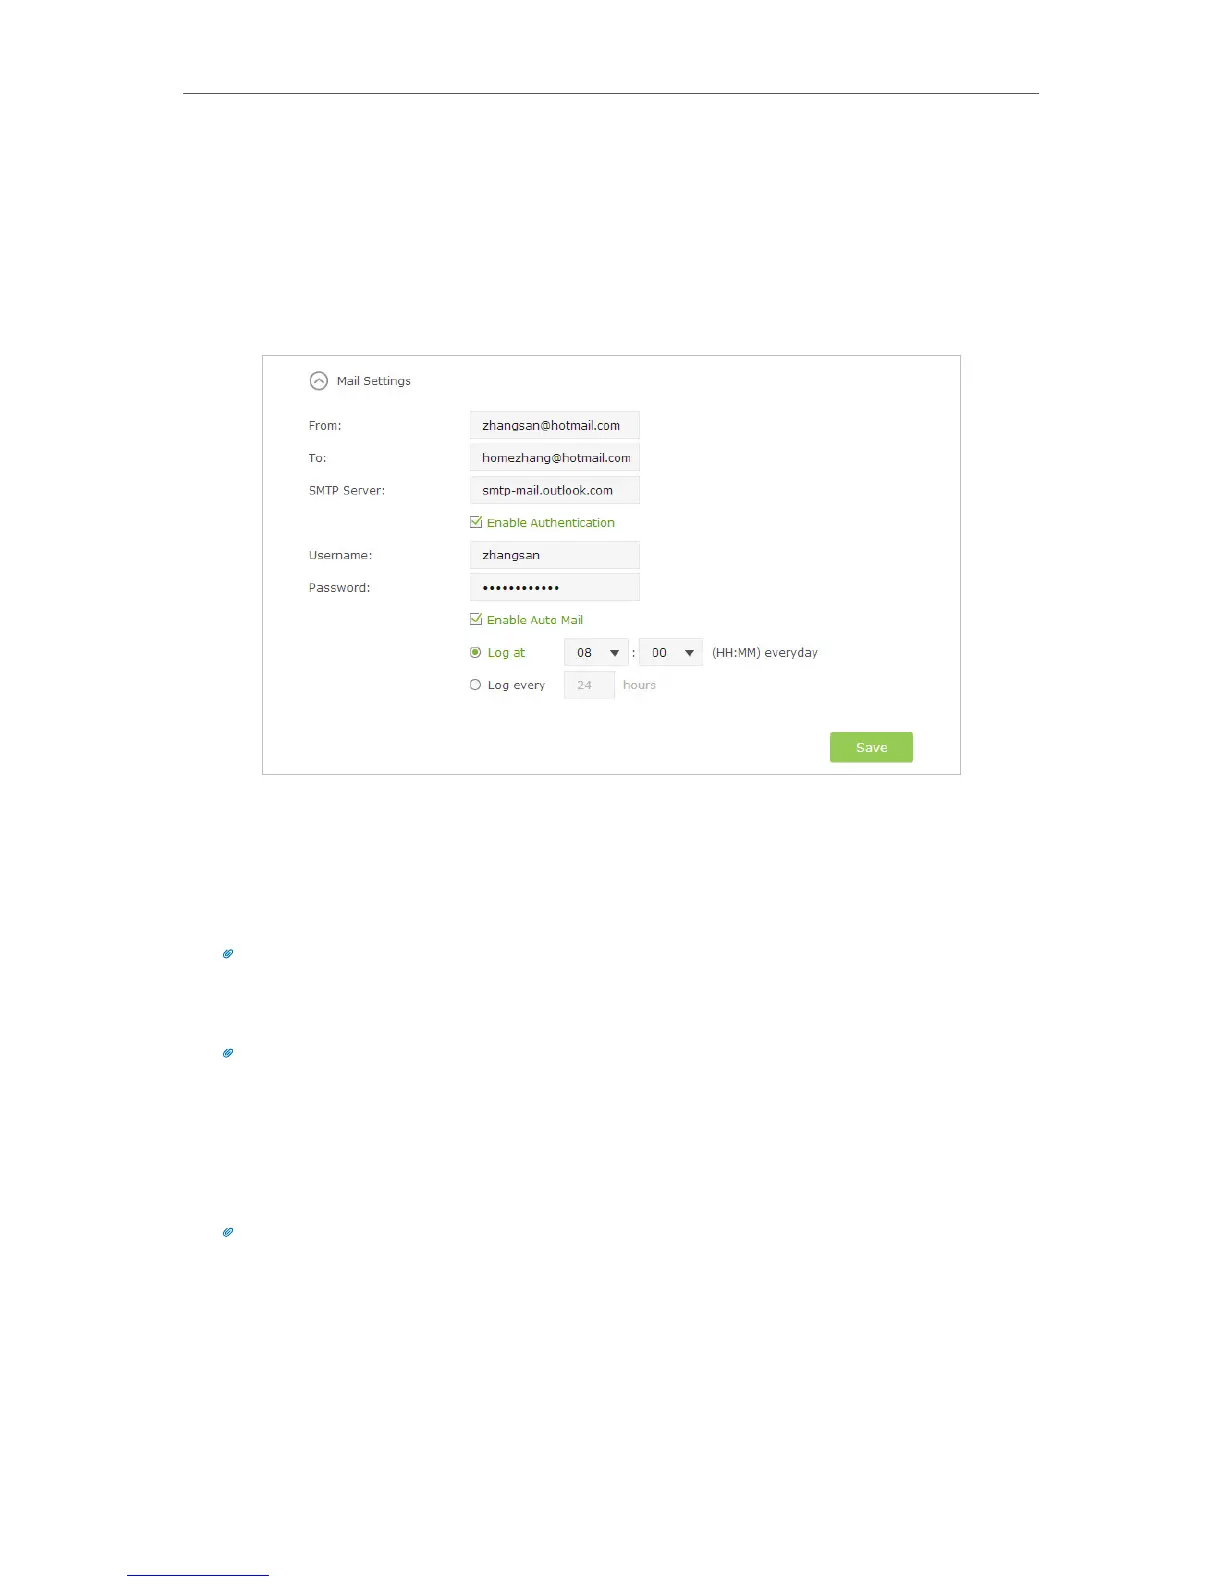
3. Click Mail Settings.
4. Enter the information with the help of page tips:
1 ) From: Enter the email address used for sending the system log.
2 ) To: Enter the recipient’s email address, which can be the same as or different
from the sender’s email address.
3 ) SMTP Server: Enter the SMTP server address.
Tips: SMTP server is available for users in most webmail systems. For example, the SMTP server address of
Hotmail is smtp-mail.outlook.com. You can refer to their Help page to learn the SMTP server address.
4 ) Select Enable Authentication.
Tips: Generally, Enable Authentication should be selected if the login of the mailbox requires username and
password.
5 ) Username: Enter the email address used for sending the system log.
6 ) Password: Enter the password to login the sender’s email address.
7 ) Select Enable Auto Mail.
Tips: The router will send the system log to the designated email address if this option is enabled.
8 ) Set a fixed time. The recipient will receive the system log sent at this time every
day.
5. Click Save.