87
Chapter 12
• Channel - Select an operating channel for the wireless network. It is recommended
to leave the channel to Auto, if you are not experiencing the intermittent wireless
connection issue.
• Transmit Power - Select either High, Middle or Low to specify the data transmit power
for 2.4GHz and 5GHz network. The default and recommended setting is High.
12. 7. Use WPS for Wireless Connection
Wi-Fi Protected Setup (WPS) gives consumers an easier approach to set up a security-
protected Wi-Fi connection.
1. Visit http://tplinkwifi.net, and log in with the username and password you set for the
router.
2. Go to Advanced > Wireless > WPS .
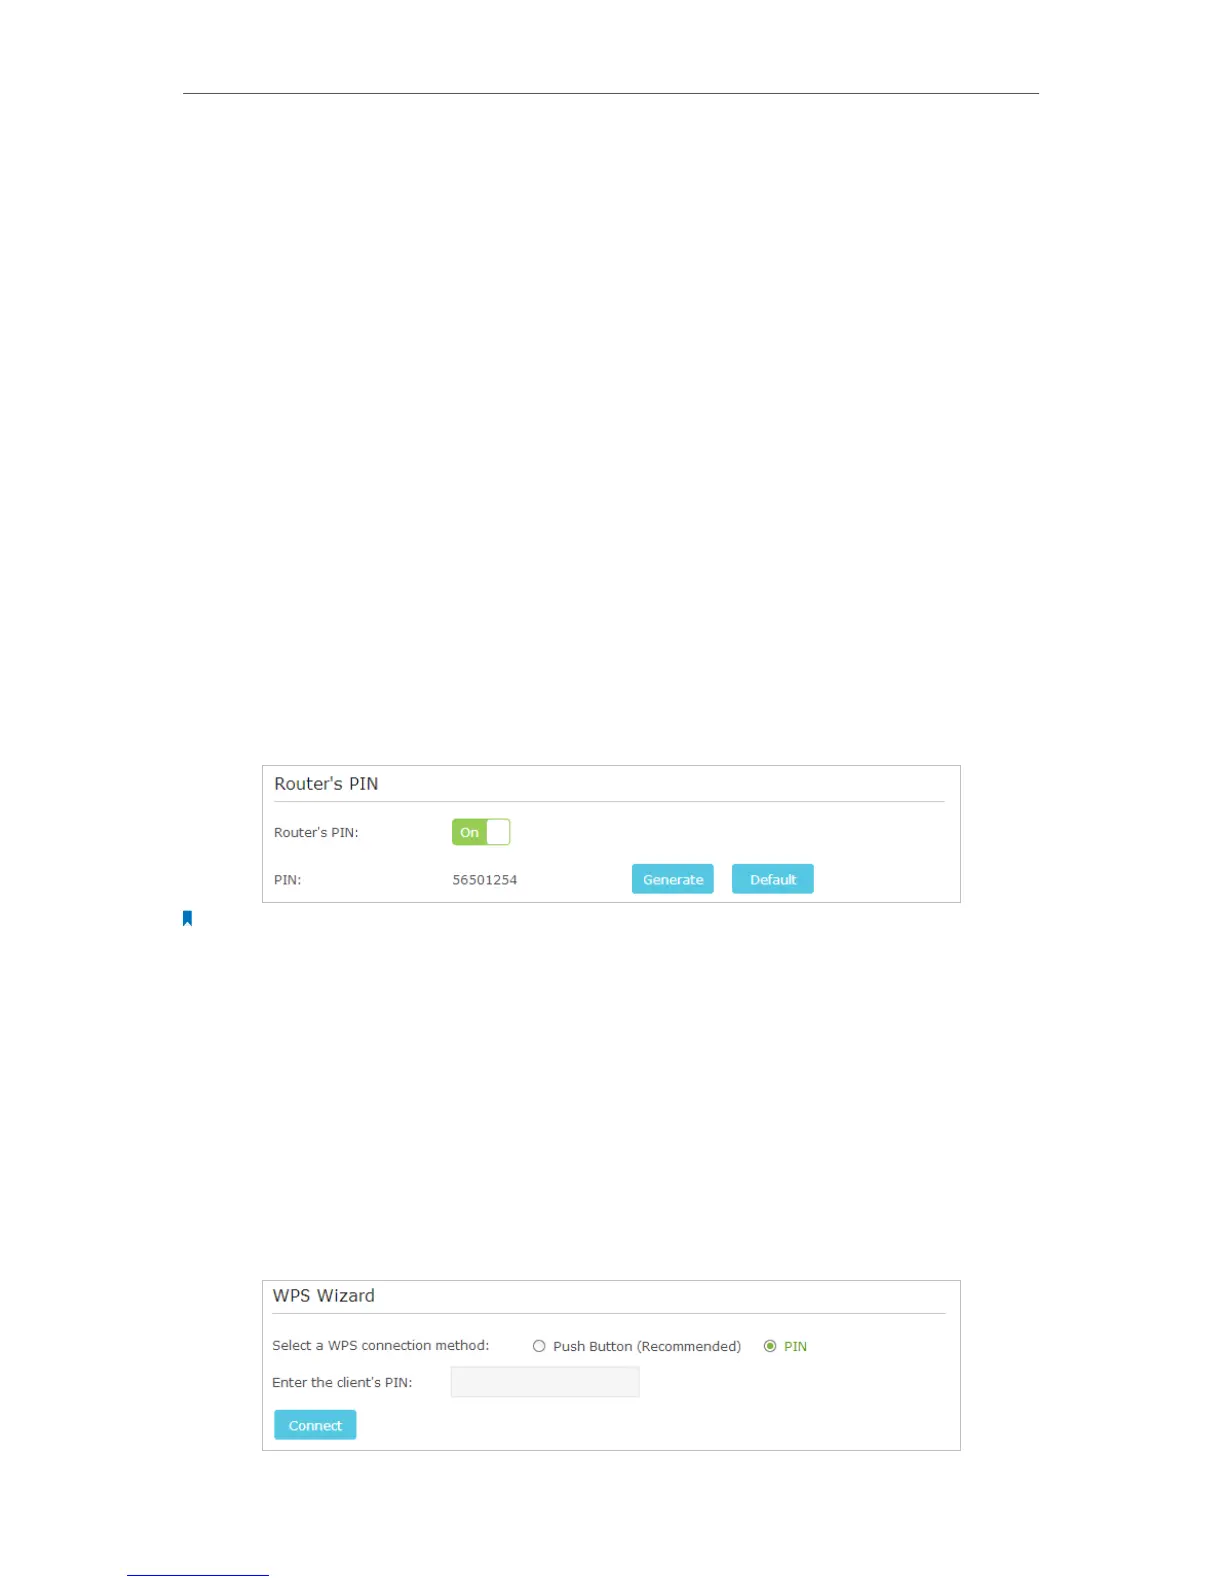
12. 7. 1. Set the Router’s PIN
Router’s PIN is enabled by default to allow wireless devices to connect to the router
using the PIN. You can use the default one or generate a new one.
Note:
1. If you want to enable/disable the WPS feature, go to System Tools > System Parameters > WPS, select or clear the
Enable WPS check box.
2. PIN (Personal Identification Number) is an eight-character identification number preset to each router. WPS
supported devices can connect to your router with the PIN. The default PIN is labeled on the bottom of the router.
12. 7. 2. Use the WPS Wizard for Wi-Fi Connections
1. Select a setup method:
• Push Button(Recommended): Click the Connect button on the screen. Within
two minutes, push the WPS button on the client device.
• PIN: Enter the client’s PIN, and click Connect.