32
Chapter 6
USB Application
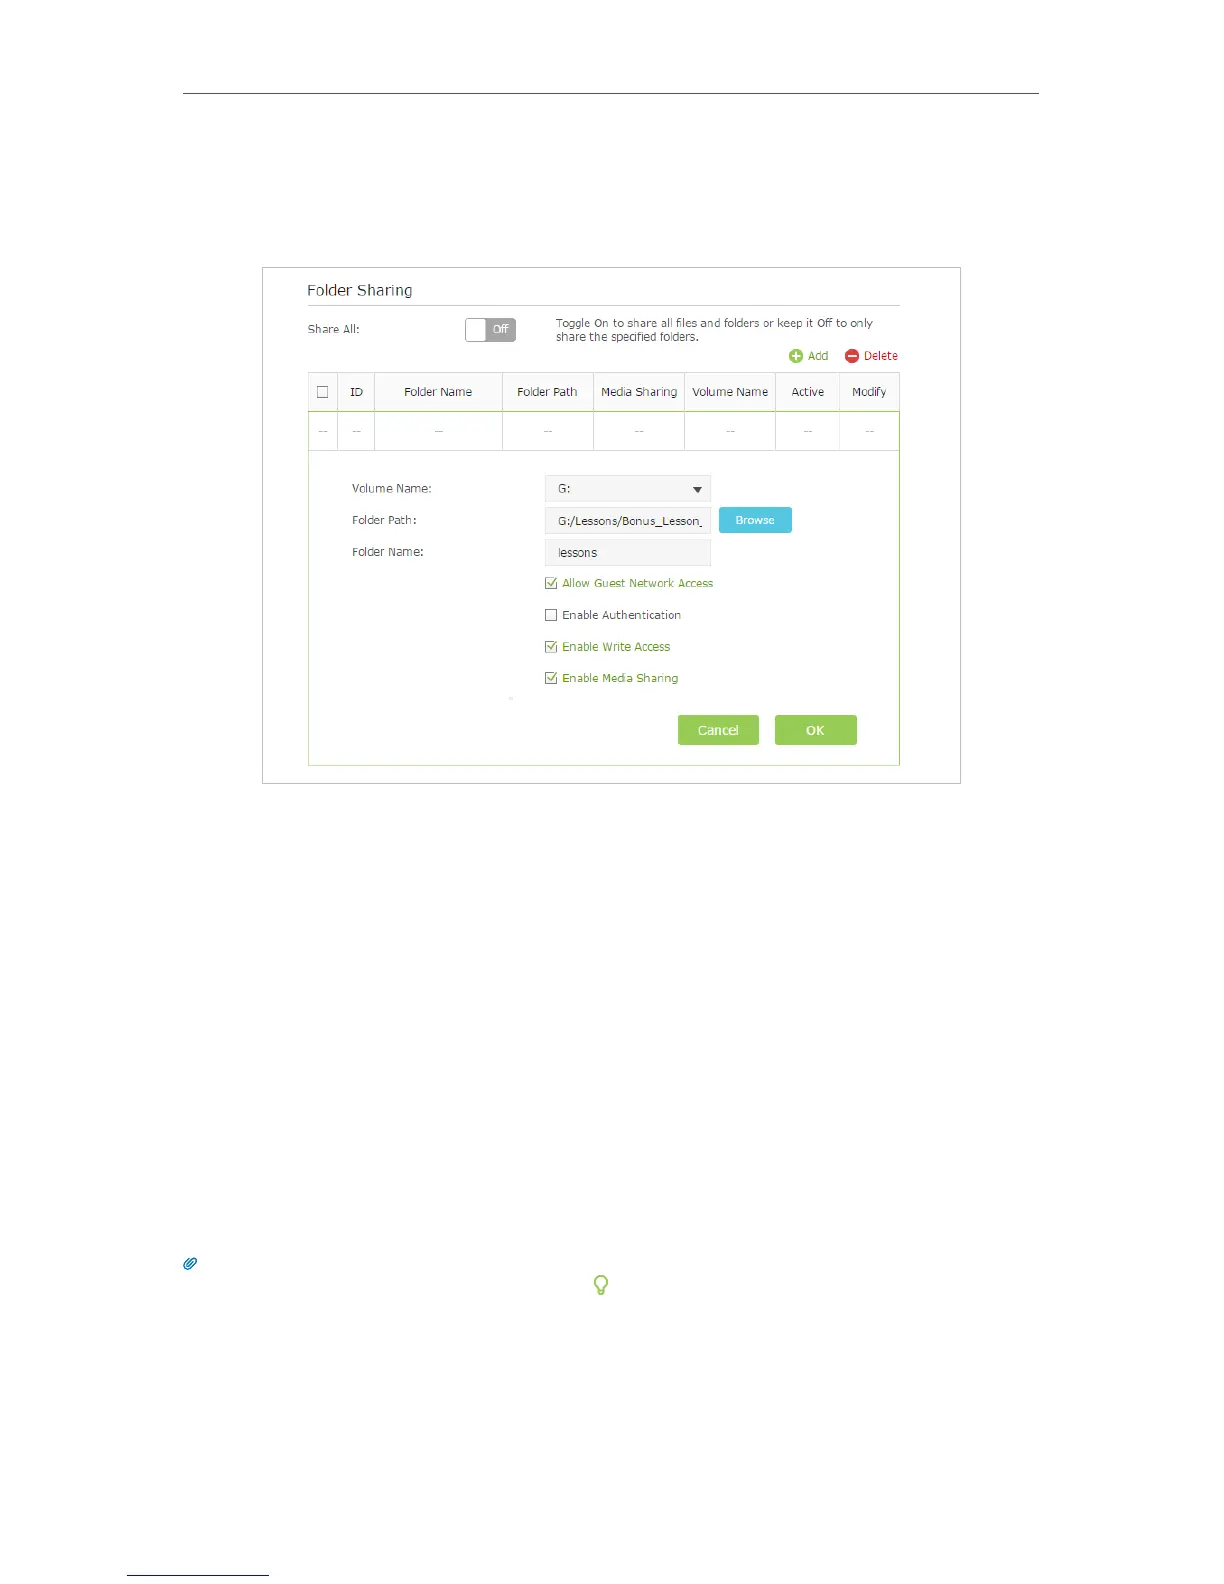
2. Go to Basic or Advanced > USB Settings > Sharing Access. Focus on the Folder Sharing
section. Click the button to disable Share All, then click Add to add a new sharing
folder.
3. Select the Volume Name and Folder Path, then enter a Folder Name as you like.
4. Decide the way you share the folder:
• Allow Guest Network Access: If you select this check box, guest network can
access to the this folder.
• Enable Authentication: Select to enable authentication for this folder sharing,
and you will be required to use a username and password to access the USB
disk. Refer to To Set up Authentication for Data Security to learn more.
• Enable Write Access: If you select this check box, network clients can modify
this folder.
• Enable Media Sharing: Select to enable media sharing for this folder, and you
can view photos, play music and watch movies stored on the USB disk directly
from DLNA-supported devices. Click Media Sharing to learn more.
5. Click OK.
Tips:
The router can share 32 volumes at most. You can click
on the page to detach the corresponding volume you do
not need to share.
¾ To Set up Authentication for Data Security
If you enable Authentication, network clients will be required to enter the username
and password you set when accessing the USB disk.