4
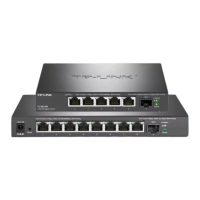
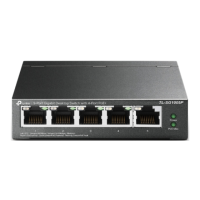
5 2.5Gbps RJ45 ports 3 1 10Gbps
SFP+ port
02Product introduction
Cloud Management Switch Installation Manual
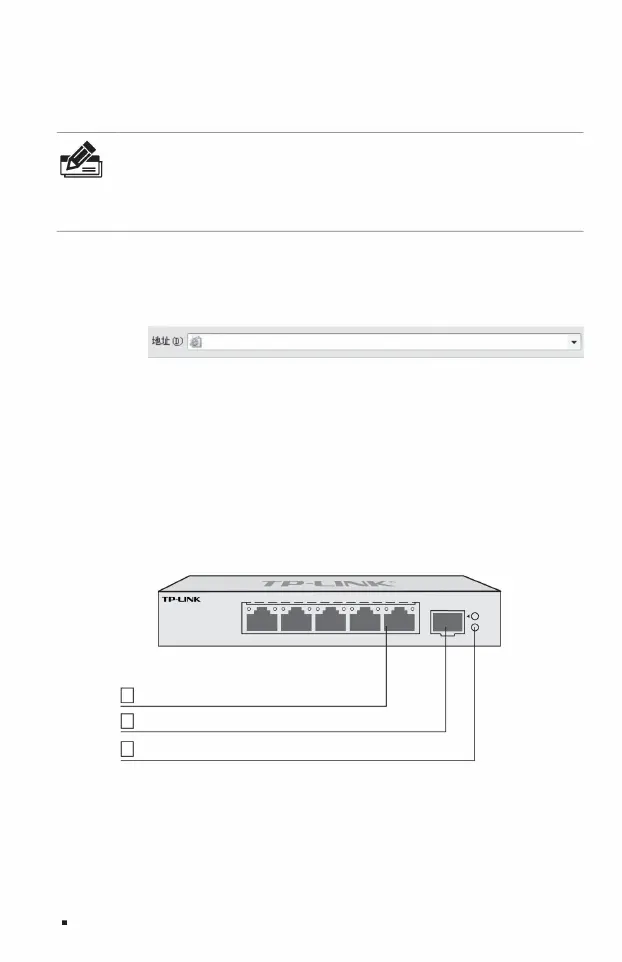
1
indicator light
TL-SE2106
ÿ TL-SE2106
Port1~5: Green=2.5Gbps, Yellow=10/100/1000Mbps, Blink=Activity SFP+: Green=10Gbps, Yellow=1/2.5Gbps, Blink=Activity
http://10.18.18.251
Link/Act
1
6
SFP+
4
Power
2.5G Managed Switch
53
Link/Act
2
The front panel of TL-SE2106 is shown in Figure 1-2.
Note: In
order to log in to the management interface of the switch, please set the IP address of the computer and
the IP address of the switch to be in the same network segment. Set the computer IP address to:
10.18.18.x ("x" is any value between 1-250), and set the subnet mask to 255.255.255.0.
noodle.
Figure 1-2 TL-SE2106 front panel diagram
1. Use an ordinary PC to correctly connect any RJ45 port of the switch using a network
cable; 2. Open the browser, enter the default management address of the switch http://10.18.18.251 in the
address bar, and press the Enter key;
3. Set the user name and password, and click "OK" to log in to the local management interface of the switch.
1.3 Local management
1.4 Product appearance
Machine Translated by Google