38
450Mbps High Power Wireless N Router
the button of the new device in two minutes” and click Connect, shown in the WPS
page.
Step 2: Press and hold the WPS button of the client. The WPS LED flashes for two minutes
during the Wi-Fi Protected Setup process.
Step 3: When the WPS LED is on, the client has successfully connected to the router.
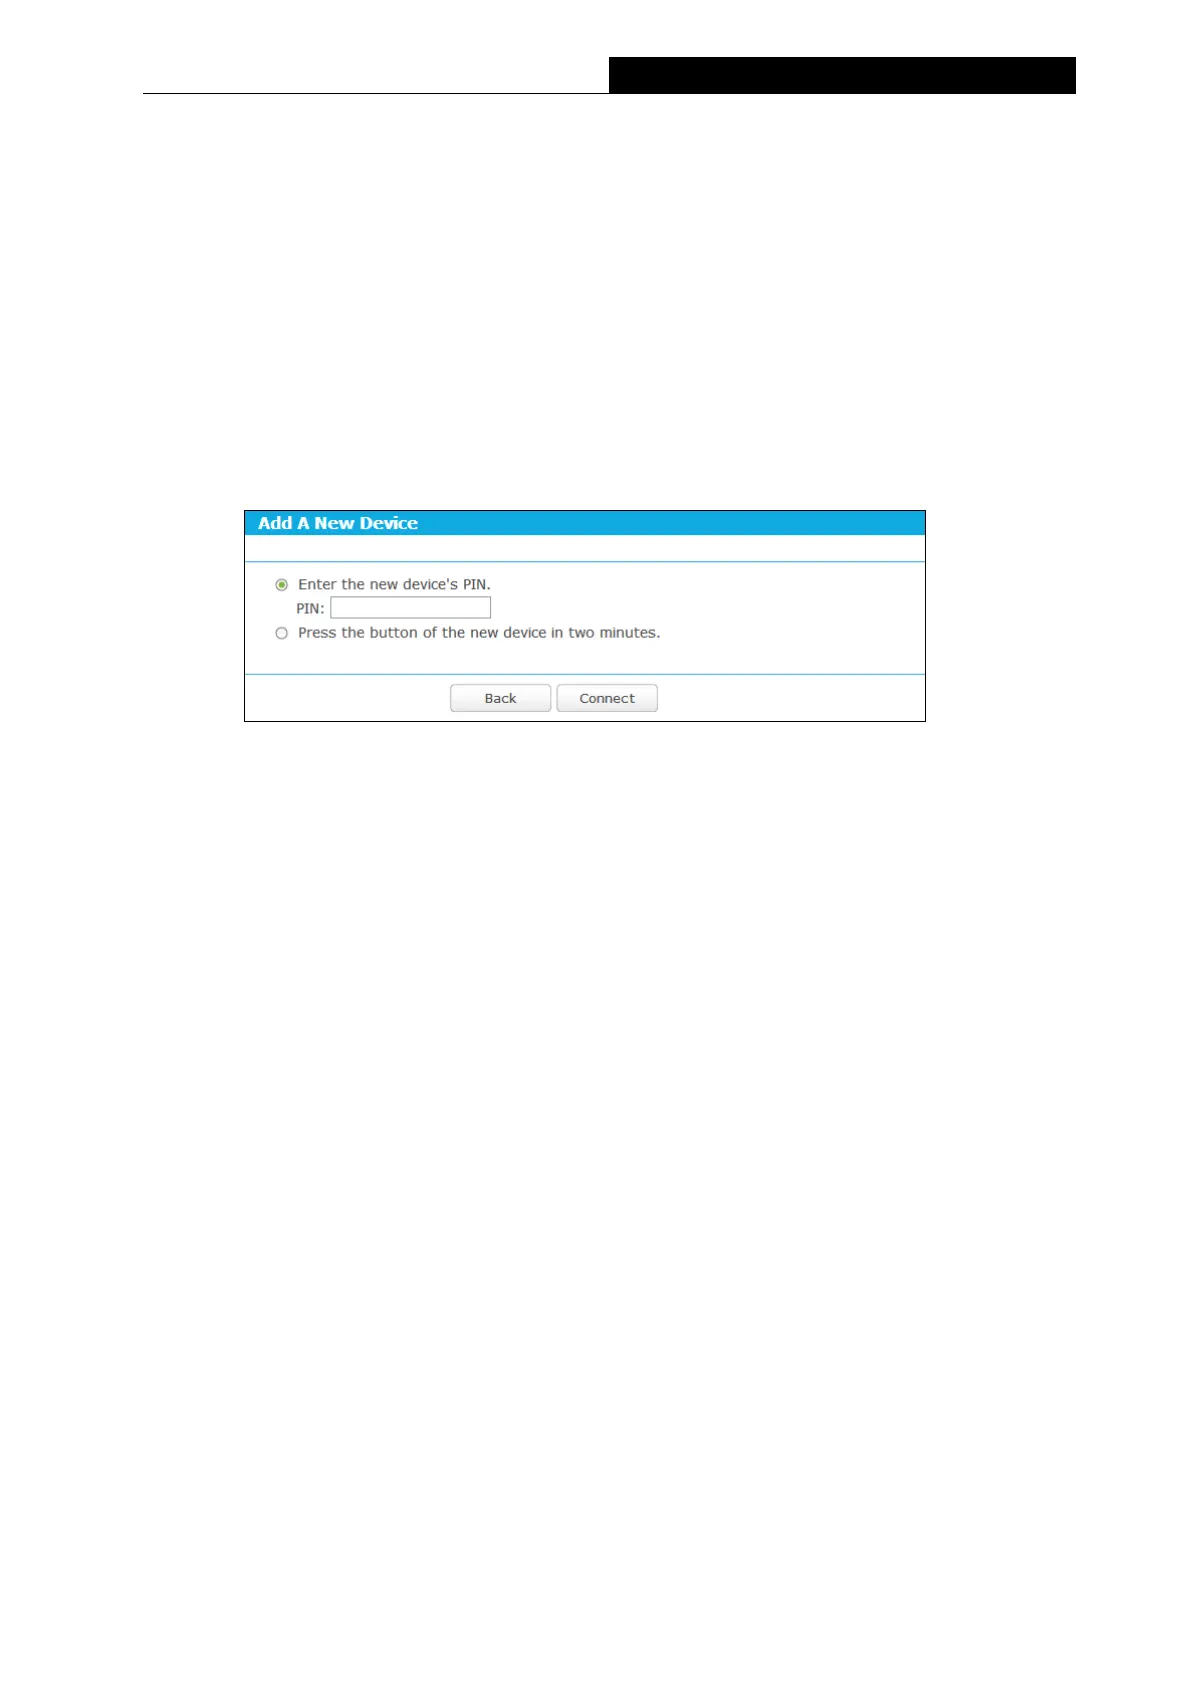
II. Enter the client device’s PIN on the router
Use this method if your client does not have the WPS button, but has a Wi-Fi Protected Setup
PIN number.
Step 1: Enable WPS. The default is enabled. Click the Add device button in the WPS page.
Figure 3-21 Add A New Device
Step 2: Enter the PIN number from the client in the field on the WPS screen above. Then click
Connect button.
Step 3: “Connect successfully” will appear on the screen, which means the client has
successfully connected to the router.
Note:
1) The WPS LED on the router will light blue for five minutes if the device has been successfully
added to the network.
2) The WPS function cannot be configured if the wireless function of the router is disabled.
Please make sure the wireless function is enabled before configuring the WPS.
III. Enter the router’s PIN on your client device
Use this method if your client device asks for the router’s PIN number.
Step 1: On the client device, enter the PIN number listed on the router’s Wi-Fi Protected
Setup screen, shown in the WPS page(It is also labeled on the bottom of the router).
Step 2: The Wi-Fi Protected Setup LED flashes for two minutes during the Wi-Fi Protected
Setup process.
Step 3: When the WPS LED is on, the client device has successfully connected to the router.
Note:
1) The WPS LED on the router will light green for five minutes if the device has been
successfully added to the network.
 Loading...