41
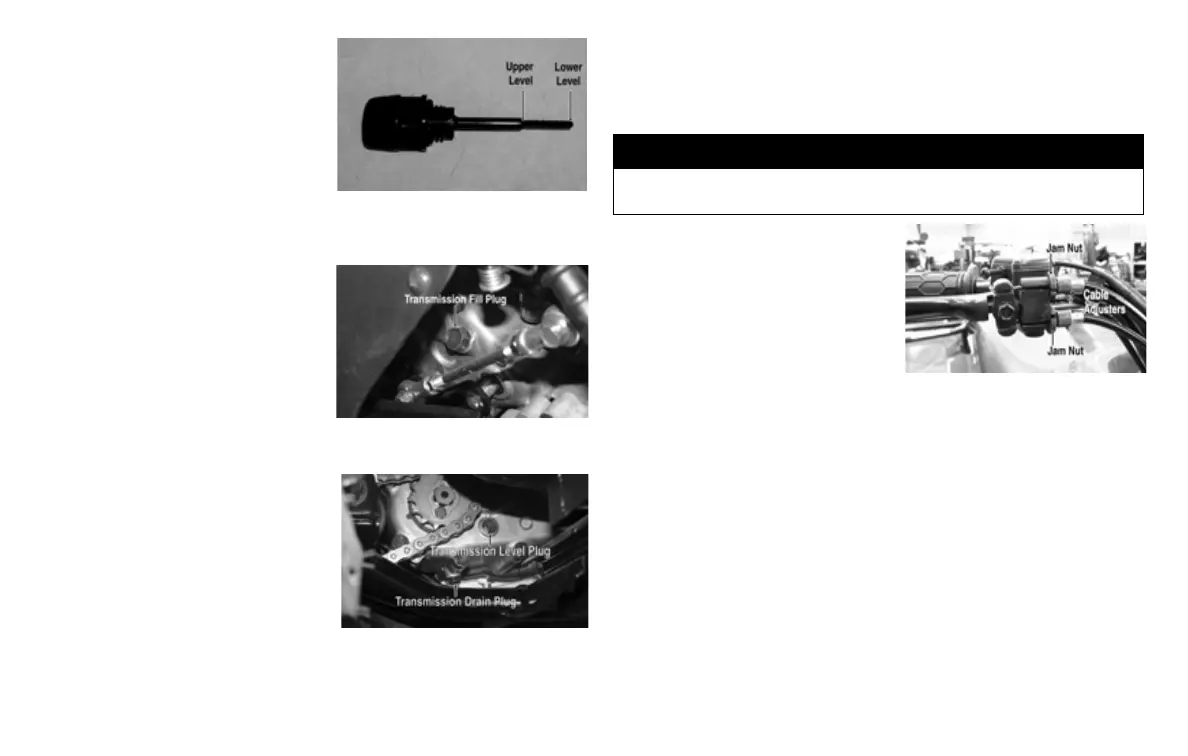
7. Shut the engine off; then allow
oil to drain into the crankcase
for approximately three min-
utes. Remove the oil level
stick and check for proper oil
level.
Transmission Lubricant
Change the transmission lubricant at
the scheduled intervals. The trans-
mission should always be warm
when the lubricant is changed so the
lubricant will drain easily and com-
pletely.
1. Park the ATV on level ground.
2. Remove the fill plug. Be care-
ful not to allow contaminates to
enter the opening.
3. Remove the drain plug from the
bottom of the transmission and
drain the lubricant into a drain
pan.
4. Install the drain plug and tighten
to 18 ft-lb. Pour the recom-
mended lubricant in the fill
hole. Install the fill plug.
5. Remove the level plug and verify oil is at the plug threads. Install
the level plug and tighten to 16 ft-lb.
6. Inspect the area around the drain plug for leaks.
Hand Brake System
Adjusting Brakes
Checking/Adjusting
Front Wheel Brake
System
1. Raise ATV enough to allow the
wheels to spin freely.
2. On the brake lever/cable assem-
bly, loosen both jam nuts. Turn
both cable adjusters counter-
clockwise until both front wheels do not spin freely.
3. Turn both cable adjusters in 1/4 turn increments (clockwise) until
wheels spin with a very slight amount of drag. Tighten the jam nuts.
4. Lower ATV, push ATV forward, and compress brake lever.
5. If front wheels lock, adjustment is correct.
6. If front wheels do not lock, additional adjustment is necessary.
! WARNING
Be sure to inspect the hand brake system before each use. Always
maintain brakes according to the Maintenance Schedule.