46
10. Remove the jumper cables in opposite order of hook-up (4, 3, 2, 1).
Be careful not to short cables against bare metal.
NOTE: Have the battery and electrical system checked
prior to operating the vehicle again.
Spark Plug
The ATV comes equipped with a
specified spark plug. See the specifi-
cations chart for the correct spark
plug. A light brown insulator indi-
cates that the plug is correct. A white
or dark insulator indicates that the
engine may need to be serviced or the
carburetor may need to be adjusted.
Consult an authorized dealer if the plug insulator is not a light brown
color. To help prevent cold weather fouling, make sure to thoroughly
warm up the engine before operating.
To maintain a hot, strong spark, keep the plug free of carbon.
Before removing the spark plug, be
sure to clean the area around the
spark plug. If you do not, dirt could
enter engine when removing or
installing the spark plug.
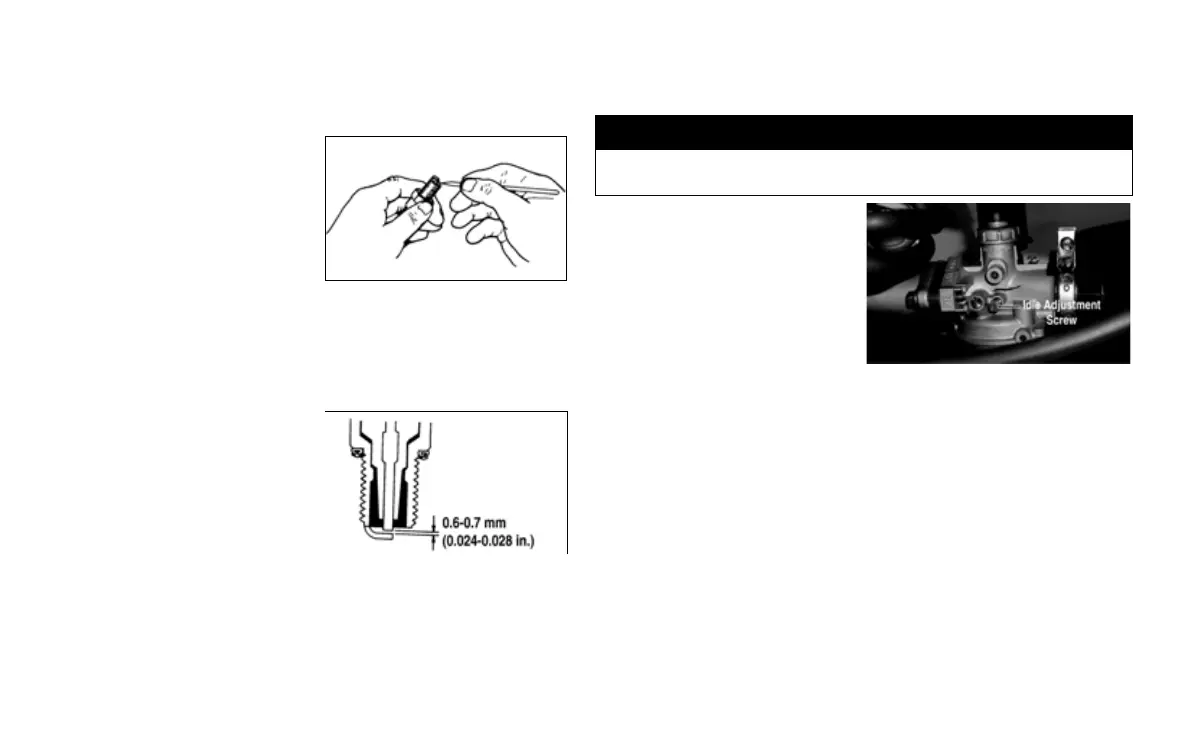
Adjust the gap to 0.6-0.7 mm (0.024-
0.028 in.) for proper ignition. Use a
feeler gauge to check the gap.
A new spark plug should be tightened 1/2 turn once the washer contacts
the cylinder head. A used spark plug should be tightened 1/8 - 1/4 turn
once the washer contacts the cylinder head.
Engine Idle RPM Adjustment
To properly adjust the idle, a tachometer is necessary. If one is not avail-
able, take the ATV to an authorized dealer.
1. Start the engine and warm it
up to normal operating tem-
perature.
2. Turn the idle adjustment
screw in or out until the
engine idles at 1700 RPM.
! WARNING
Adjust the idle to the correct RPM. Make sure the engine is at
normal operating temperature before adjusting the idle RPM.