Installation - Mechanical
28 CLCH-SVX009J-EN
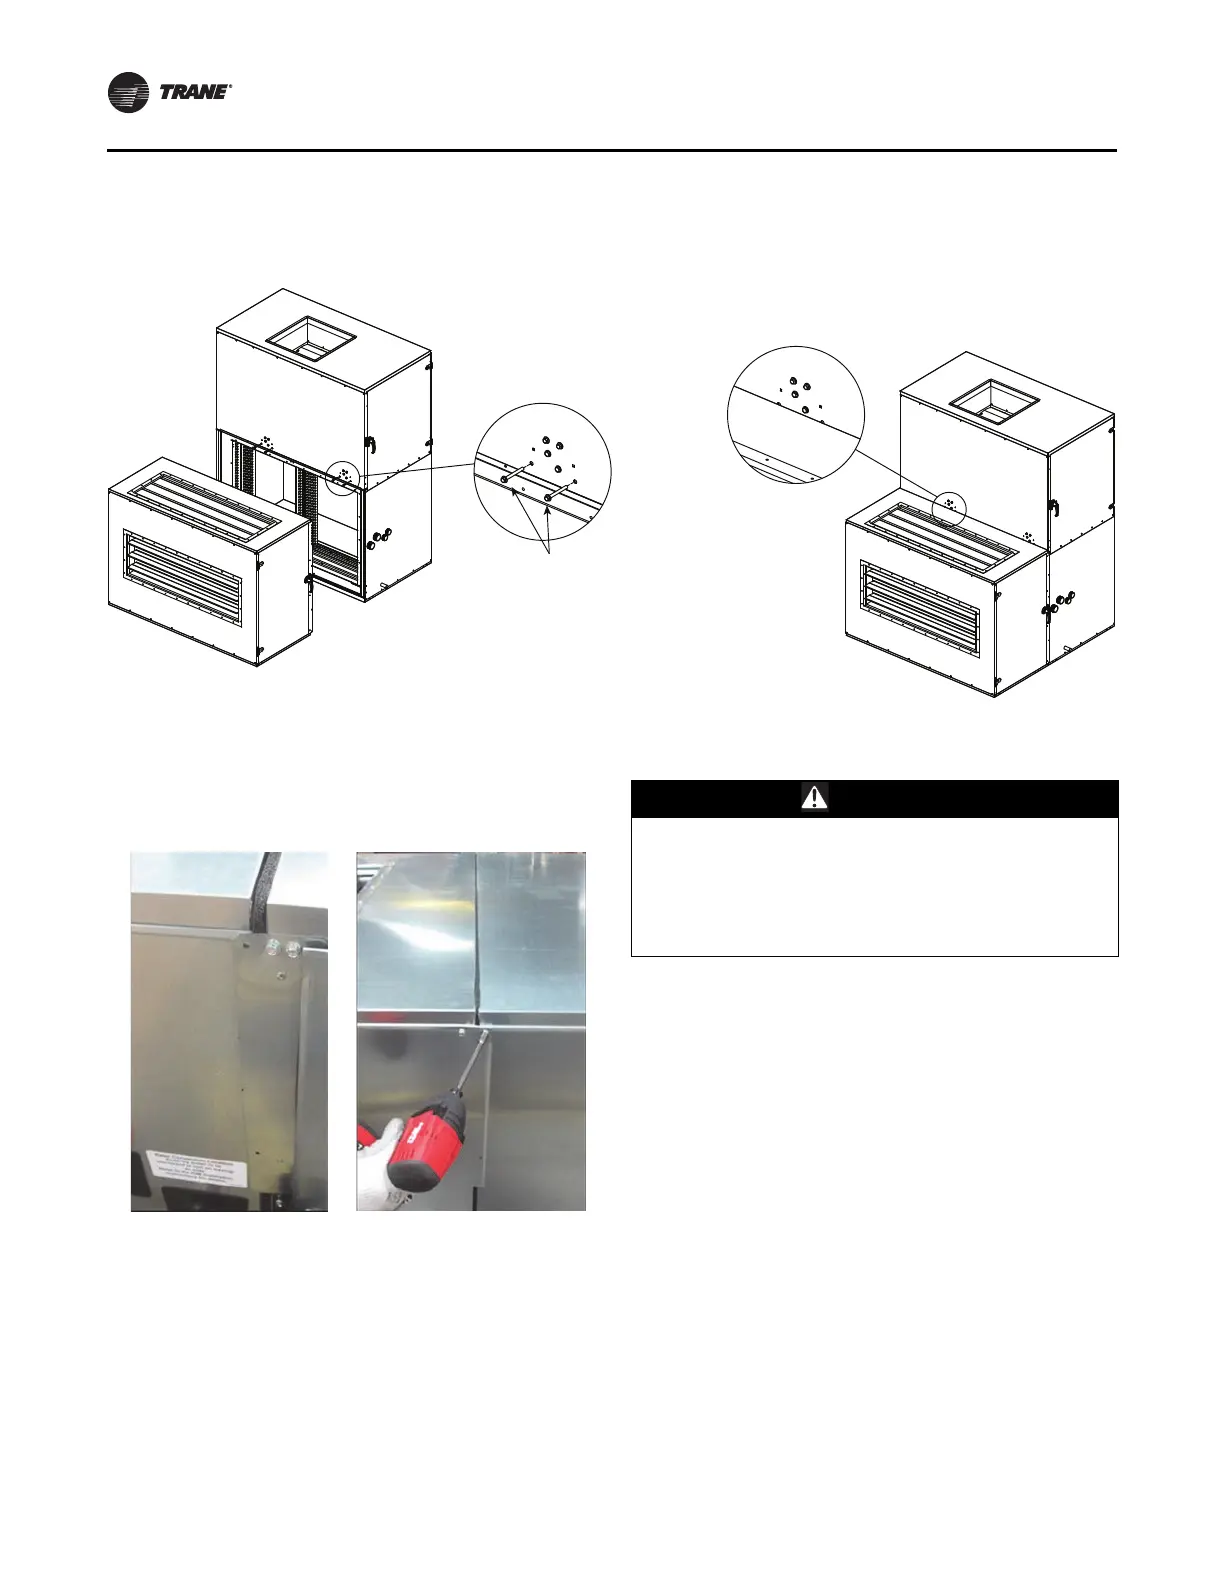
If the unit has a second level fan, it is necessary to remove
the screws, as shown in the figure below, before joining
the mixing or filter section to the coil section.
3. Slide the sections together so the side flanges overlap
the main section.
4. Align the top and bottom holes and replace the screws.
5. Use pipe clamps or other means to crowd the sections,
if needed.
6. Make sure to provide enough protections to the
sections, so the clamps do not damage it.
7. Only top and bottom mounting holes will be aligned.
8. Use self drilling screws on the other section mounting
holes.
9. Make sure the section joint gasket is compressed and
sealed properly.
Fan Removal
When the air handler must fit into a tight space, the second
level fan section of a vertical unit can be removed to
maneuver the unit into the space. Removal will require
field-supplied lifting lugs (part # LUG00180).
1. Remove screws (Item 2) located in front and rear
panels of second level fan portion.
2. Install four lifting lugs (Item 1). Install two on front
panel and two on rear panel of second level fan portion
using screws (Item 2). See Figure 28.
Figure 26. Joining mixing, return, and other accessories section to unit with second level fan
Final assembly with
screws removed
Remove Bottom Two Screws:
0.250 - 10 x 3 hex washer
head tapping
Figure 27. Bring sections together, align holes
WARNING
Hazardous Voltage!
Failure to disconnect power before servicing could
result in death or serious injury. Disconnect all electric
power, including remote disconnects before servicing.
Follow proper lockout/tagout procedures to ensure the
power can not be inadvertently energized.