Installation - Mechanical
32 CLCH-SVX009J-EN
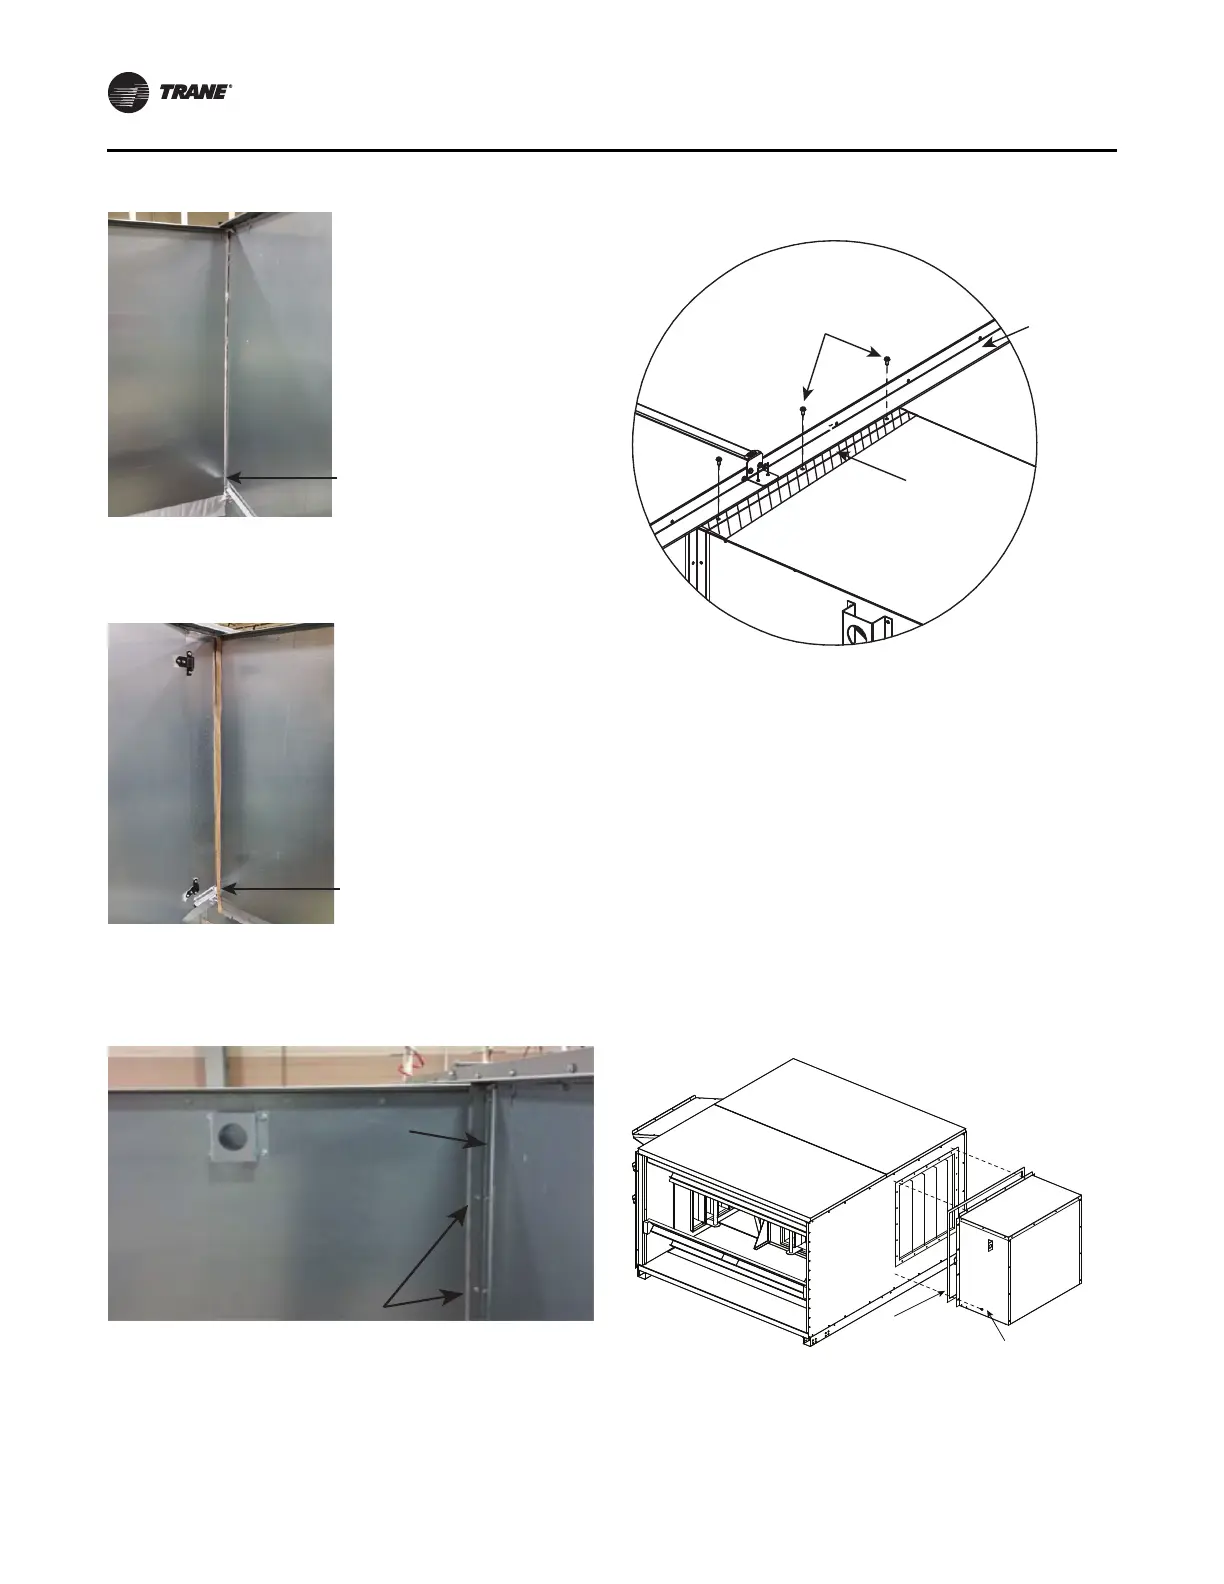
7. Maker sure there is a gap between pipe cabinet and
bottom deflectors.
8. Starting from the bottom, attach the trim angles to the
pipe cabinet first, then fasten the trim angles to the unit
wall.
9. Apply the roof hook to the roof of the pipe cabinet,
sliding in from the side of the unit overhang.
Weather Hoods
1. Remove shipping protection plastic film from the
hood.
2. Per the unit drawing, determine mounting locations of
the unit weather hoods.
3. Using the factory provided screws, mount the weather
hoods to the unit.
4. Units with multiple intake hoods require that the hoods
be installed from bottom to top. Overlap locations
should be sealed with butyl caulk between the hoods.
Note: It is required that the hoods be sealed to the unit
using factory-provided Butyl caulk tape. This is
applicable to mixing box hoods as well.
Pipe
cabinet Unit
1 5/8-in. ± 1/8-in. gap
between pipe cabinet
and horizontal deflector
1 5/8-in. ± 1/8-in. gap
between pipe cabinet
and horizontal deflector
Trim angle
Pipe cabinet
Unit
#10 screws
Figure 34. Attach roof hook
Figure 35. Exhaust hood assembly
Unit roof
overhang
1/4 in. screws
Roof hook
Butyl caulk tape
1.00W x 0.125T
Screw self-driller
0.250-14 x 0.750
Exhaust
hood